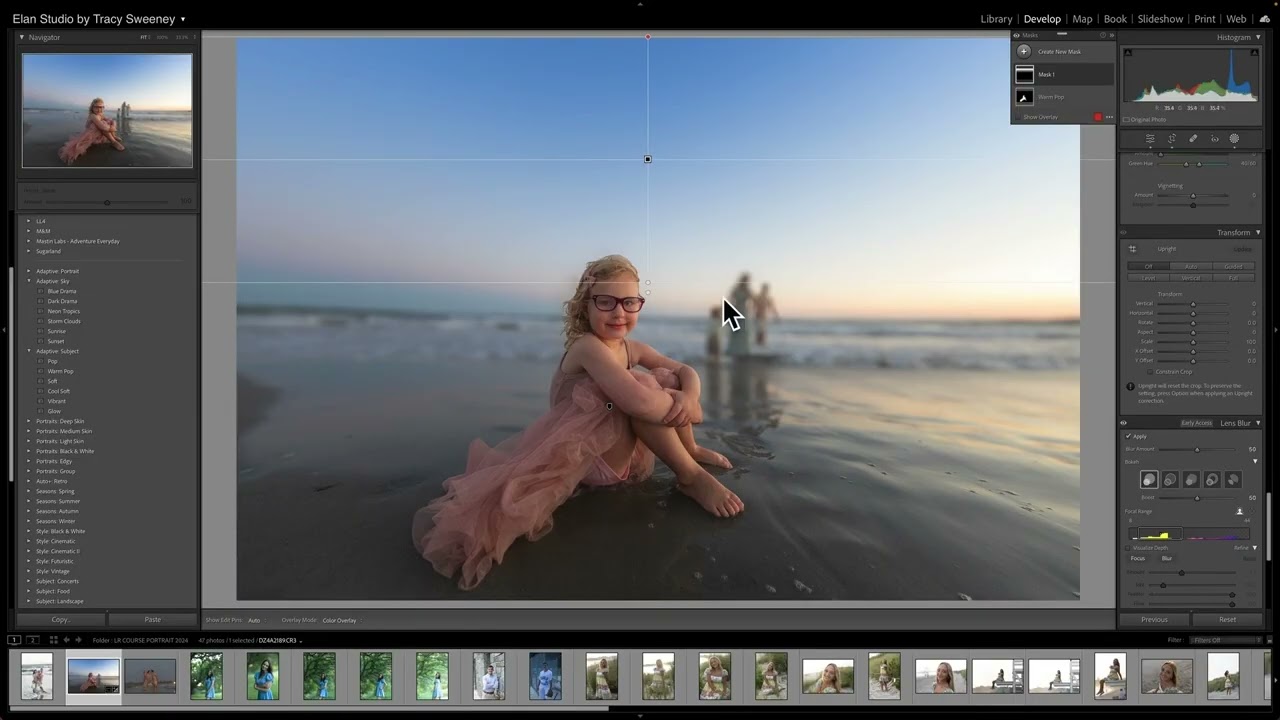
I shoot on a budget. That’s literally my whole thing. And one of the most common complaints I hear from readers who are working with kit lenses or slower zooms is that they can’t get that soft, blurry background that makes portraits look polished and intentional. They think the only answer is to drop $400 on a fast prime. I’ve been there. I still remember agonizing over whether to buy a 50mm f/1.8 just to get that look.
Here’s what I wish someone had told me sooner: Lightroom now has a Lens Blur tool that can get you surprisingly close to that effect in post. In Watch the full tutorial on YouTube, photographer Tracy Sweeney walks through her full editing process on a beach portrait shot with a fisheye lens at around f/4. No dreamy prime bokeh to start with. By the end, the image has real depth. The walkthrough covers global adjustments, color work, and then the lens blur itself, and it’s worth following start to finish because the pre-work she does actually makes the blur land better.
What I want to do here is break down her process into repeatable steps you can follow in your own edits, with enough context that you don’t need to pause and rewind every 30 seconds.
Step 1: Fix Your Horizon and Geometry First
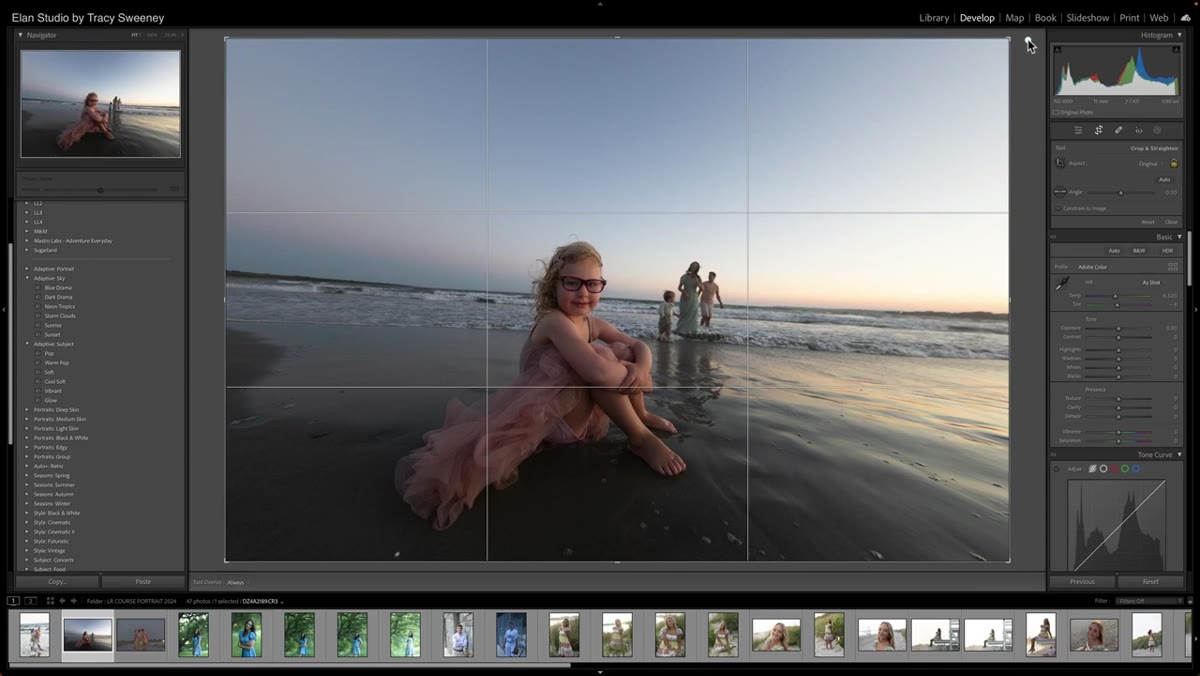 Straightening a crooked horizon line in Lightroom
Before any tonal or color work, Sweeney straightens the horizon line. This sounds basic, but it matters more than people think. When you’re about to add a background blur, a tilted horizon becomes twice as distracting because the viewer’s eye has nowhere clean to land. Go to the Crop tool, use the angle slider or the straighten line tool, and get that horizon level before you touch anything else. A blurred background won’t save a compositionally sloppy frame.
Straightening a crooked horizon line in Lightroom
Before any tonal or color work, Sweeney straightens the horizon line. This sounds basic, but it matters more than people think. When you’re about to add a background blur, a tilted horizon becomes twice as distracting because the viewer’s eye has nowhere clean to land. Go to the Crop tool, use the angle slider or the straighten line tool, and get that horizon level before you touch anything else. A blurred background won’t save a compositionally sloppy frame.
Step 2: Apply an Adaptive Subject Preset as a Starting Point
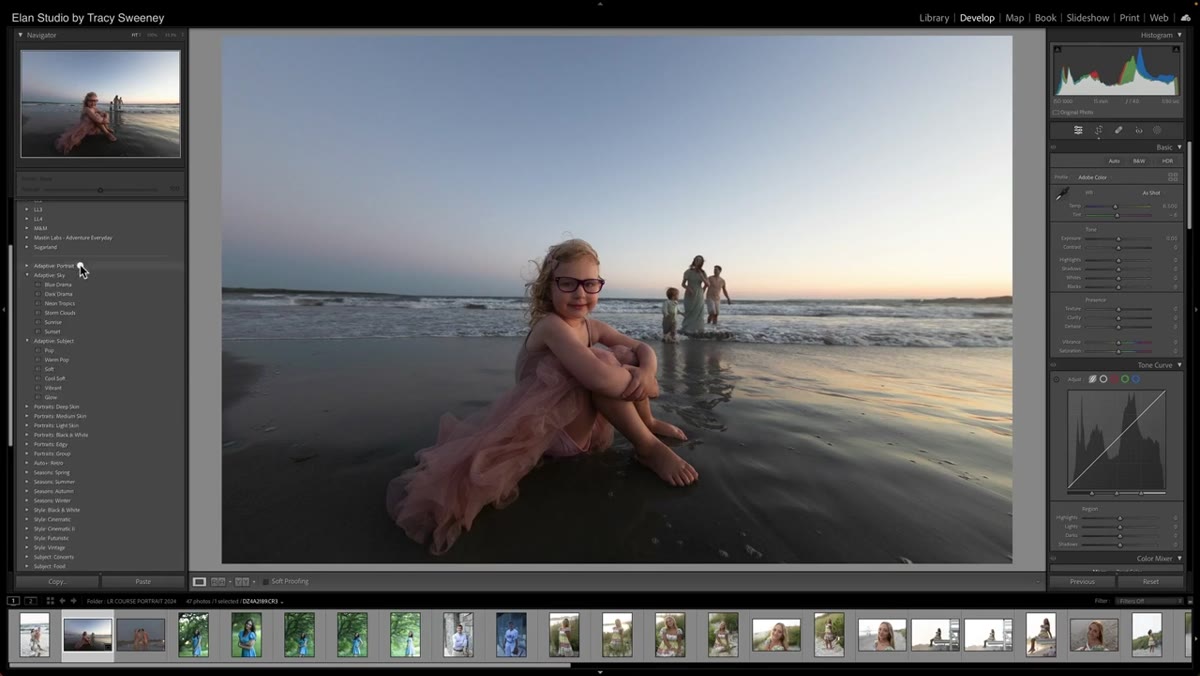 Browsing adaptive subject presets in the Presets panel
Sweeney tries a few of Lightroom’s adaptive subject presets to get a quick tonal foundation. These presets are smarter than the old ones because they use AI masking to apply adjustments selectively to the subject rather than the whole image. She settles on “Warm Pop” but dials back the intensity so it doesn’t push too orange. The key move here is treating the preset as a starting point, not a finish line. Apply it, then immediately reduce the Amount slider to maybe 50-70% so you’re getting a hint of the look without the preset running the whole edit.
Browsing adaptive subject presets in the Presets panel
Sweeney tries a few of Lightroom’s adaptive subject presets to get a quick tonal foundation. These presets are smarter than the old ones because they use AI masking to apply adjustments selectively to the subject rather than the whole image. She settles on “Warm Pop” but dials back the intensity so it doesn’t push too orange. The key move here is treating the preset as a starting point, not a finish line. Apply it, then immediately reduce the Amount slider to maybe 50-70% so you’re getting a hint of the look without the preset running the whole edit.
Step 3: Make Global Tonal Adjustments, Including a Negative Clarity Move
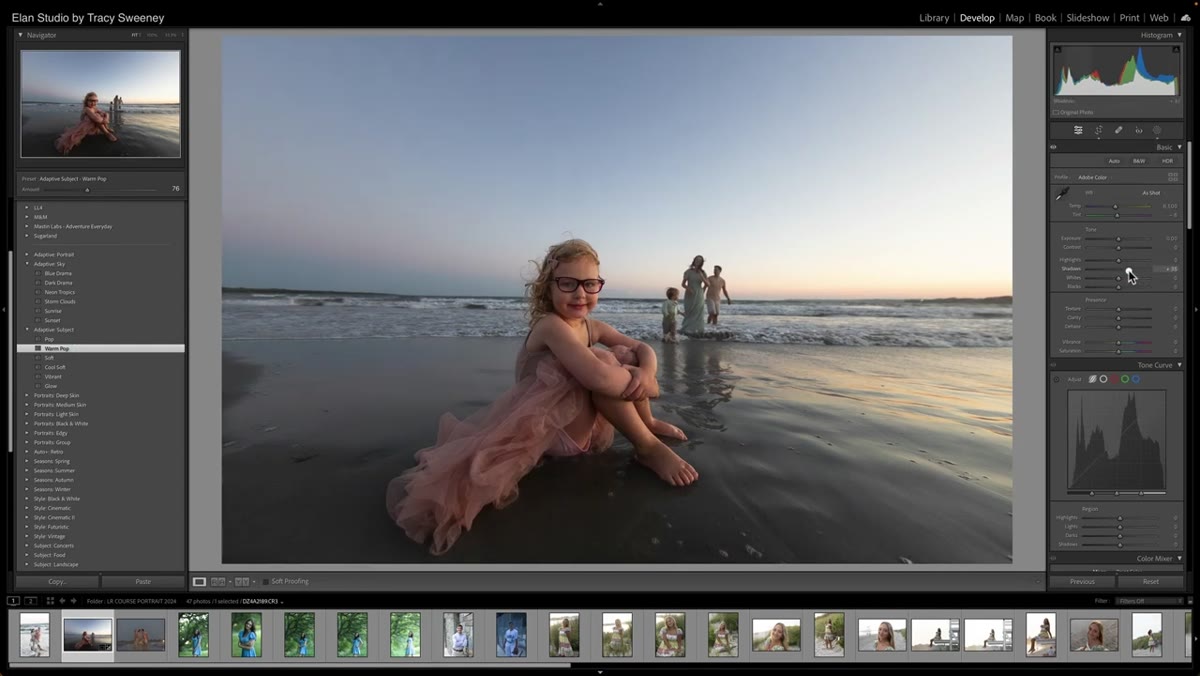 Global adjustment sliders with Clarity pulled into negative values
This is where Sweeney does something counterintuitive that I’ve actually started using myself. She lifts the shadows to open up the darker areas of the image, which is standard. But she also pulls the Clarity slider into negative values. Most people use Clarity to add punch and sharpness. Going negative does the opposite: it softens mid-tone contrast and gives the image a slightly dreamy, diffused quality. On portraits, especially beach or outdoor lifestyle shots, this works really well. Try somewhere between -10 and -25 and see how it feels. It’s subtle, but it complements the lens blur you’re about to add.
Global adjustment sliders with Clarity pulled into negative values
This is where Sweeney does something counterintuitive that I’ve actually started using myself. She lifts the shadows to open up the darker areas of the image, which is standard. But she also pulls the Clarity slider into negative values. Most people use Clarity to add punch and sharpness. Going negative does the opposite: it softens mid-tone contrast and gives the image a slightly dreamy, diffused quality. On portraits, especially beach or outdoor lifestyle shots, this works really well. Try somewhere between -10 and -25 and see how it feels. It’s subtle, but it complements the lens blur you’re about to add.
Step 4: Work the Color Mixer (HSL) with Intention
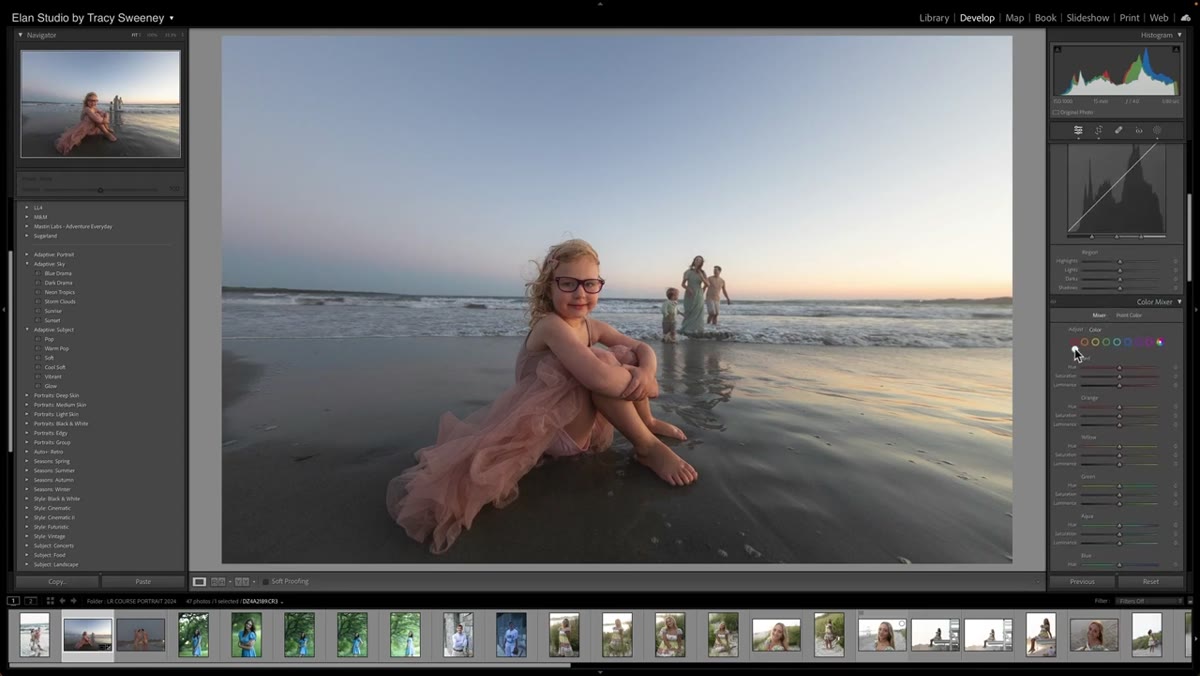 HSL Color Mixer panel open with reds and purples selected
Sweeney opens the Color Mixer panel, which is Lightroom’s HSL (Hue, Saturation, Luminance) tool. Her subject is wearing a mauve dress, so she works the reds and purples. Here’s the important caveat she calls out: HSL adjustments are global. If you boost saturation on reds to make a dress pop, you’re also boosting reds in skin tones, which can look great or terrible depending on the image. She watches the lips and skin as she moves the saturation slider and only goes as far as the skin tones will allow. For blues (sky, ocean), she’s more aggressive because there’s no skin-tone conflict. Adjust Hue to shift a color toward a neighboring color. Adjust Saturation to make it more or less vivid. Adjust Luminance to make it brighter or darker. Work one channel at a time and watch the whole frame, not just your target area.
HSL Color Mixer panel open with reds and purples selected
Sweeney opens the Color Mixer panel, which is Lightroom’s HSL (Hue, Saturation, Luminance) tool. Her subject is wearing a mauve dress, so she works the reds and purples. Here’s the important caveat she calls out: HSL adjustments are global. If you boost saturation on reds to make a dress pop, you’re also boosting reds in skin tones, which can look great or terrible depending on the image. She watches the lips and skin as she moves the saturation slider and only goes as far as the skin tones will allow. For blues (sky, ocean), she’s more aggressive because there’s no skin-tone conflict. Adjust Hue to shift a color toward a neighboring color. Adjust Saturation to make it more or less vivid. Adjust Luminance to make it brighter or darker. Work one channel at a time and watch the whole frame, not just your target area.
Step 5: Apply the Lens Blur Tool
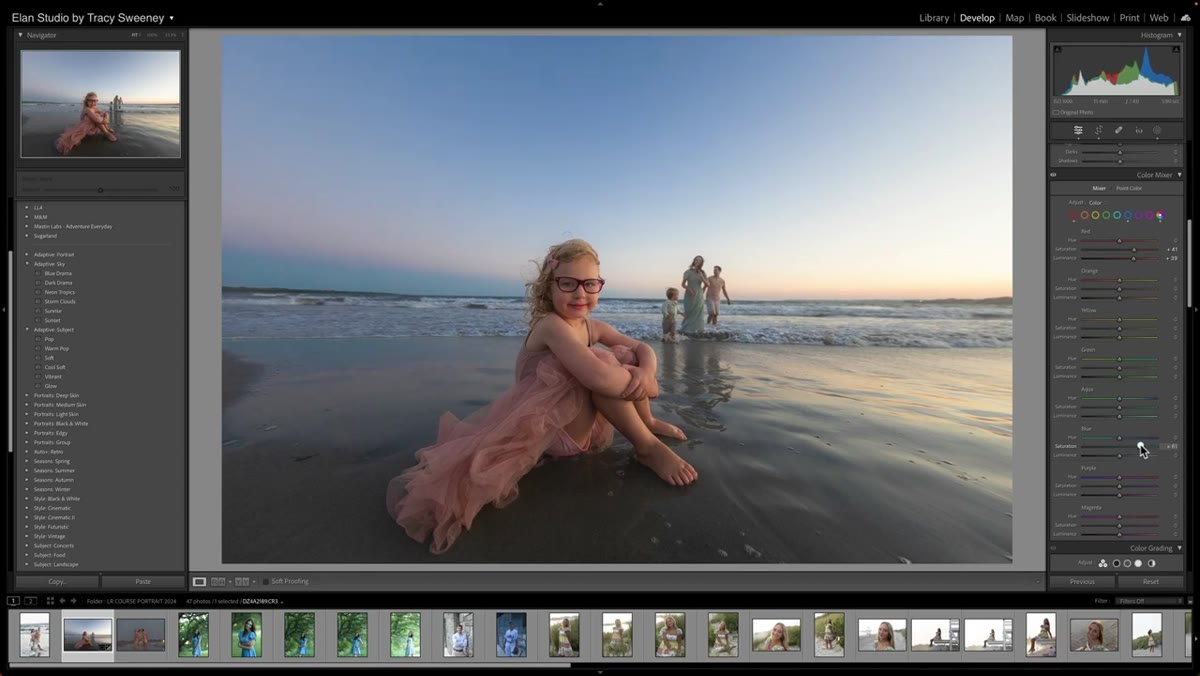 Lens Blur tool panel open with background blur applied
This is the main event. Find the Lens Blur tool in the editing panel (it sits in the Effects section in recent Lightroom versions). Lightroom uses AI to detect your subject and create a depth map, essentially figuring out what’s in the foreground versus the background. Once you apply the effect, you can control the blur amount with the Blur Amount slider. Sweeney recommends going subtle rather than cranking it, because an overdone digital blur looks immediately fake. The goal is to approximate what a slightly faster lens would have produced, not to make the background look like a painting. The tool also lets you adjust the focal range if the automatic depth detection has misread your scene.
Lens Blur tool panel open with background blur applied
This is the main event. Find the Lens Blur tool in the editing panel (it sits in the Effects section in recent Lightroom versions). Lightroom uses AI to detect your subject and create a depth map, essentially figuring out what’s in the foreground versus the background. Once you apply the effect, you can control the blur amount with the Blur Amount slider. Sweeney recommends going subtle rather than cranking it, because an overdone digital blur looks immediately fake. The goal is to approximate what a slightly faster lens would have produced, not to make the background look like a painting. The tool also lets you adjust the focal range if the automatic depth detection has misread your scene.
Step 6: Refine the Blur and Check Subject Edges
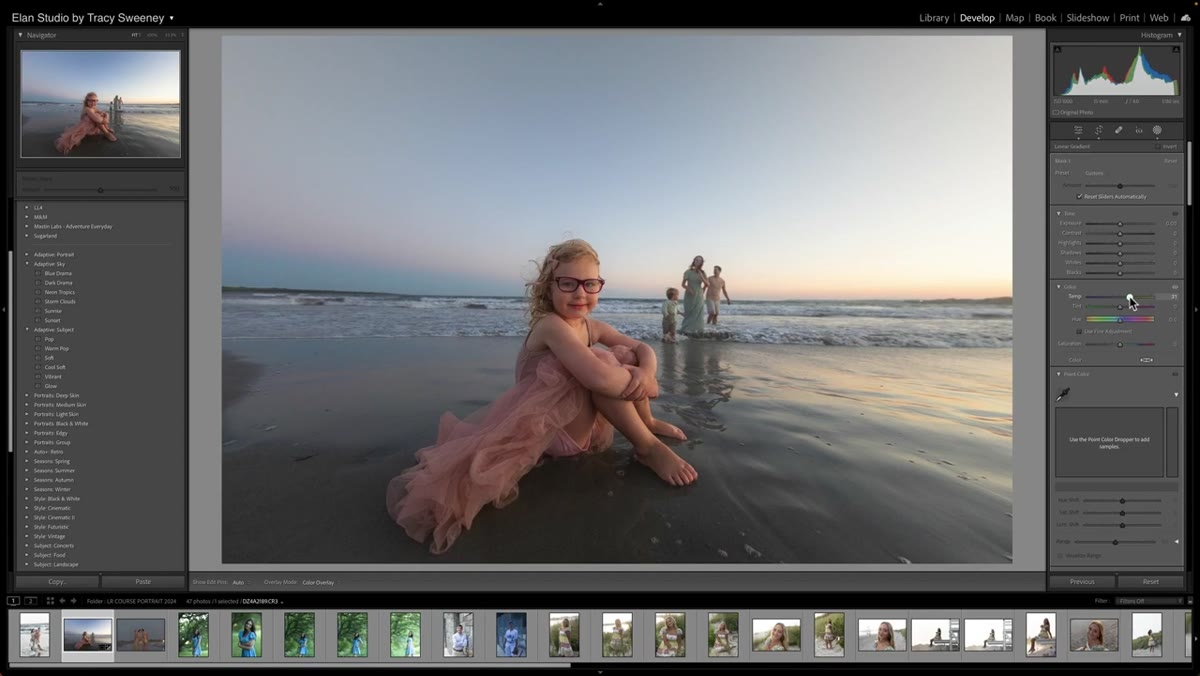 Zoomed view checking subject edges where blur meets sharp areas
After applying the blur, zoom in to 100% and check the edges where your subject meets the background. This is where digital blur tools tend to fall apart. Look for halos, weird transitions, or areas where the blur has crept onto your subject’s hair or arms. Lightroom’s AI masking has gotten genuinely good at this, but it’s not perfect, especially with fine hair or complex edge situations. If you see problems, use the Visualize Depth option (if available in your version) to see how Lightroom is reading the depth in the scene, and adjust the focal range to correct it. A slightly imperfect blur that’s been refined is always better than a heavy blur that creates obvious artifacts.
Zoomed view checking subject edges where blur meets sharp areas
After applying the blur, zoom in to 100% and check the edges where your subject meets the background. This is where digital blur tools tend to fall apart. Look for halos, weird transitions, or areas where the blur has crept onto your subject’s hair or arms. Lightroom’s AI masking has gotten genuinely good at this, but it’s not perfect, especially with fine hair or complex edge situations. If you see problems, use the Visualize Depth option (if available in your version) to see how Lightroom is reading the depth in the scene, and adjust the focal range to correct it. A slightly imperfect blur that’s been refined is always better than a heavy blur that creates obvious artifacts.
What I’d Add From My Own Testing
The lens blur tool works best on images where there’s already some natural separation between subject and background. If your subject is standing directly against a flat wall or a background with no depth variation, the AI has a harder time building an accurate depth map and the results get muddy fast. My workaround is to use a radial gradient mask in combination with the lens blur, which gives you manual control over where the blur starts and stops. It’s an extra step, but it saved more than a few images where the automatic detection wasn’t cutting it.
Also worth noting: this tool is much more forgiving on images shot in soft, even light. High-contrast scenes with harsh shadows at the subject’s edges will make the masking look worse. If you’re a natural light shooter like Sweeney, you’re already set up for success here.
The biggest takeaway from this tutorial is that the gap between “I have a kit lens” and “I want portrait bokeh” is now closable in software, and you don’t need to spend a cent on new glass to test it. That doesn’t mean I’m retiring my spreadsheet of budget primes anytime soon. But for the shoots where you didn’t have the right lens, or you grabbed the wrong body, this tool is genuinely useful. Give it a run on an image you’ve already written off.
Watch the full tutorial on YouTube to see Tracy Sweeney walk through the entire edit from start to finish.
Comments (2)
My workflow just got 10x faster. Not even kidding.
Love how you break down complex stuff into manageable steps.
Leave a Comment