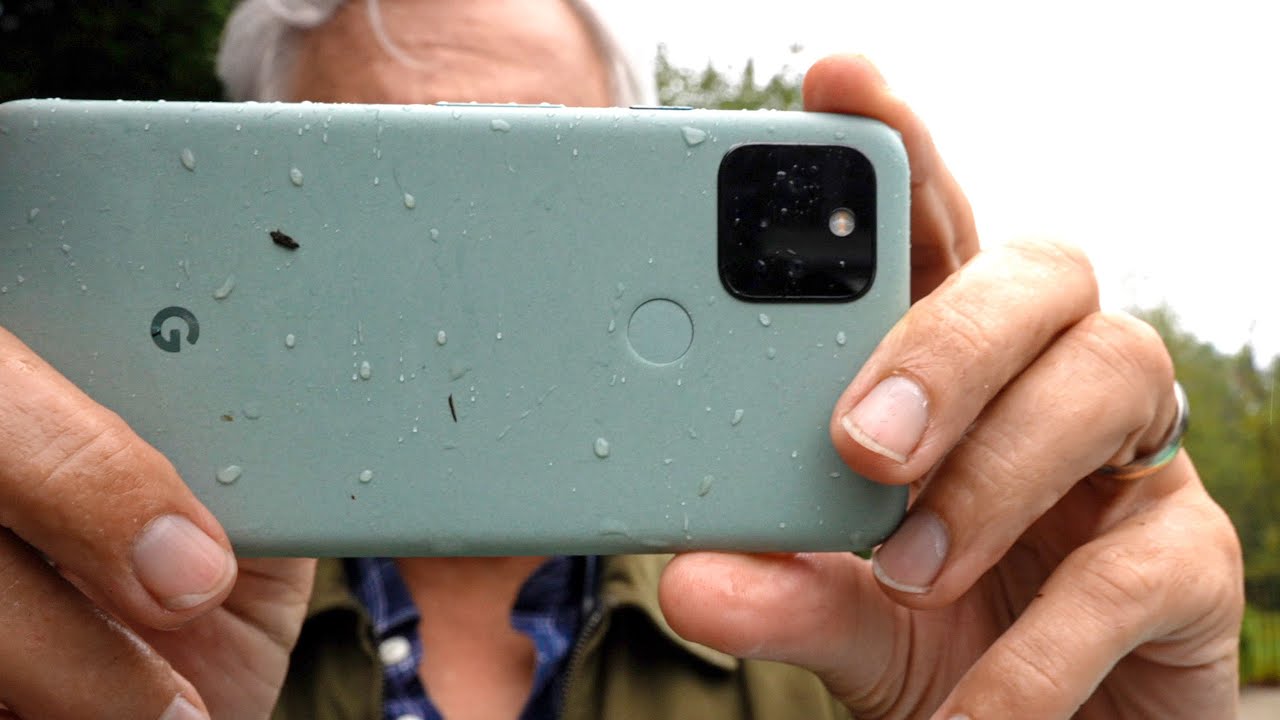
I run my whole content operation on the idea that the price tag on your gear matters a lot less than how well you understand what it can and can’t do. That philosophy got put to the test when Google sent Tony and Chelsea Northrup a Pixel 5 to review. At $700, it sits in an interesting spot: not a bargain-bin phone, but nearly $400 cheaper than the iPhone 12 Pro Max that launched around the same time. Watch the full tutorial on YouTube
In this Tony and Chelsea Northrup tutorial, they put the Pixel 5 through real-world shooting conditions, including rain, night skies, and portrait sessions, to figure out exactly where Google’s computational photography approach wins and where it quietly compromises. I’ve been watching this one closely because I cover a lot of mid-range gear for readers who don’t want to spend flagship money but still need results they can actually use. What I found in this breakdown is a phone that makes smart trade-offs in most areas, and one frustrating one in particular.
The honest answer on whether the Pixel 5 beats the iPhone isn’t a clean yes or no. It depends entirely on what you’re shooting. Here’s how to actually get the most out of each scenario the video walks through.
Step 1: Understand What You’re Paying For Before You Shoot Anything
 Specs overview with $700 price point highlighted
Before you even open the camera app, know this: the Pixel 5 is priced at $700 while the iPhone 12 Pro Max starts at $1,100. That gap is real money, and Tony’s point is that the Pixel closes most of the performance distance between them. The phone is also rated waterproof to around three meters, which matters more than people give it credit for. Rain, boats, clumsy moments near a pool - you don’t have to think twice. Build confidence in using it in conditions where you’d otherwise leave your camera at home.
Specs overview with $700 price point highlighted
Before you even open the camera app, know this: the Pixel 5 is priced at $700 while the iPhone 12 Pro Max starts at $1,100. That gap is real money, and Tony’s point is that the Pixel closes most of the performance distance between them. The phone is also rated waterproof to around three meters, which matters more than people give it credit for. Rain, boats, clumsy moments near a pool - you don’t have to think twice. Build confidence in using it in conditions where you’d otherwise leave your camera at home.
Step 2: Learn the Two-Lens Setup and How to Use Each One
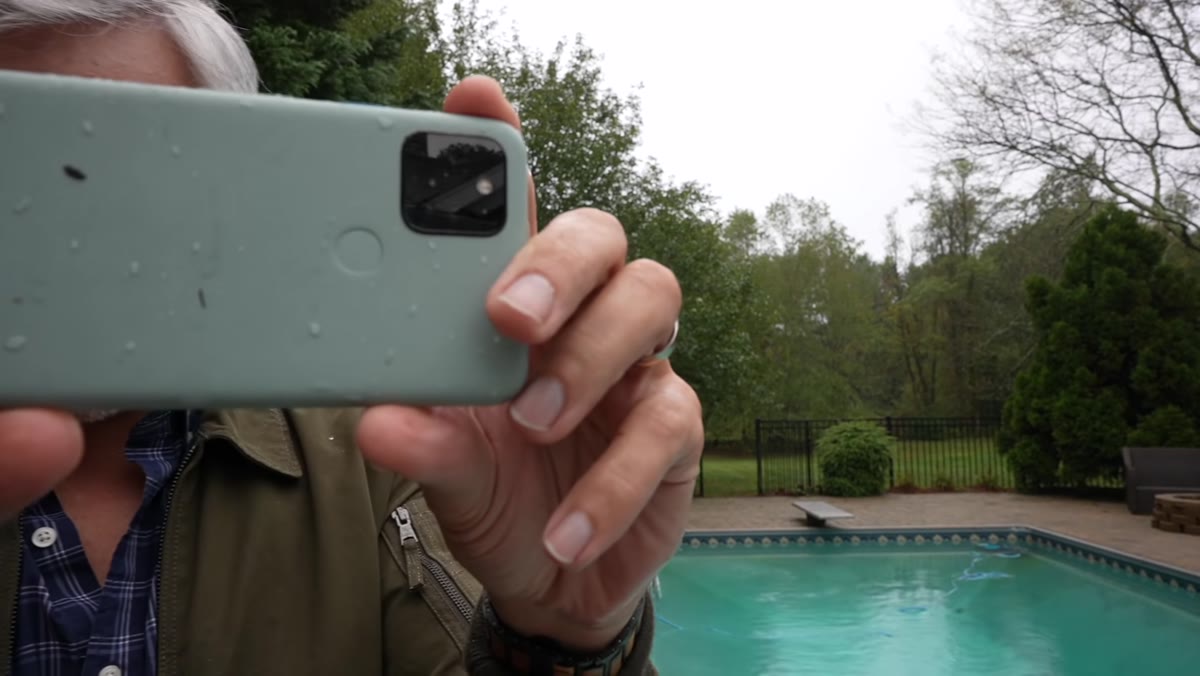 Side-by-side comparison of 27mm and 16mm lens options
The Pixel 5 carries two lenses: a standard 27mm equivalent and a 16mm super-wide angle. For the first time in the Pixel lineup, Google dropped the telephoto in favor of that wide angle. If you’ve been using earlier Pixels and missing ultra-wide shots, this is a significant upgrade. For smartphone shooting where you’re physically close to your subject - people, architecture, tight interior spaces - the 16mm opens up compositions that the standard lens simply can’t capture.
Side-by-side comparison of 27mm and 16mm lens options
The Pixel 5 carries two lenses: a standard 27mm equivalent and a 16mm super-wide angle. For the first time in the Pixel lineup, Google dropped the telephoto in favor of that wide angle. If you’ve been using earlier Pixels and missing ultra-wide shots, this is a significant upgrade. For smartphone shooting where you’re physically close to your subject - people, architecture, tight interior spaces - the 16mm opens up compositions that the standard lens simply can’t capture.
The telephoto trade-off is real but less damaging than it sounds. Tony’s argument, and I agree with it, is that on most phones the telephoto lens doesn’t deliver meaningfully sharper results than just cropping from the standard lens anyway. The Pixel leans into digital zoom with cropping, and if you can’t see the sharpness difference in your final output, it functionally doesn’t matter.
Step 3: Shoot Portraits and Evaluate the Skin Tone Rendering
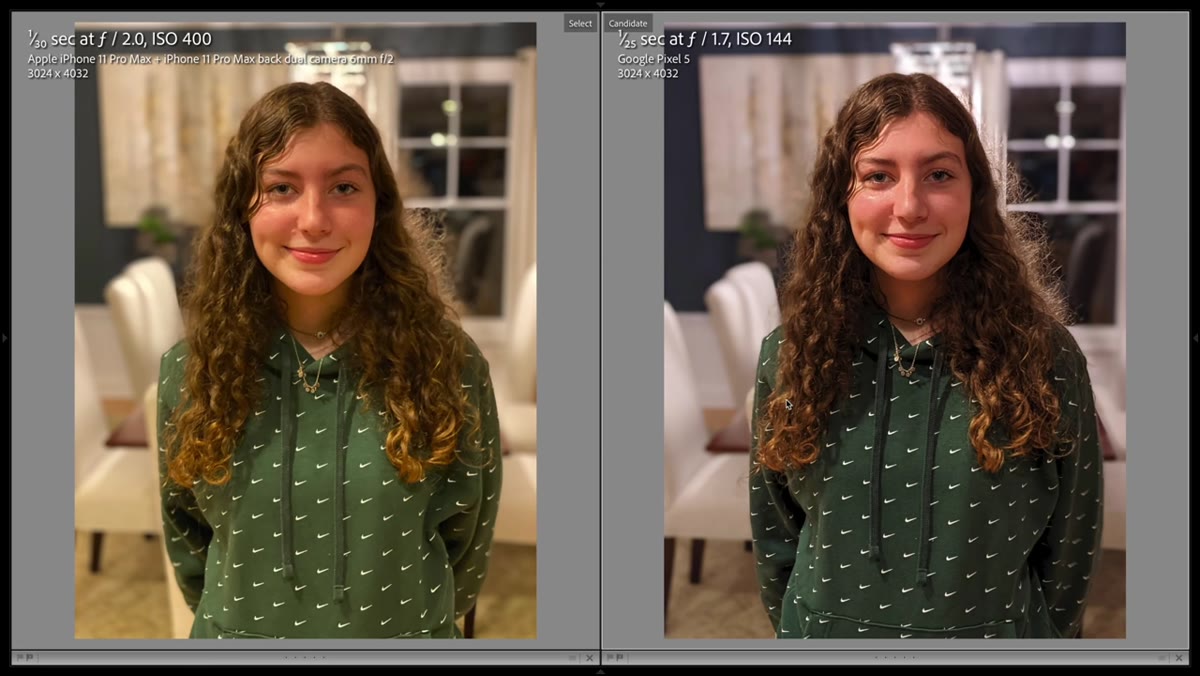 Portrait comparison between Pixel 5 and iPhone 11 Pro Max
When shooting portraits, switch to portrait mode and pay close attention to two things: skin tones and edge detection around hair. In the direct comparison against the iPhone 11 Pro Max, the Pixel 5 renders skin tones that look noticeably more natural. The iPhone pushed toward warmer, yellowish tones and applied heavier processing to the overall image. If you’re shooting people for social content or client work, more natural color rendering means less time correcting in post.
Portrait comparison between Pixel 5 and iPhone 11 Pro Max
When shooting portraits, switch to portrait mode and pay close attention to two things: skin tones and edge detection around hair. In the direct comparison against the iPhone 11 Pro Max, the Pixel 5 renders skin tones that look noticeably more natural. The iPhone pushed toward warmer, yellowish tones and applied heavier processing to the overall image. If you’re shooting people for social content or client work, more natural color rendering means less time correcting in post.
That said, both phones struggle with fine hair detail in portrait mode. The Pixel 5’s edge blurring breaks down around flyaway strands in ways that look artificial when you zoom in. The iPhone has its own version of this problem. The takeaway is practical: portrait mode on either phone works for environmental portraits and casual headshots, but if a client is paying for polished results, you still need a real lens with real bokeh.
Step 4: Check for Artificial Sharpening When Reviewing Detail Shots
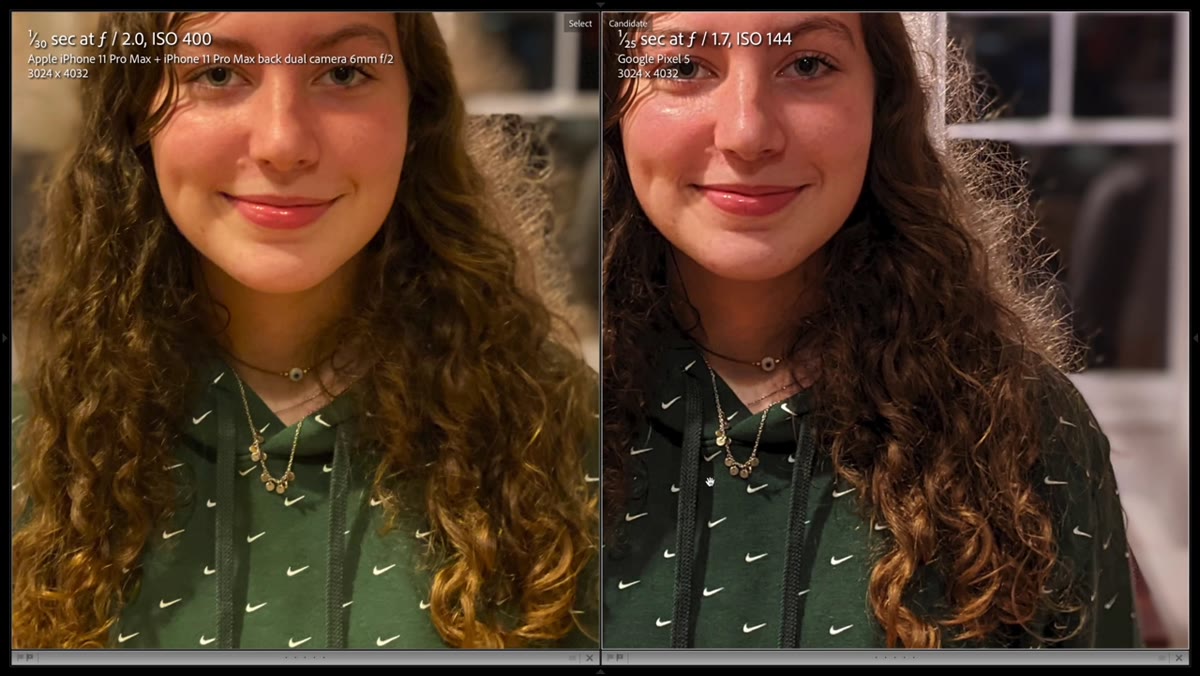 Zoomed-in detail comparison showing edge glow artifact
Zoom into any detailed subject after you shoot - fabric, text, architectural edges - and look specifically at the borders between contrasting areas. The Pixel 5 applies aggressive sharpening that makes images look crisp at a thumbnail view, but when you pixel-peep, you’ll see a dark halo effect along high-contrast edges. That’s a signature of over-processed sharpening, not optical clarity.
Zoomed-in detail comparison showing edge glow artifact
Zoom into any detailed subject after you shoot - fabric, text, architectural edges - and look specifically at the borders between contrasting areas. The Pixel 5 applies aggressive sharpening that makes images look crisp at a thumbnail view, but when you pixel-peep, you’ll see a dark halo effect along high-contrast edges. That’s a signature of over-processed sharpening, not optical clarity.
The iPhone 11 Pro Max handles sharpening more conservatively in comparison, which produces a less dramatic first impression but a cleaner result under scrutiny. If you’re posting to Instagram at compressed sizes, the Pixel’s approach often looks better on screen. If you’re printing or delivering full-resolution files to anyone, be aware that the sharpness is somewhat manufactured.
Step 5: Use Night Mode Correctly and Know Its Trade-Off
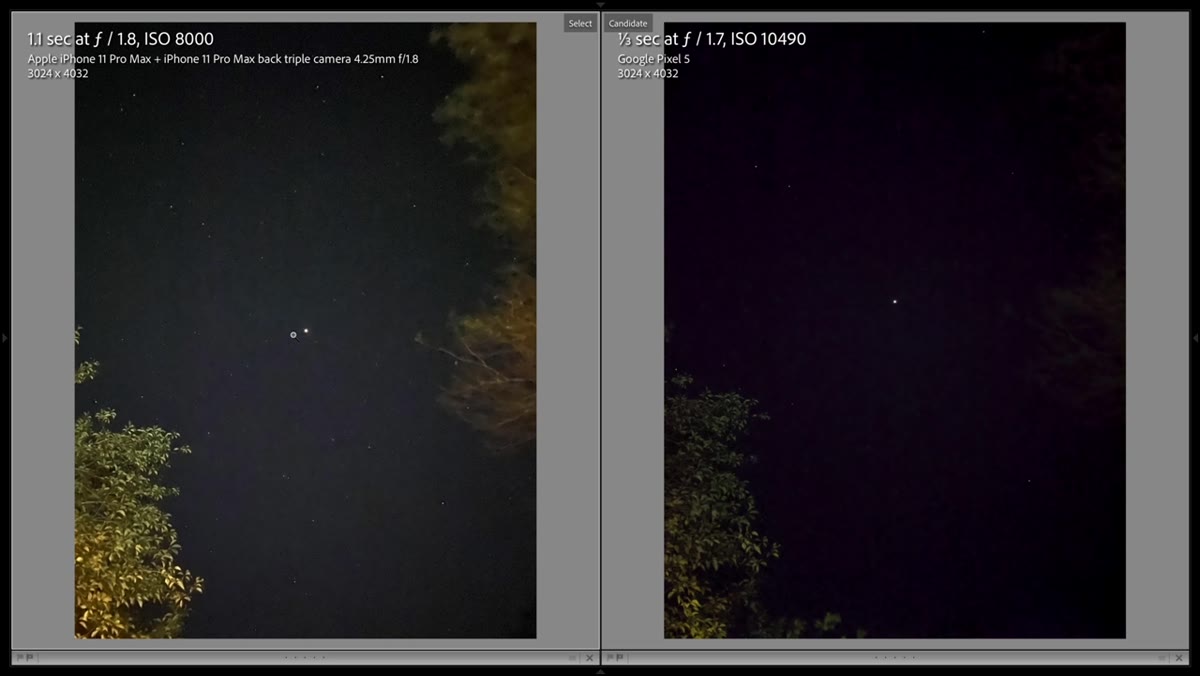 Night sky comparison showing star visibility versus noise levels
Night mode on the Pixel 5 captures darker overall exposures than the iPhone’s equivalent, which initially looks like a disadvantage. The iPhone renders brighter night sky images with more visible stars. But when you zoom in on the Pixel’s result, the image is significantly cleaner with far less noise. The iPhone introduces noticeable grain chasing that brighter exposure.
Night sky comparison showing star visibility versus noise levels
Night mode on the Pixel 5 captures darker overall exposures than the iPhone’s equivalent, which initially looks like a disadvantage. The iPhone renders brighter night sky images with more visible stars. But when you zoom in on the Pixel’s result, the image is significantly cleaner with far less noise. The iPhone introduces noticeable grain chasing that brighter exposure.
The practical decision depends on your intent. If you want a shareable photo that immediately looks impressive, the iPhone’s brighter rendering wins on first view. If you want a technically cleaner image that holds up to editing and cropping, the Pixel’s more conservative exposure gives you better raw material. Neither is objectively right - know which output you’re after before you decide which approach to favor.
Step 6: Keep Megapixel Count in Perspective
 Megapixel specs with comparison context
The Pixel 5’s super-wide lens shoots at 18 megapixels and the standard lens at 12 megapixels. Those numbers are fine for almost everything most photographers actually do. Tony makes a point I’ve tested myself: a Samsung with a 100-megapixel sensor didn’t outperform a standard 24-megapixel camera in real-world image quality. Lens quality and processing matter far more than the raw megapixel count.
Megapixel specs with comparison context
The Pixel 5’s super-wide lens shoots at 18 megapixels and the standard lens at 12 megapixels. Those numbers are fine for almost everything most photographers actually do. Tony makes a point I’ve tested myself: a Samsung with a 100-megapixel sensor didn’t outperform a standard 24-megapixel camera in real-world image quality. Lens quality and processing matter far more than the raw megapixel count.
This is the same argument I made when I ran a blind test at a local photography meetup - people consistently couldn’t separate the shots from a $500 camera from those taken with gear costing four times as much. The Pixel 5 is another example of that principle. Don’t let the spec sheet drive your buying decision.
What I’d Add From My Own Testing
The waterproofing point deserves more attention than it gets in gear reviews. Consistency of use is where smartphone cameras beat dedicated cameras for a lot of working photographers. A phone you’ll actually pull out in rain or at the edge of a waterfall beats a better sensor you leave in the bag. At $700, the Pixel 5 is also sitting in a price range where the used and refurbished market gets interesting - I’ve seen certified refurbished units at meaningful discounts, which shifts the value calculation even further in its favor.
The lens trade-off - wide angle instead of telephoto - is the one choice that genuinely splits users. If your shooting style relies on compression and reach, this phone will frustrate you. If you shoot wide and close, it’s probably the better tool than anything else in its class.
The Pixel 5 is not the most powerful smartphone camera on paper, but it makes consistently good decisions with light, color, and processing in a way that produces usable images faster than many more expensive competitors. That’s worth more in daily practice than a spec sheet win.
Watch the full tutorial on YouTube to see the full side-by-side comparisons Tony and Chelsea walk through - the portrait and night mode sections especially are worth seeing on a large screen where the differences actually show up.
Comments
Leave a Comment