I spend an embarrassing amount of time thinking about gear. Not because I’m obsessed with specs, but because I’ve learned the hard way that the wrong purchase can sit in your bag for two years making you feel guilty every time you open it. When I started out with a $300 kit and somehow shot a wedding that ended up in print, I realized quickly that the decision about what to buy matters more than how much you spend. That’s why I pay attention when a working professional talks openly about their hits and misses.
In this First Man Photography tutorial, Watch the full tutorial on YouTube, the creator breaks down five best and five worst gear purchases from his career as a landscape photographer. This isn’t a spec sheet comparison. It’s the kind of honest, experience-backed take you usually only get from a friend who’s been shooting for years. What I want to do here is pull out the practical lessons from each item so you can apply them to your own buying decisions, whether you’re building a kit from scratch or trying to figure out if an upgrade is actually worth it.
The through-line I kept noticing: the best purchases solved a specific problem he hadn’t fully articulated yet. The worst ones looked good on paper but didn’t survive contact with real shooting conditions. That pattern maps almost perfectly to my own experience, and it’s a useful filter to run any potential purchase through before you click buy.
Step 1: Start With the Gear Nobody Talks About
 Down jacket pulled from a small waterproof stuff sack
The first item on his best-of list isn’t a camera or a lens. It’s a down jacket. Specifically, one that packs into a waterproof stuff sack small enough to throw in a camera bag. For landscape photographers, this is actually a survival tool. You hike in, your body temperature rises, you feel fine. Then you stop moving and stand completely still on an exposed ridge for an hour waiting for the light to shift, and the cold hits fast.
Down jacket pulled from a small waterproof stuff sack
The first item on his best-of list isn’t a camera or a lens. It’s a down jacket. Specifically, one that packs into a waterproof stuff sack small enough to throw in a camera bag. For landscape photographers, this is actually a survival tool. You hike in, your body temperature rises, you feel fine. Then you stop moving and stand completely still on an exposed ridge for an hour waiting for the light to shift, and the cold hits fast.
The lesson here isn’t “buy this jacket.” It’s that your comfort directly affects your shooting. When you’re shivering and miserable, you stop experimenting. You take the safe shot and leave. A packable insulating layer that doesn’t take up meaningful bag space is one of the highest return-on-investment purchases a working outdoor photographer can make, and it costs a fraction of what most people spend on filters or lens accessories they use twice a year.
Step 2: Rethink How You Interact With Editing Software
 Loupedeck editing console sitting beside a laptop on a desk
His second pick is the Loupedeck, a dedicated hardware controller for Lightroom and other editing software. It puts physical knobs and dials in your hands for controls like exposure, contrast, saturation, and temperature. He makes a point worth sitting with: photo editing is framed as a technical process, but it doesn’t have to feel like one. When you’re reaching for a mouse, clicking a slider, and squinting at a number, your brain is in problem-solving mode. When you’re turning a knob while looking at the image, you start making decisions by feel.
Loupedeck editing console sitting beside a laptop on a desk
His second pick is the Loupedeck, a dedicated hardware controller for Lightroom and other editing software. It puts physical knobs and dials in your hands for controls like exposure, contrast, saturation, and temperature. He makes a point worth sitting with: photo editing is framed as a technical process, but it doesn’t have to feel like one. When you’re reaching for a mouse, clicking a slider, and squinting at a number, your brain is in problem-solving mode. When you’re turning a knob while looking at the image, you start making decisions by feel.
He specifically calls out the layout, with saturation and vibrance knobs adjacent to each other, temperature and tint together, so you can adjust related sliders simultaneously with one hand. That’s a workflow detail that sounds minor until you’ve actually tried it. If you edit a high volume of images, the Loupedeck isn’t a luxury, it’s a time and quality-of-work upgrade. Worth pricing out the current generation before dismissing it.
Step 3: Evaluate Cameras on Longevity, Not Launch Hype
 Canon 5D Mark IV mounted and filming the tutorial setup
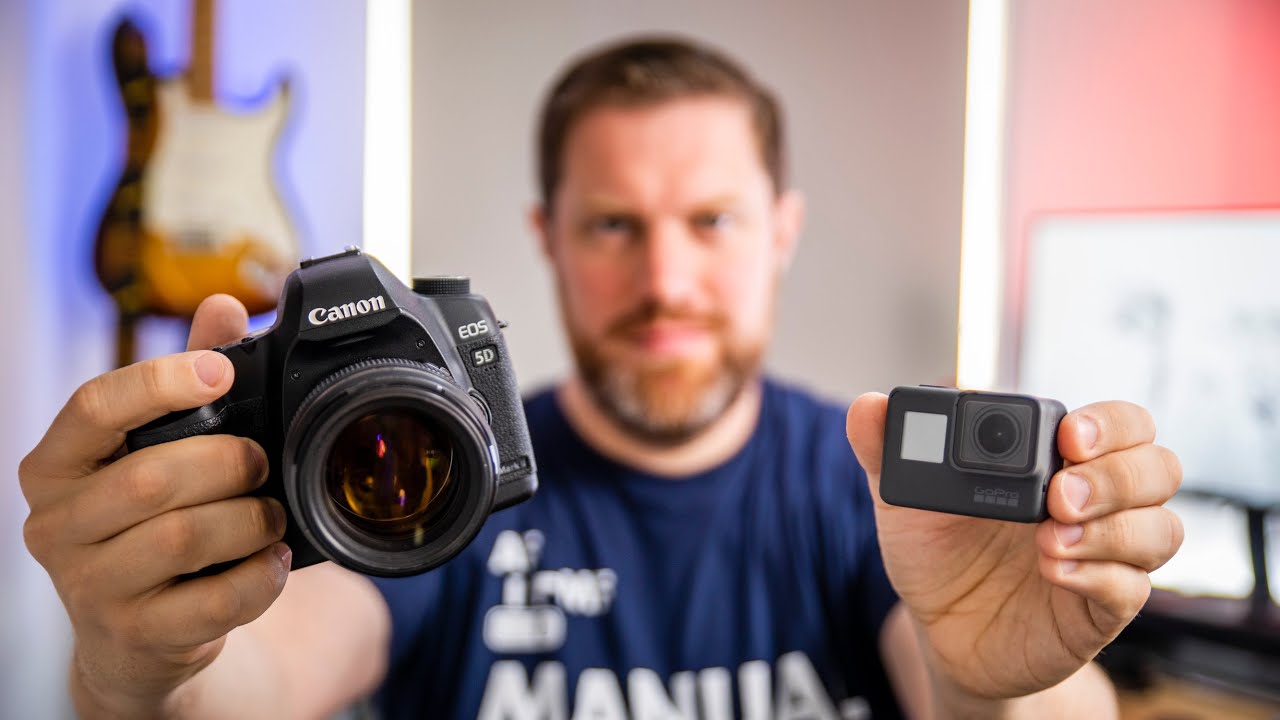
His top camera pick is the Canon 5D Mark IV, which he’s owned long enough to test its staying power against newer competition. His criteria aren’t about megapixels or autofocus points. He’s asking: does it hold up across different kinds of work? Weddings, landscapes, video. Does it still perform when you put it next to something newer? His honest answer is yes, and the secondary point he makes is that used prices have come down enough to put it in a reasonable range now.
Canon 5D Mark IV mounted and filming the tutorial setup
His top camera pick is the Canon 5D Mark IV, which he’s owned long enough to test its staying power against newer competition. His criteria aren’t about megapixels or autofocus points. He’s asking: does it hold up across different kinds of work? Weddings, landscapes, video. Does it still perform when you put it next to something newer? His honest answer is yes, and the secondary point he makes is that used prices have come down enough to put it in a reasonable range now.
This is exactly how I think about camera recommendations for people coming from budget kits. Don’t buy the newest mid-range body. Buy the previous flagship used. You get weather sealing, better sensor performance, and a build quality that survives years of actual use, often for less than a new entry-level camera. The 5D Mark IV is a good specific example, but the principle applies across systems.
Step 4: Solve Specific Problems With Inexpensive Mounts
 Neewer phone mount attached to tripod head with ball joint visible
The fourth item is a phone mount from Neewer that attaches directly to a tripod. It handles both common thread sizes and includes a ball head for independent positioning. The context here is that he’d just done a video on smartphone photography, and having a reliable way to mount a phone on the same tripod as your main camera opens up a lot of practical options: behind-the-scenes content, second-angle coverage, or just using your phone as a remote monitor.
Neewer phone mount attached to tripod head with ball joint visible
The fourth item is a phone mount from Neewer that attaches directly to a tripod. It handles both common thread sizes and includes a ball head for independent positioning. The context here is that he’d just done a video on smartphone photography, and having a reliable way to mount a phone on the same tripod as your main camera opens up a lot of practical options: behind-the-scenes content, second-angle coverage, or just using your phone as a remote monitor.
What I like about this recommendation is the price-to-problem-solved ratio. This is a sub-$20 accessory that removes a real friction point. It’s exactly the category of purchase I think most photographers underweight. People will agonize over a lens upgrade but skip a $15 mount that would actually change how they work on location. Add it to your list.
Step 5: Apply the “Would I Miss It?” Test Before Every Purchase
 Creator talking to camera, podcast context being explained
The structure of this video came from a podcast conversation where he and a co-host swapped their personal best and worst lists. What came through, even in the best picks, is a recurring question underneath each one: would shooting be meaningfully worse without this? The down jacket, the Loupedeck, the camera, the phone mount. Each one passes that test clearly.
Creator talking to camera, podcast context being explained
The structure of this video came from a podcast conversation where he and a co-host swapped their personal best and worst lists. What came through, even in the best picks, is a recurring question underneath each one: would shooting be meaningfully worse without this? The down jacket, the Loupedeck, the camera, the phone mount. Each one passes that test clearly.
Before any purchase, I’d suggest actually writing down what specific problem the gear solves and what you’d do without it. If the answer is “basically the same thing,” that’s useful data. This isn’t anti-gear thinking. It’s pro-efficiency thinking. The worst purchases almost always come from excitement about a category rather than a clearly defined need.
My Take: The Budget Angle Nobody Mentions
The items on his best list are spread across a huge price range, from a packable jacket to a full-frame professional camera. But the common thread is that every one of them was purchased with a specific use case in mind, not because it was new or well-reviewed in the abstract. That’s a discipline I try to apply even at the budget end of the market. My most-shared piece ever was about a $12 Amazon accessory that replaced a $200 brand-name product because the $12 version solved the exact same problem.
The gear that earns a permanent spot in your kit is almost never the most expensive thing you own. It’s the thing you’d replace immediately if it broke. Build your list around those items, whatever the price point.
The single most useful takeaway from this video: buy for the specific conditions you actually shoot in, not the ones you imagine. A down jacket beats a $500 filter for a cold-weather landscape photographer. Know your shoots, then buy accordingly.
Watch the full tutorial on YouTube to hear the full best and worst lists, including the gear purchases he regrets most.
Comments
Leave a Comment