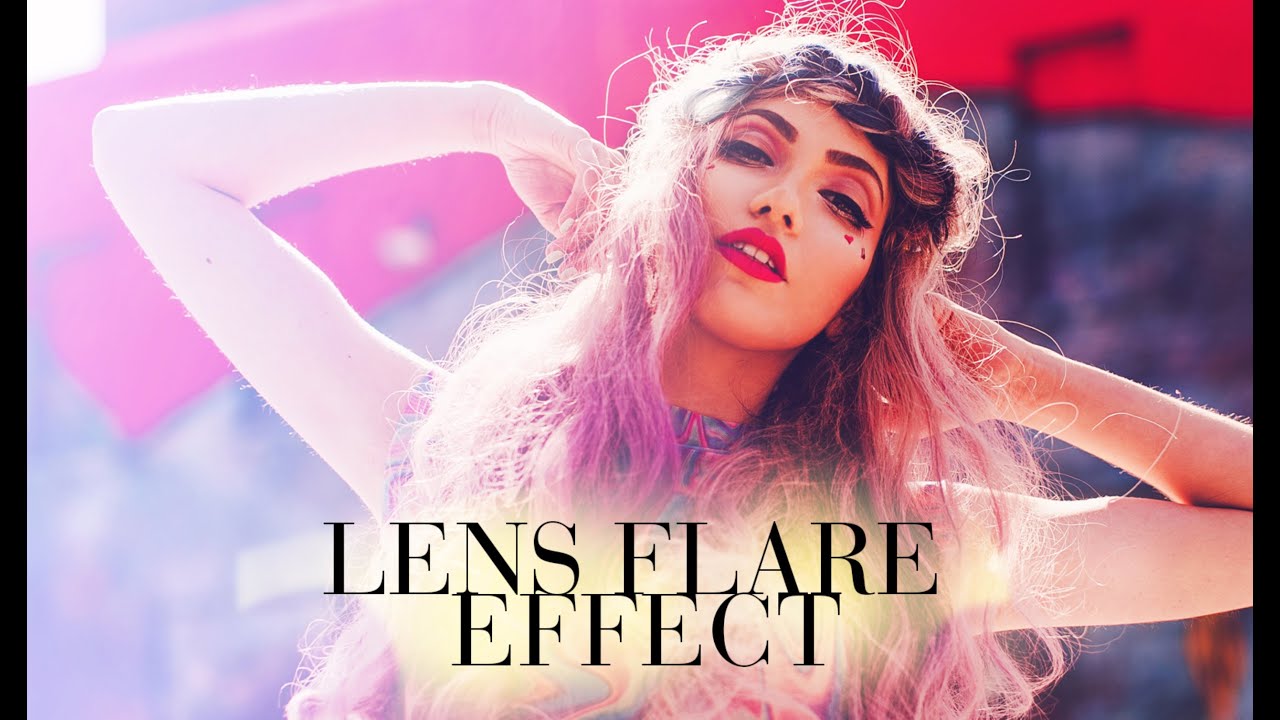
I used to think lens flare effects required either an expensive prime lens shot wide open into harsh backlight, or some bloated plugin that costs more than a budget nifty fifty. Turns out neither is true. In this Jessica Kobeissi tutorial on creating a lens flare effect in Photoshop, she walks through a surprisingly simple gradient-based method that produces a convincing warm, glowing flare using tools that are already sitting in your Photoshop toolbar. No plugins. No additional downloads.
Watch the full tutorial on YouTube
What got my attention is how practical this is for anyone editing portrait or lifestyle photography who wants that golden-hour feel without having to reshoot. I’ve been reprocessing older images from my early days shooting with a kit lens, trying to give them a more editorial look. This technique slots right into that workflow. The whole thing runs on gradient fills, blend modes, and layer masks. If you know those three things even at a basic level, you can follow along.
Step 1: Open Your Image and Select the Gradient Tool
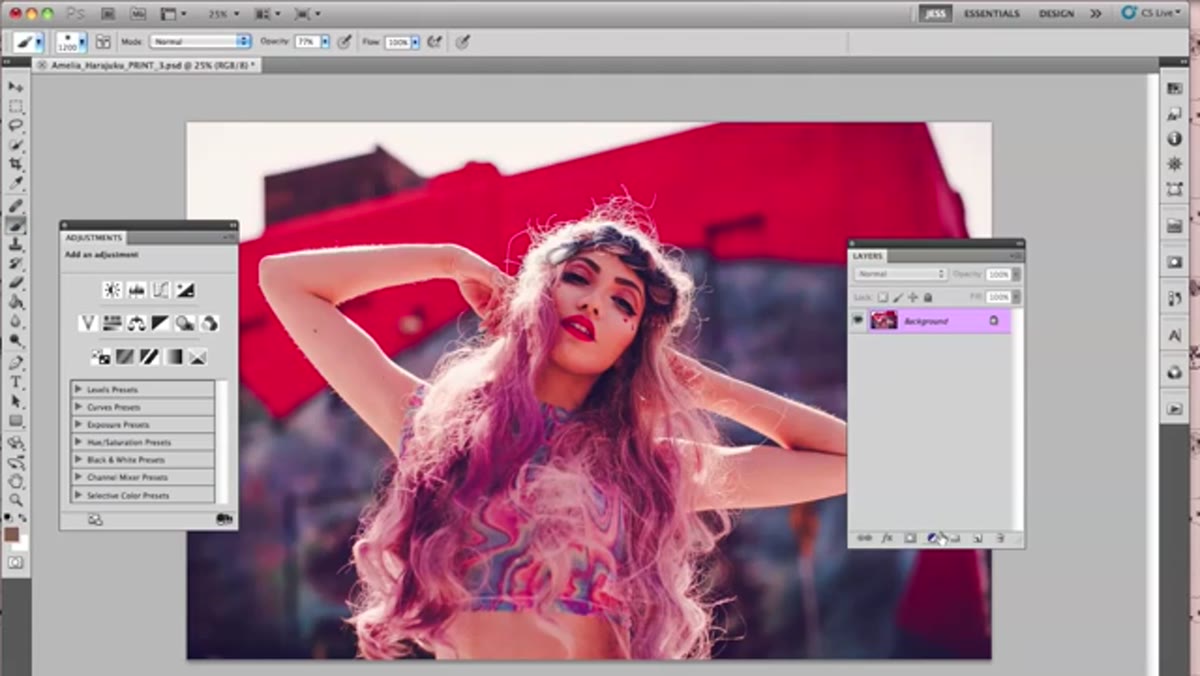 Opening a photo and navigating to the gradient tool
Start with any portrait or lifestyle photo. Open it in Photoshop and head to the gradient tool in the left-hand toolbar. You are not painting directly on your photo here. You will be adding a gradient fill layer, which keeps everything non-destructive and easy to adjust later. Go to Layer, then New Fill Layer, then Gradient. This gives you a dedicated gradient layer that sits above your image and can be tweaked, masked, or deleted without touching the original.
Opening a photo and navigating to the gradient tool
Start with any portrait or lifestyle photo. Open it in Photoshop and head to the gradient tool in the left-hand toolbar. You are not painting directly on your photo here. You will be adding a gradient fill layer, which keeps everything non-destructive and easy to adjust later. Go to Layer, then New Fill Layer, then Gradient. This gives you a dedicated gradient layer that sits above your image and can be tweaked, masked, or deleted without touching the original.
Step 2: Set Up a White-to-Transparent Gradient
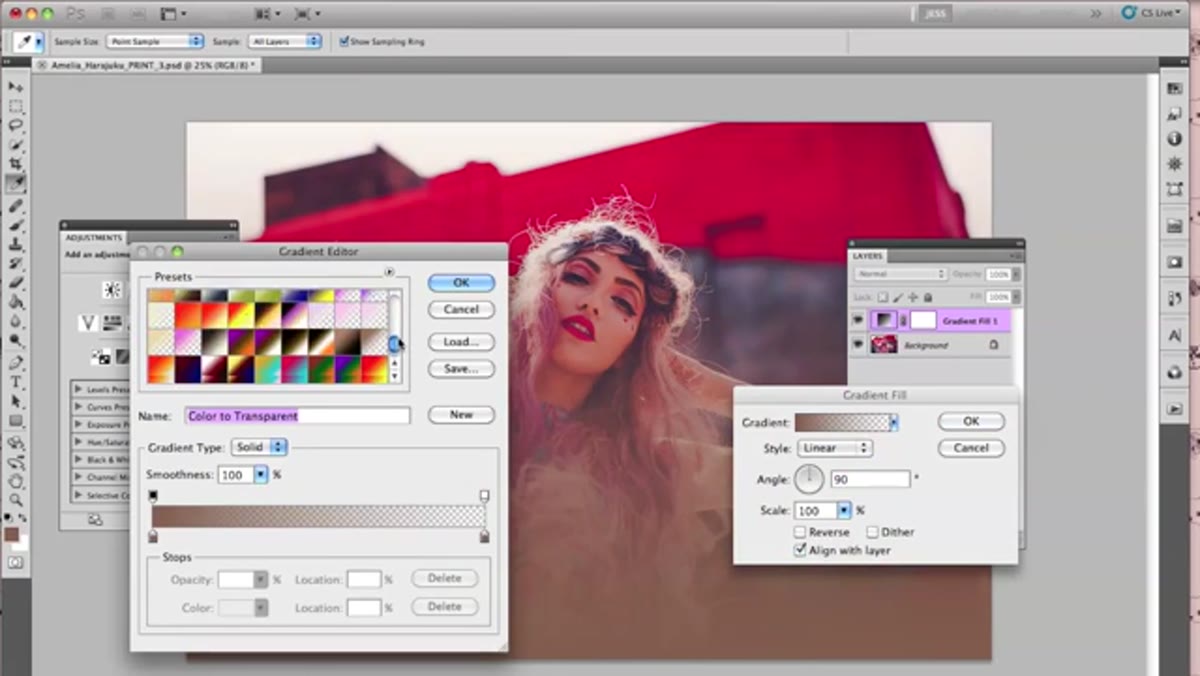 Selecting a white-to-transparent gradient from the preset panel
Inside the gradient fill dialog, click on the gradient preview bar to open the gradient editor. You want a white-to-transparent preset. It can be a little tricky to spot because the white end blends into the white background of the panel. Scroll through the presets carefully. Once selected, this gradient will act as the base of your flare, simulating the bright blown-out region where lens flare originates. Without this foundation layer, the color layers you add later will look flat and disconnected from the image.
Selecting a white-to-transparent gradient from the preset panel
Inside the gradient fill dialog, click on the gradient preview bar to open the gradient editor. You want a white-to-transparent preset. It can be a little tricky to spot because the white end blends into the white background of the panel. Scroll through the presets carefully. Once selected, this gradient will act as the base of your flare, simulating the bright blown-out region where lens flare originates. Without this foundation layer, the color layers you add later will look flat and disconnected from the image.
Step 3: Adjust the Angle and Strength of the Gradient
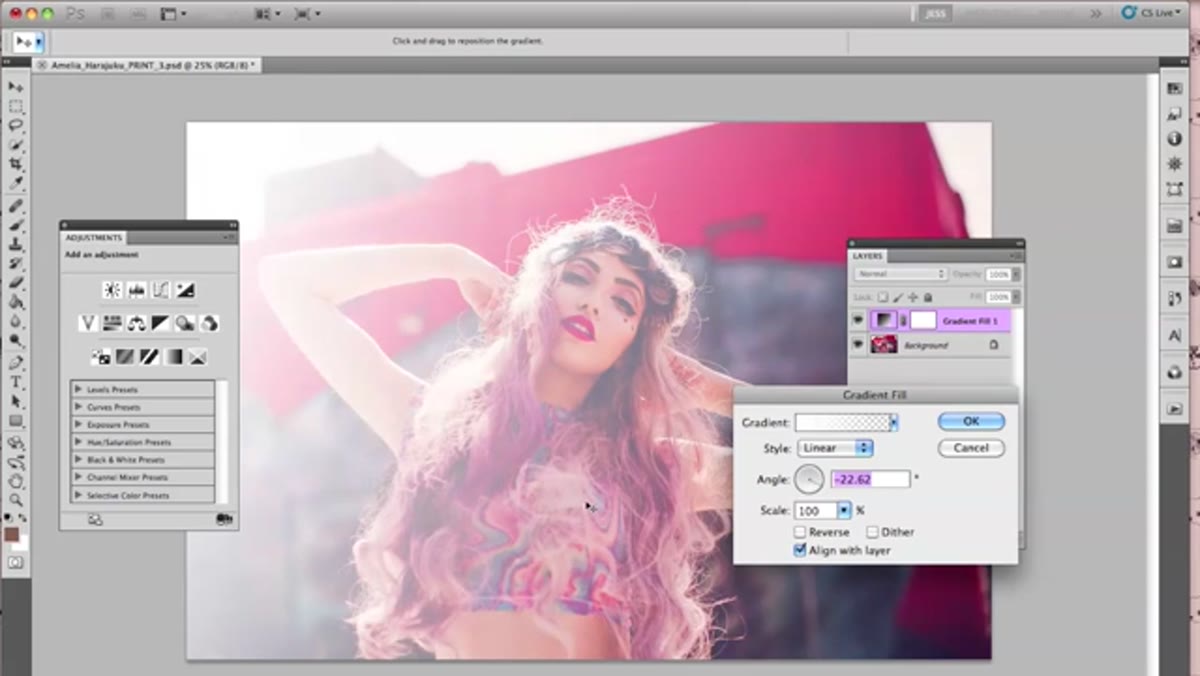 Adjusting gradient angle and dragging to set direction
Still in the gradient fill dialog, adjust the angle so the gradient sweeps in from one side of the frame. Jessica targets the left side of her photo, which gives the effect a directional quality that reads as natural light coming from off-camera. You can click directly on the image preview to reposition where the gradient originates and how far it reaches. Drag back and forth to test the intensity. A stronger pull creates a more dramatic flare. A shorter drag keeps it subtle. Start stronger than you think you need. You can always pull back with the mask in the next step.
Adjusting gradient angle and dragging to set direction
Still in the gradient fill dialog, adjust the angle so the gradient sweeps in from one side of the frame. Jessica targets the left side of her photo, which gives the effect a directional quality that reads as natural light coming from off-camera. You can click directly on the image preview to reposition where the gradient originates and how far it reaches. Drag back and forth to test the intensity. A stronger pull creates a more dramatic flare. A shorter drag keeps it subtle. Start stronger than you think you need. You can always pull back with the mask in the next step.
Step 4: Mask the Gradient to Contain It to One Side
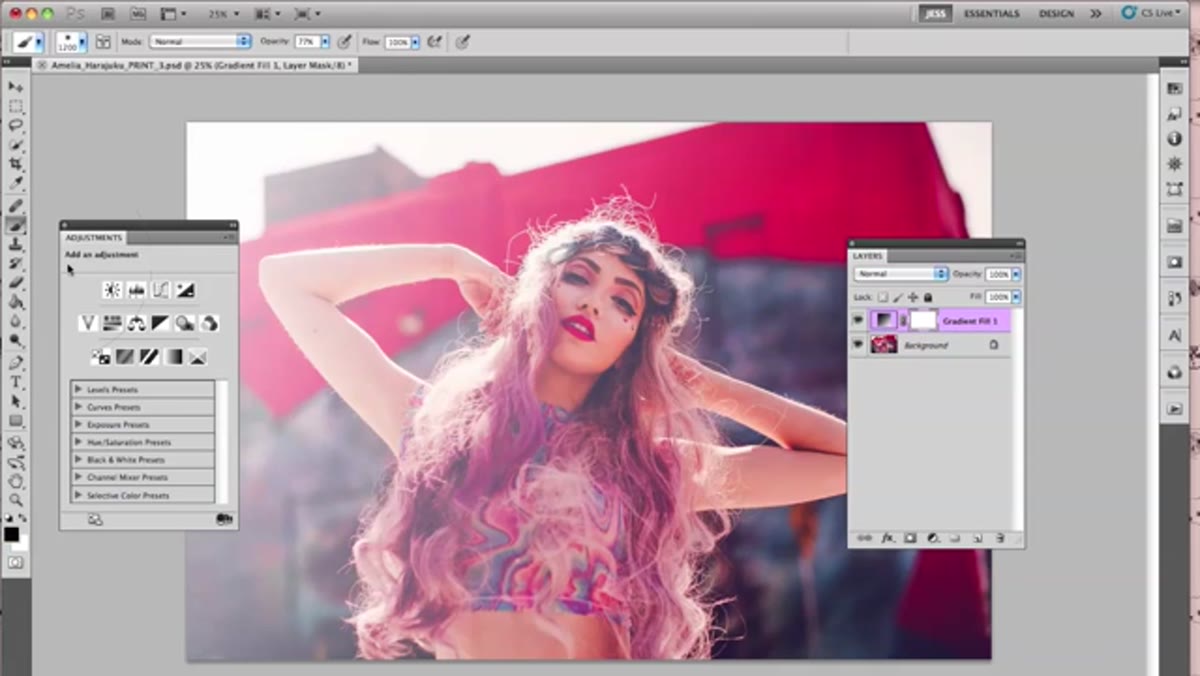 Painting on the gradient mask with a black brush
Once you confirm the gradient fill, you will see the layer appears with a white mask thumbnail. Click that mask thumbnail and select a soft black brush. Set the hardness to zero percent. Paint over the areas of the image where you do not want the gradient showing. The goal is to keep the bright white gradient strictly on the side where your flare is supposed to originate, cleaning it off the main subject or the opposite edge of the frame. Low brush opacity works well here. Build up the mask gradually rather than wiping the gradient out in one stroke. This keeps the edge soft and believable.
Painting on the gradient mask with a black brush
Once you confirm the gradient fill, you will see the layer appears with a white mask thumbnail. Click that mask thumbnail and select a soft black brush. Set the hardness to zero percent. Paint over the areas of the image where you do not want the gradient showing. The goal is to keep the bright white gradient strictly on the side where your flare is supposed to originate, cleaning it off the main subject or the opposite edge of the frame. Low brush opacity works well here. Build up the mask gradually rather than wiping the gradient out in one stroke. This keeps the edge soft and believable.
Step 5: Add Color Layers Using Overlay and Screen Blend Modes
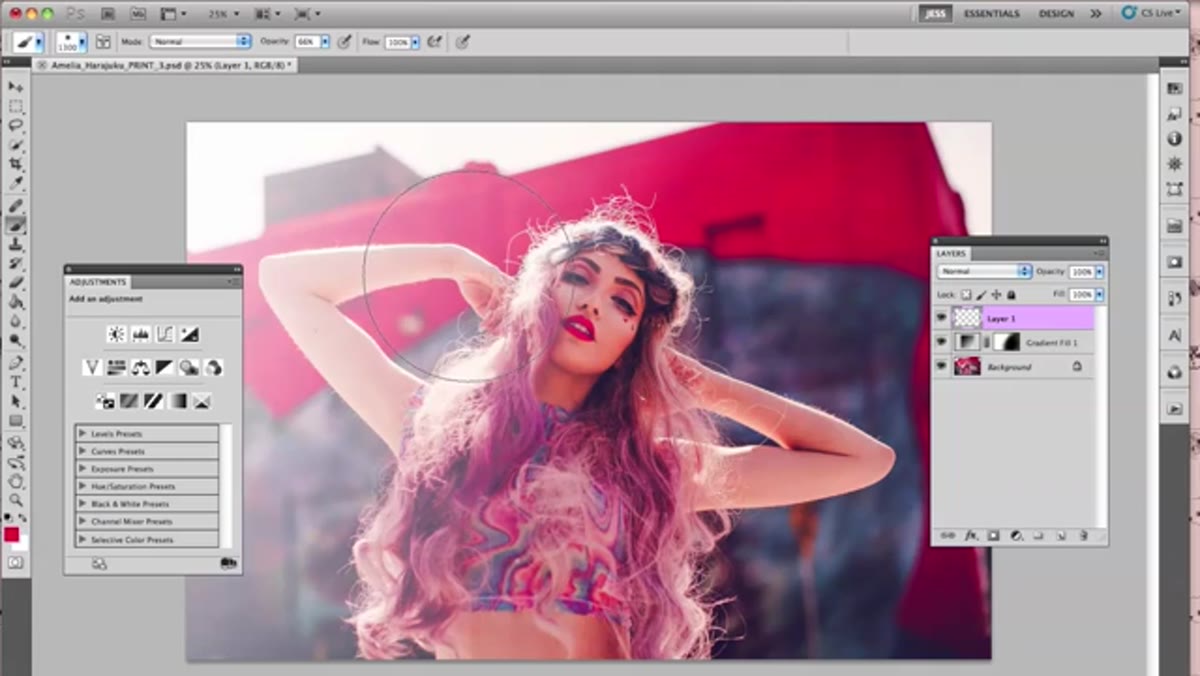 New layer set to Overlay blend mode with red brush strokes
Create a new blank layer above your gradient fill. Pick a warm color like a deep red or magenta. Using a large, soft brush at low opacity, paint loosely over the flare region. Then set that layer’s blend mode to Overlay. This mixes the color into the highlights without muddying the shadows. Create another new layer, choose a lighter pink or coral, and set that one to Screen. Screen mode pushes color into the bright areas and fades out in the darks, which mimics how real lens flare bleeds color into overexposed regions. You can stack several of these layers with different colors, adjusting opacity per layer. This is where trial and error pays off. Some color combinations work immediately. Others need to be dialed way down or scrapped entirely.
New layer set to Overlay blend mode with red brush strokes
Create a new blank layer above your gradient fill. Pick a warm color like a deep red or magenta. Using a large, soft brush at low opacity, paint loosely over the flare region. Then set that layer’s blend mode to Overlay. This mixes the color into the highlights without muddying the shadows. Create another new layer, choose a lighter pink or coral, and set that one to Screen. Screen mode pushes color into the bright areas and fades out in the darks, which mimics how real lens flare bleeds color into overexposed regions. You can stack several of these layers with different colors, adjusting opacity per layer. This is where trial and error pays off. Some color combinations work immediately. Others need to be dialed way down or scrapped entirely.
Step 6: Try the Gradient Fill Method as an Alternative
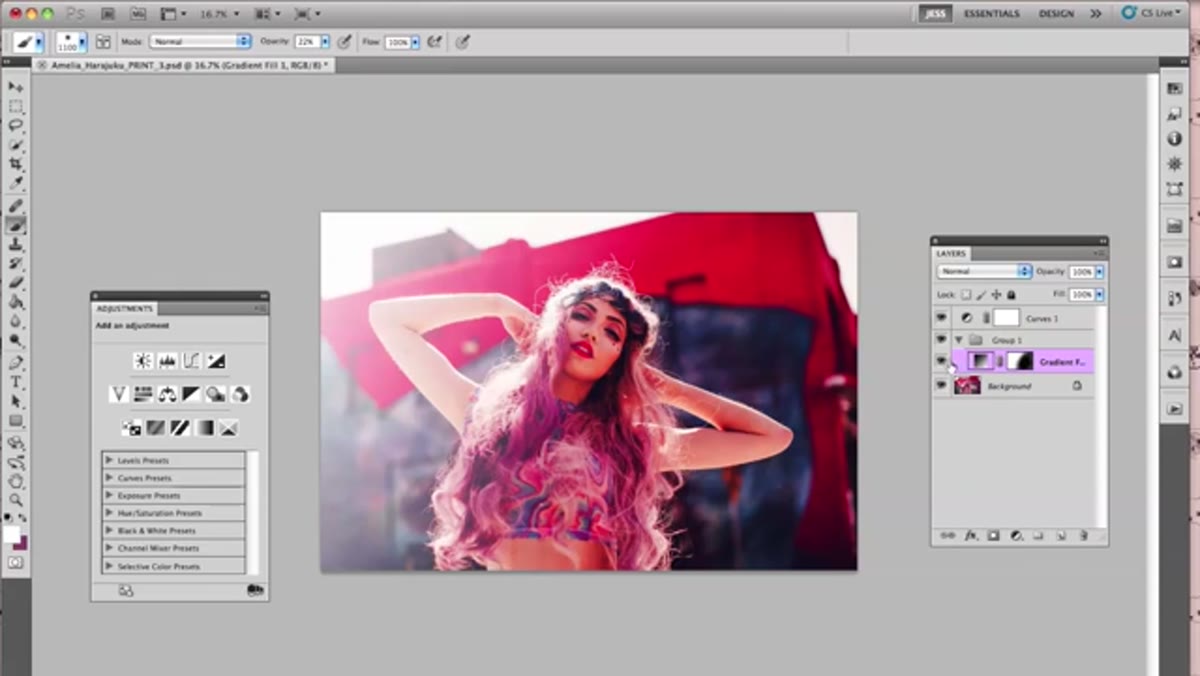 Applying a colored gradient fill layer set to Overlay
If painting with a brush feels too loose or inconsistent, the same color effect can be achieved using additional gradient fill layers instead of brush strokes. Go back to Layer, New Fill Layer, Gradient. This time choose a color gradient preset and set the layer blend mode to Overlay or Screen. Pick the angle so it aligns with your original white gradient. This approach gives you cleaner, more symmetrical color blending and is faster once you have the first gradient already masked. Add a second colored gradient fill for a second hue if you want more complexity.
Applying a colored gradient fill layer set to Overlay
If painting with a brush feels too loose or inconsistent, the same color effect can be achieved using additional gradient fill layers instead of brush strokes. Go back to Layer, New Fill Layer, Gradient. This time choose a color gradient preset and set the layer blend mode to Overlay or Screen. Pick the angle so it aligns with your original white gradient. This approach gives you cleaner, more symmetrical color blending and is faster once you have the first gradient already masked. Add a second colored gradient fill for a second hue if you want more complexity.
Step 7: Add a Curves Adjustment Layer to Tie It Together
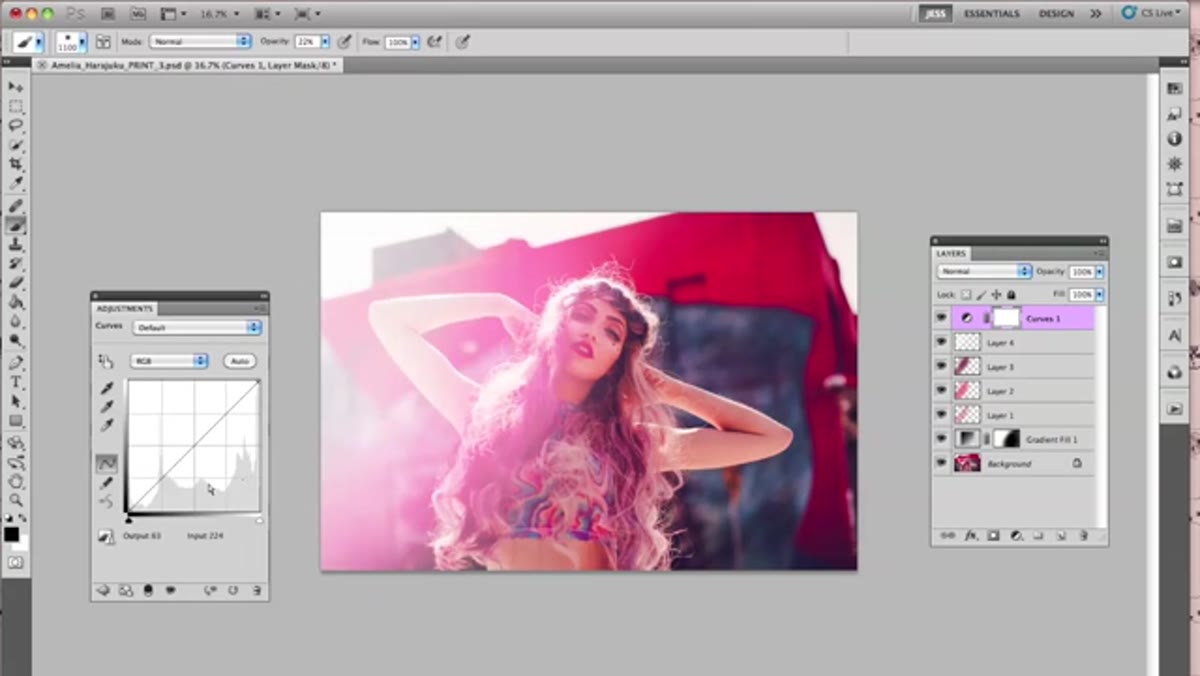 Curves adjustment layer dialog with a slight lift applied
Once your color layers are in place, add a Curves adjustment layer at the top of the stack. A gentle S-curve or a slight lift in the midtones helps unify the flare with the rest of the image. Without this step, the gradient and color layers can look pasted on. The curves adjustment pulls everything into the same tonal range, so the flare reads as part of the photo rather than sitting on top of it.
Curves adjustment layer dialog with a slight lift applied
Once your color layers are in place, add a Curves adjustment layer at the top of the stack. A gentle S-curve or a slight lift in the midtones helps unify the flare with the rest of the image. Without this step, the gradient and color layers can look pasted on. The curves adjustment pulls everything into the same tonal range, so the flare reads as part of the photo rather than sitting on top of it.
What I Would Add From My Own Editing Workflow
One thing the tutorial does not cover is clipping your color layers to the white gradient layer using a clipping mask. If you Option-click (Alt-click on Windows) between the color layer and the gradient layer below it, the color only renders where the gradient is visible. This eliminates the need to manually repaint every color layer’s mask. It is a small change that saves time when you are stacking four or five color layers, which I usually am when I want a more complex flare.
Also worth noting: keep your total layer opacity low across the board. Lens flare in real photography is almost always subtle unless you are deliberately going for a heavy stylized look. Somewhere between 20 and 40 percent opacity on each color layer tends to look the most natural, especially on portrait work.
This technique costs nothing and takes about ten minutes once you have run through it a couple of times. The real value is that it is fully non-destructive and endlessly adjustable. If a client wants the flare warmer, cooler, or gone entirely, you are one layer toggle away from any of those answers. That kind of flexibility matters more than any preset or plugin.
Watch the full tutorial on YouTube and follow along with Jessica’s original walkthrough to see the technique in action from start to finish.
Comments (2)
Wow, I had no idea you could do this. Mind blown.
Wow, I had no idea you could do this. Mind blown.
Leave a Comment