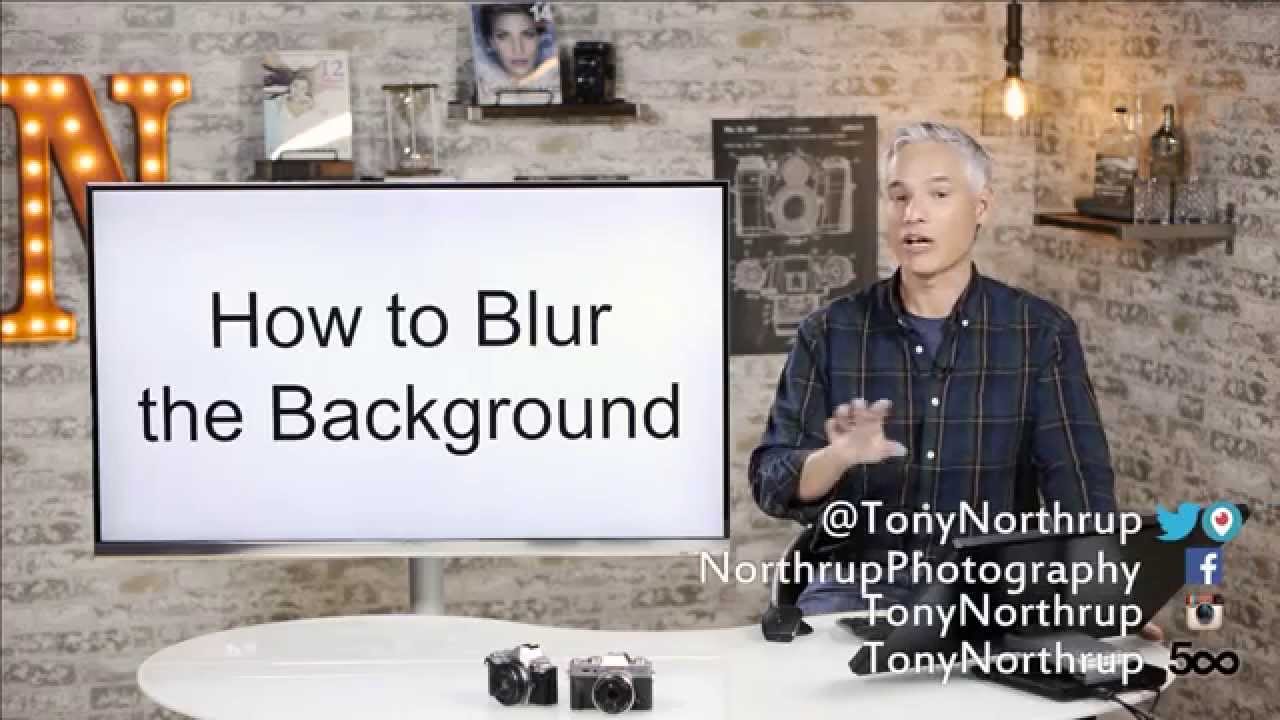
I’ve been saying for years that the gap between a kit lens and a $1,200 prime isn’t as wide as the gear crowd wants you to believe. I started with a $300 camera kit and shot a wedding that ended up published in a local magazine. Nobody asked what lens I used. What they cared about was whether the subject popped off the background, whether the photo felt professional. That separation, that sense of depth, is something most people assume you can only get by spending serious money on fast glass. That assumption is wrong, and this Photoshop technique is one of the clearest proofs I’ve found.
Watch the full tutorial on YouTube
In this Tony and Chelsea Northrup tutorial, Tony walks through a workflow for isolating a subject, rebuilding the background, and applying a believable blur entirely in post. It’s not a one-click filter slapped on top of everything. It’s a layered approach that treats the foreground and background as separate elements, which is what makes the result actually convincing. I’ve watched a lot of Photoshop tutorials and most of them skip the part that makes or breaks the effect. This one doesn’t.
Step 1: Lock Your Background and Duplicate the Layer
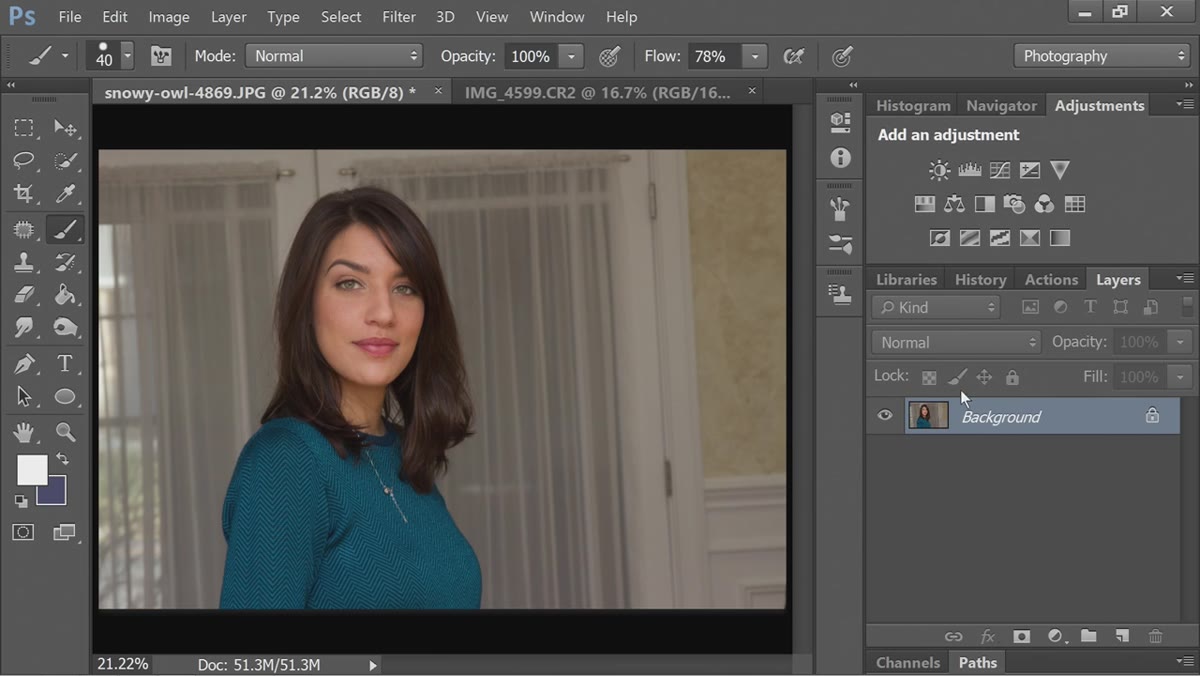 Photoshop layers panel with locked background layer visible
Before touching any selection tool, protect your original. Tony’s first move is keeping the background layer locked so there’s always a clean copy to fall back on. Duplicate the layer before you do anything else. This is basic discipline but it’s the kind of thing tutorials skip because it feels obvious, and then you’re twenty steps in with no undo path.
Photoshop layers panel with locked background layer visible
Before touching any selection tool, protect your original. Tony’s first move is keeping the background layer locked so there’s always a clean copy to fall back on. Duplicate the layer before you do anything else. This is basic discipline but it’s the kind of thing tutorials skip because it feels obvious, and then you’re twenty steps in with no undo path.
Step 2: Use Focus Area to Make Your Initial Selection
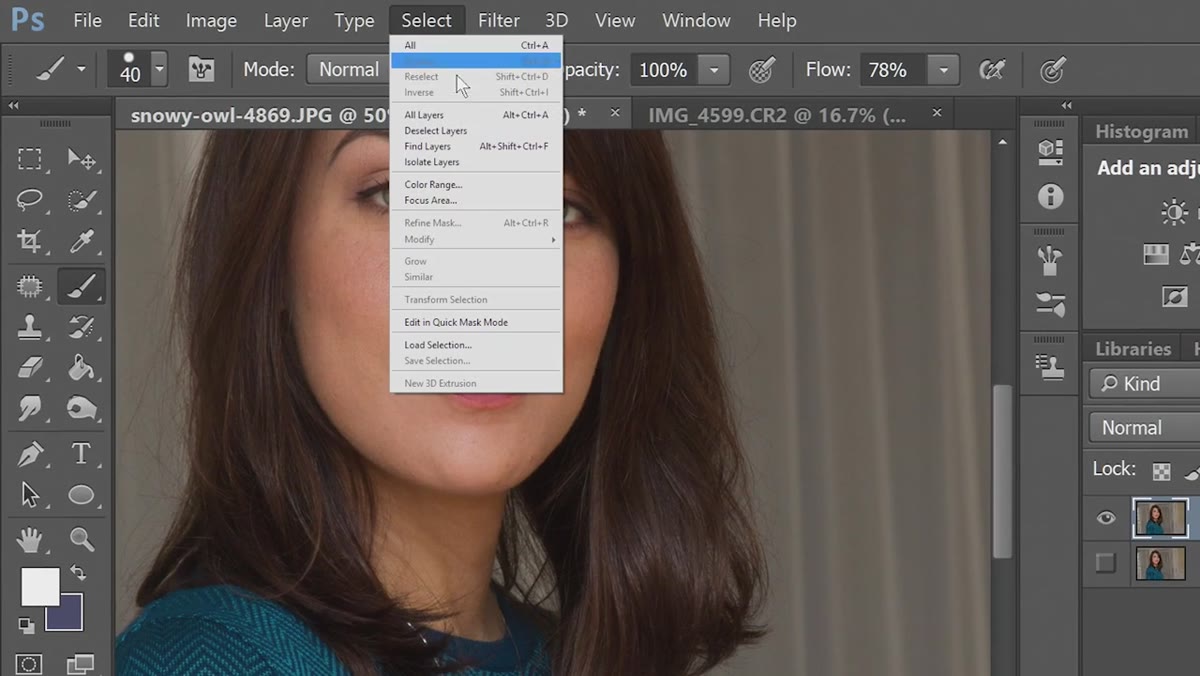 Select menu open with Focus Area option highlighted
Go to Select, then choose Focus Area. This tool analyzes the image and tries to identify which parts of the frame are sharp versus which are soft. It’s essentially asking Photoshop to make an educated guess about where your subject ends and your background begins, based on sharpness data. For portraits, especially ones where the background was already slightly out of focus when you shot it, this works surprisingly well right out of the gate. The default sensitivity setting was solid for Tony’s test image, but you can slide the in-focus range up or down if the selection is grabbing too much or cutting off parts of your subject.
Select menu open with Focus Area option highlighted
Go to Select, then choose Focus Area. This tool analyzes the image and tries to identify which parts of the frame are sharp versus which are soft. It’s essentially asking Photoshop to make an educated guess about where your subject ends and your background begins, based on sharpness data. For portraits, especially ones where the background was already slightly out of focus when you shot it, this works surprisingly well right out of the gate. The default sensitivity setting was solid for Tony’s test image, but you can slide the in-focus range up or down if the selection is grabbing too much or cutting off parts of your subject.
Step 3: Refine the Edge, Especially Around Hair
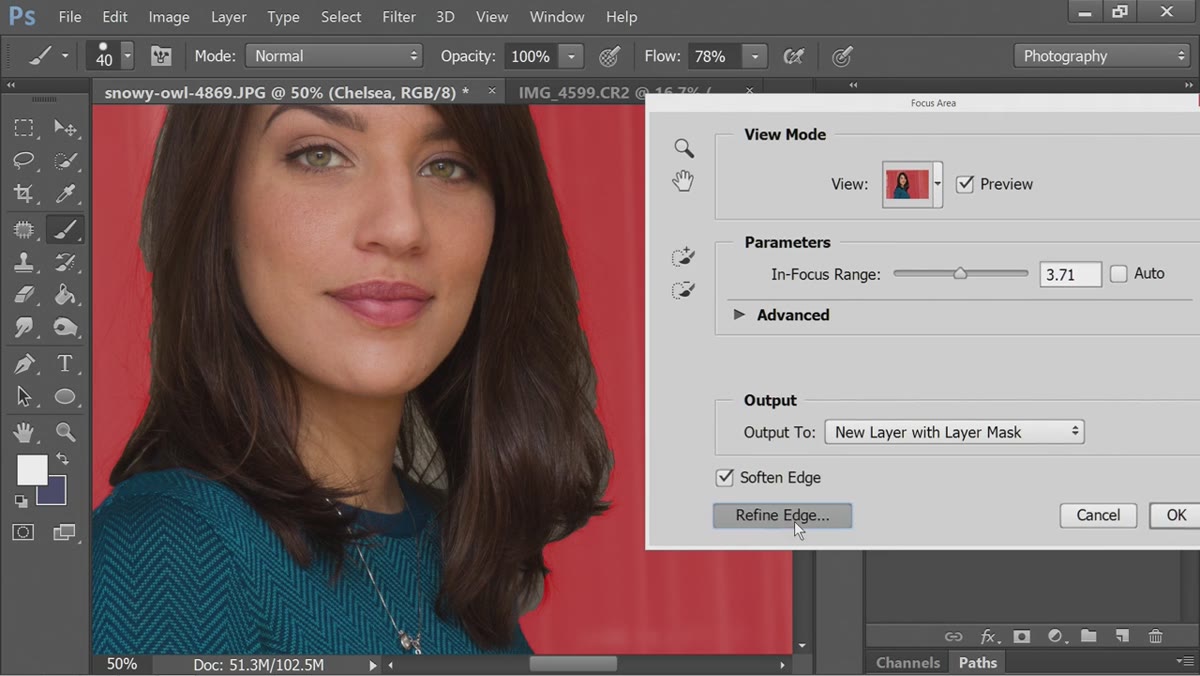 Refine Edge dialog open with Smart Radius slider active
This is where most people bail out and accept a mediocre cutout. Don’t. Before confirming your selection, click Refine Edge inside the Focus Area dialog. Enable Smart Radius and push the slider up. What Smart Radius does is analyze the transition zone between your subject and the background, and it’s particularly important for hair, fur, or anything with fine detail that a hard selection would butcher. Tony notes that for his image, cranking the radius up produced cleaner results than leaving it at a conservative value, but you’ll want to test both ends on your specific photo. When you’re done, set the output to a new layer with a layer mask. That keeps everything non-destructive.
Refine Edge dialog open with Smart Radius slider active
This is where most people bail out and accept a mediocre cutout. Don’t. Before confirming your selection, click Refine Edge inside the Focus Area dialog. Enable Smart Radius and push the slider up. What Smart Radius does is analyze the transition zone between your subject and the background, and it’s particularly important for hair, fur, or anything with fine detail that a hard selection would butcher. Tony notes that for his image, cranking the radius up produced cleaner results than leaving it at a conservative value, but you’ll want to test both ends on your specific photo. When you’re done, set the output to a new layer with a layer mask. That keeps everything non-destructive.
Step 4: Build a Separate Background Layer
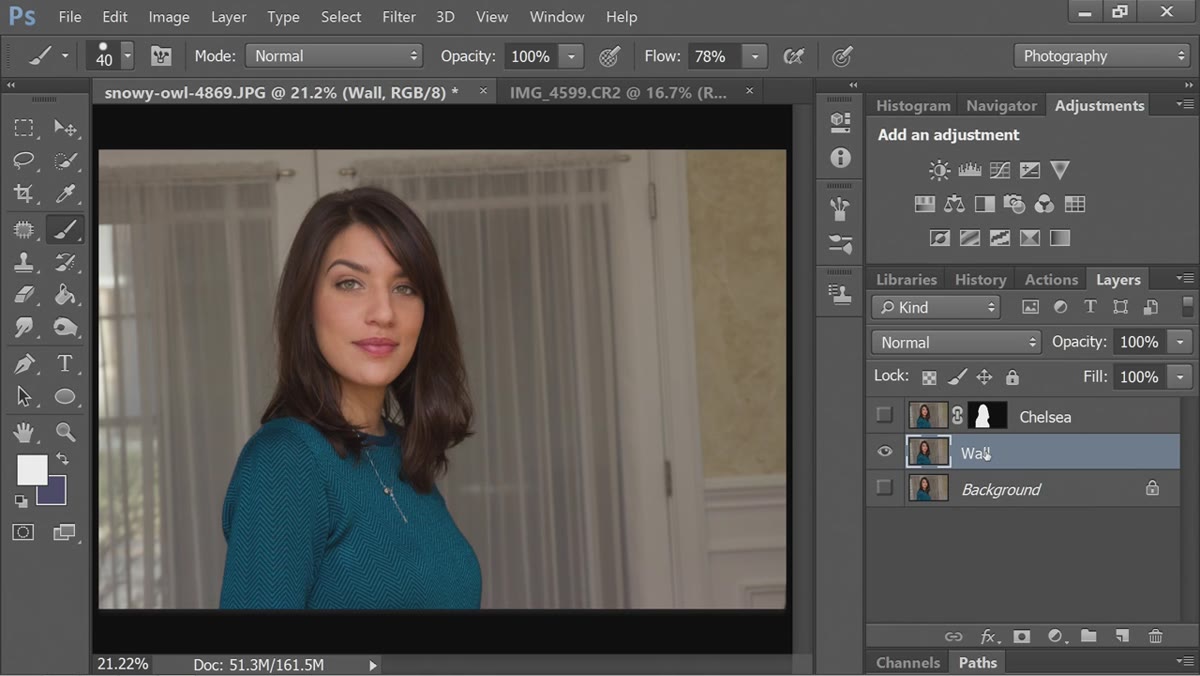 Layers panel showing Chelsea layer hidden, background layer selected
Here’s the step that separates this technique from a lazy blur job. Hide your subject layer and create a dedicated background layer below it. The goal is to have a clean version of the background with no subject in it at all. You’ll use this layer to apply your blur separately, which gives you far more control over how the effect looks and prevents ugly halos at the edge of your subject.
Layers panel showing Chelsea layer hidden, background layer selected
Here’s the step that separates this technique from a lazy blur job. Hide your subject layer and create a dedicated background layer below it. The goal is to have a clean version of the background with no subject in it at all. You’ll use this layer to apply your blur separately, which gives you far more control over how the effect looks and prevents ugly halos at the edge of your subject.
Step 5: Remove the Subject with Content Aware Fill (With a Catch)
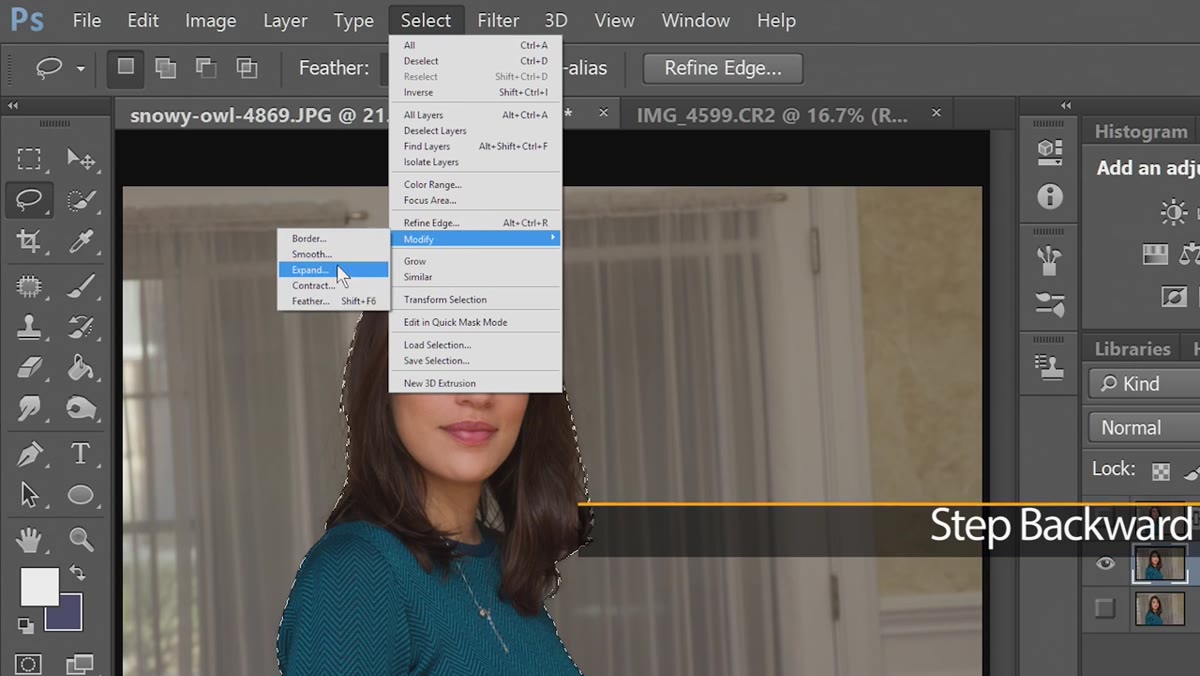 Expand Selection dialog set to 3 pixels
With your subject layer hidden, load the subject’s mask as a selection on the background layer. Before running Content Aware Fill, go to Select, then Modify, then Expand, and push the selection out by about 3 pixels. This small step matters more than it sounds. Without expanding the selection, the fill algorithm has to work right up to the edge of your cutout, and it tends to leave a ghost halo of your subject behind. Expanding by a few pixels gives Content Aware Fill a little breathing room. Run it with Shift F5 and let Photoshop patch in the background. On complex or patterned backgrounds it won’t be perfect, but that’s okay.
Expand Selection dialog set to 3 pixels
With your subject layer hidden, load the subject’s mask as a selection on the background layer. Before running Content Aware Fill, go to Select, then Modify, then Expand, and push the selection out by about 3 pixels. This small step matters more than it sounds. Without expanding the selection, the fill algorithm has to work right up to the edge of your cutout, and it tends to leave a ghost halo of your subject behind. Expanding by a few pixels gives Content Aware Fill a little breathing room. Run it with Shift F5 and let Photoshop patch in the background. On complex or patterned backgrounds it won’t be perfect, but that’s okay.
Step 6: Clean Up the Background Layer
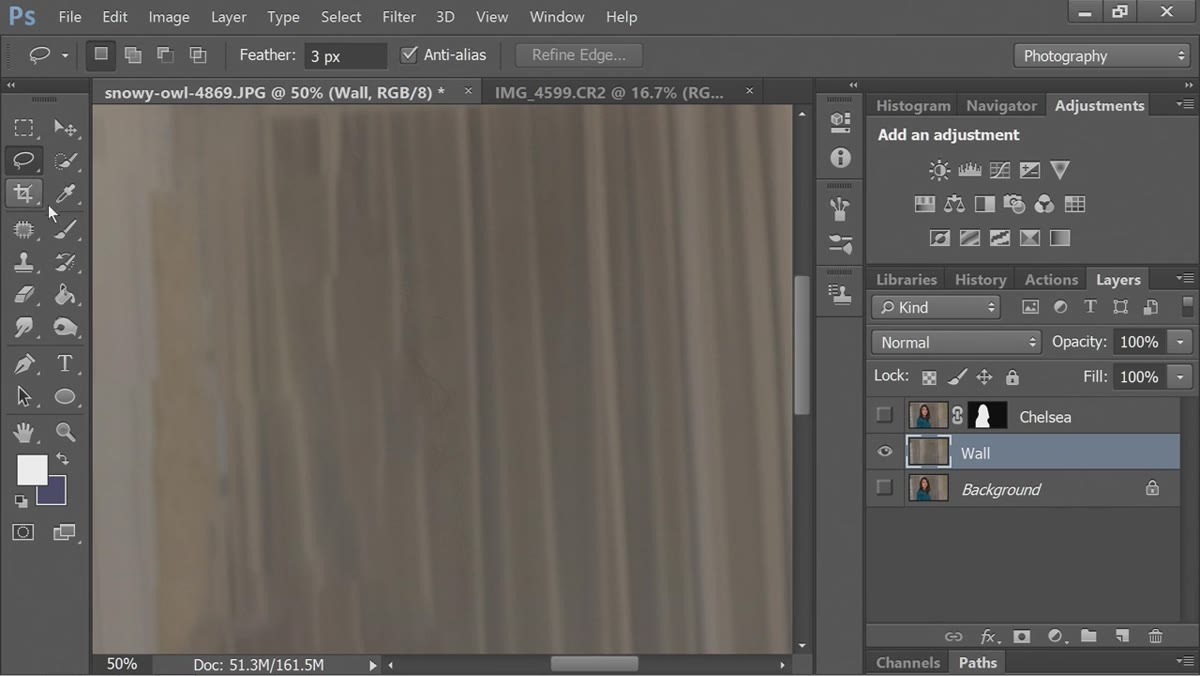 Spot Healing Brush cleaning stray hair strands from background
Use the Spot Healing Brush to fix whatever Content Aware Fill got wrong. Stray hair strands, cloned artifacts, weird repeating patterns from textured walls, these are all fixable with a few quick strokes. Tony points out something I think is worth emphasizing: this background does not need to be perfect. You’re going to blur it. Small imperfections vanish completely once you apply a Gaussian blur. Don’t waste thirty minutes on pixel-perfect cleanup of something that’s about to go soft anyway.
Spot Healing Brush cleaning stray hair strands from background
Use the Spot Healing Brush to fix whatever Content Aware Fill got wrong. Stray hair strands, cloned artifacts, weird repeating patterns from textured walls, these are all fixable with a few quick strokes. Tony points out something I think is worth emphasizing: this background does not need to be perfect. You’re going to blur it. Small imperfections vanish completely once you apply a Gaussian blur. Don’t waste thirty minutes on pixel-perfect cleanup of something that’s about to go soft anyway.
Step 7: Apply the Blur and Composite
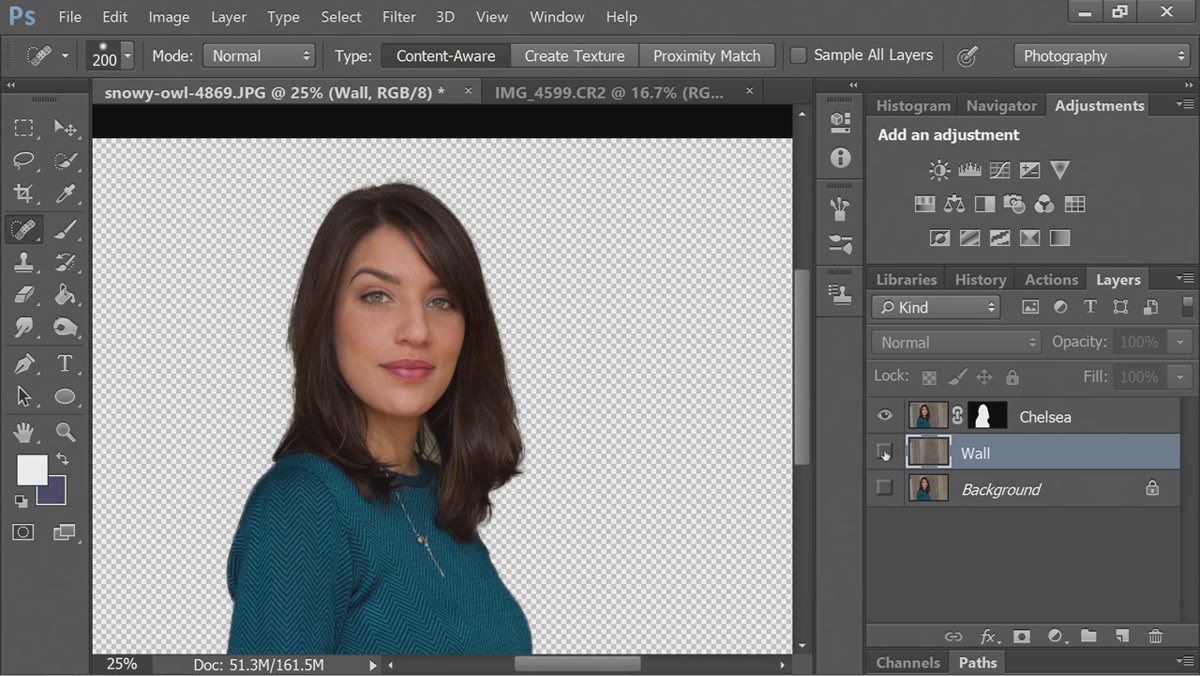 Layers panel showing subject and cleaned background as separate layers
With a clean background layer in place, apply your blur of choice, Gaussian Blur, Lens Blur, or Field Blur, directly to that layer only. Then bring your subject layer back on top. Because the two elements are on separate layers with a clean edge between them, the blur doesn’t contaminate the subject at all. That’s the payoff for all the setup work. The result looks like it was shot with a wide aperture because the transition between sharp subject and soft background is clean and believable.
Layers panel showing subject and cleaned background as separate layers
With a clean background layer in place, apply your blur of choice, Gaussian Blur, Lens Blur, or Field Blur, directly to that layer only. Then bring your subject layer back on top. Because the two elements are on separate layers with a clean edge between them, the blur doesn’t contaminate the subject at all. That’s the payoff for all the setup work. The result looks like it was shot with a wide aperture because the transition between sharp subject and soft background is clean and believable.
One Thing I’d Add: Check Your Edge Lighting Before You Call It Done
The technique works, and works well. Where I’ve seen people trip up is when the lighting on the subject doesn’t match the background. If your subject was shot in flat office light and the background, even blurred, has a noticeably different color temperature or luminosity, your eye picks up on it even if it can’t articulate why. Spend thirty seconds with a Curves adjustment clipped to your subject layer and nudge the overall brightness or color balance until the two feel like they belong in the same space. It’s a five-second check that closes the gap between “edited” and “looks like it was shot this way.”
The real takeaway here is that bokeh is a rendering decision, not a hardware requirement. Gear matters, but technique matters more, and this workflow gives you the kind of subject separation that most people assume costs $1,200 in glass. It costs about twenty minutes in Photoshop.
Watch the full tutorial on YouTube and follow along with Tony’s original walkthrough. His explanation of the Smart Radius tool alone is worth the watch time.
Comments (2)
Applied this to my portfolio shots and the improvement is noticeable.
Love this. I referenced a similar technique in one of my recent posts. Always good to see other perspectives.
Leave a Comment