
If you’ve ever applied Photoshop’s built-in lens flare filter and immediately regretted where you put it, you’re not alone. The filter has one deeply annoying limitation: it bakes directly onto whatever layer you’re working on, and if that layer is empty, Photoshop won’t even let you run it. You’re stuck either flattening your whole image first or stamping a visible layer just to have something for the filter to grab onto. Neither option is great if you care about keeping your edit flexible.
I ran into this wall constantly when I first started adding atmospheric light effects to portraits. I’d apply the flare, decide it was 10% too bright or half an inch too far left, and have no clean way to fix it without starting over. In this Aaron Nace (PHLEARN) tutorial, Watch the full tutorial on YouTube, Aaron walks through a simple workaround using a black-filled layer and a blending mode that most people overlook. It takes maybe two extra steps and gives you full, non-destructive control over your lens flare going forward. Here’s exactly how it works.
Step 1: Apply the Lens Flare to Your Image Layer First
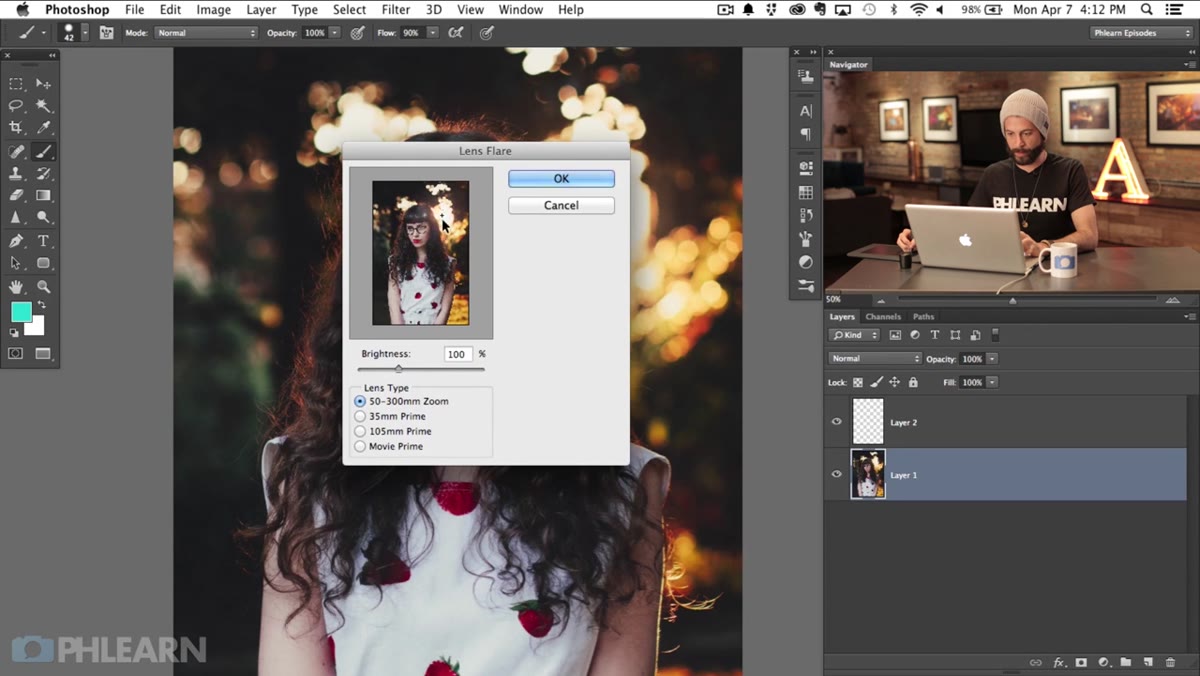 Lens Flare dialog open over the photo layer
Start by clicking on your actual image layer, not a blank one. Go to Filter, then Render, then Lens Flare. Position the flare where you want it in the preview window and set your brightness. Get it looking the way you want it. This step isn’t about keeping the result - it’s about locking in your settings. Photoshop remembers the last filter you ran, including the exact position and intensity you chose, and that’s what you’re actually after here.
Lens Flare dialog open over the photo layer
Start by clicking on your actual image layer, not a blank one. Go to Filter, then Render, then Lens Flare. Position the flare where you want it in the preview window and set your brightness. Get it looking the way you want it. This step isn’t about keeping the result - it’s about locking in your settings. Photoshop remembers the last filter you ran, including the exact position and intensity you chose, and that’s what you’re actually after here.
Step 2: Undo the Flare Immediately
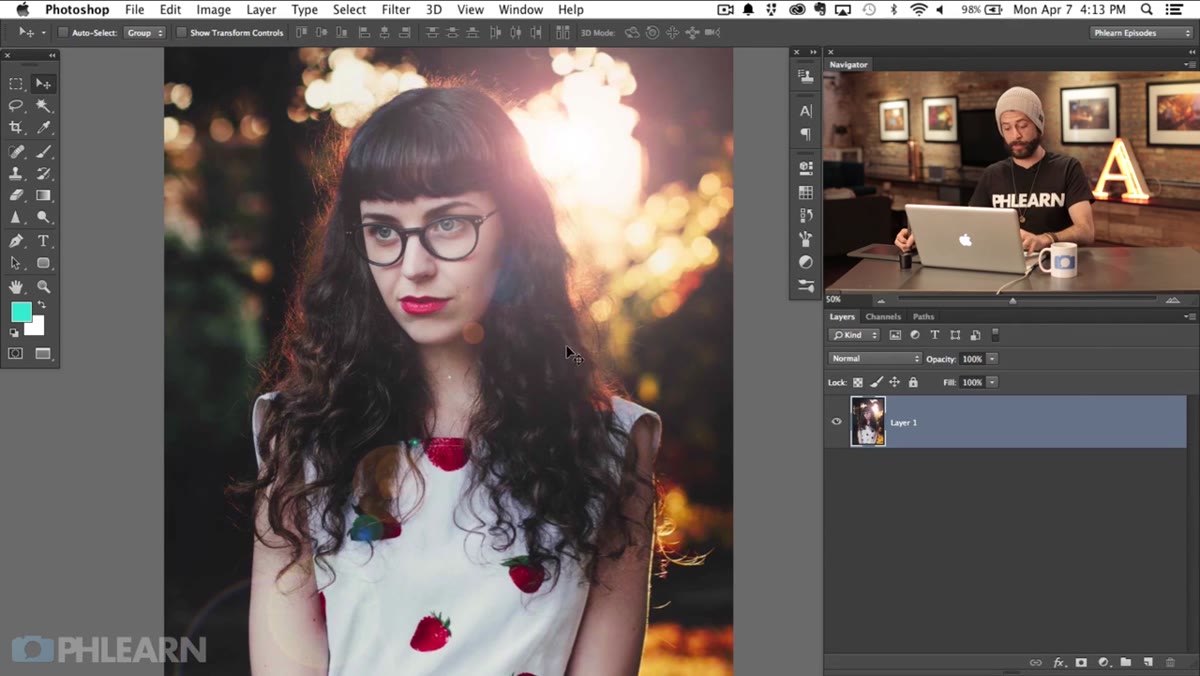 History panel showing the undo step
Once you’ve confirmed your settings, hit Command+Z (or Ctrl+Z on Windows) to undo the filter. Your image goes back to normal. This feels counterintuitive, but it’s the core of the trick. Photoshop keeps your most recent filter settings cached so you can re-run it instantly, and that’s exactly what you’re going to exploit in the next step.
History panel showing the undo step
Once you’ve confirmed your settings, hit Command+Z (or Ctrl+Z on Windows) to undo the filter. Your image goes back to normal. This feels counterintuitive, but it’s the core of the trick. Photoshop keeps your most recent filter settings cached so you can re-run it instantly, and that’s exactly what you’re going to exploit in the next step.
Step 3: Create a New Layer and Fill It with Black
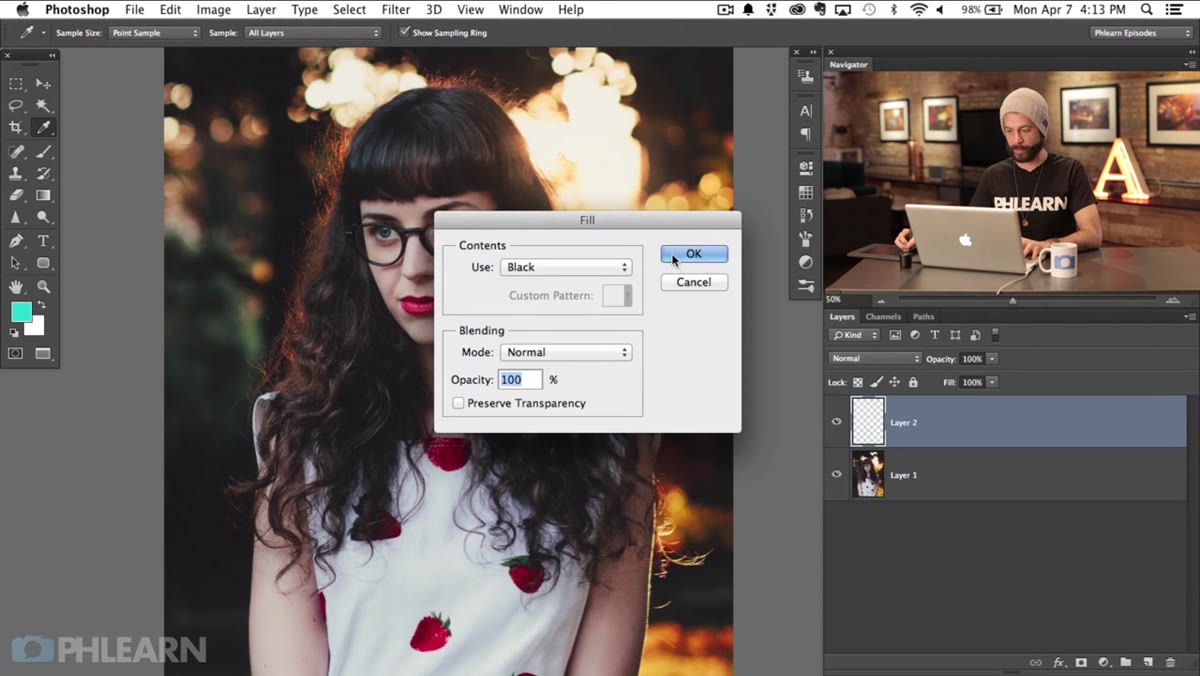 New blank layer filled solid black above the image
Create a new layer above your image layer. With the new layer selected, hit Shift+Delete (Shift+Backspace on Windows) to open the Fill dialog. Set the fill to black and click OK. You now have a solid black layer sitting on top of your photo. It’ll block out everything underneath for now, but don’t worry - that goes away in the last step.
New blank layer filled solid black above the image
Create a new layer above your image layer. With the new layer selected, hit Shift+Delete (Shift+Backspace on Windows) to open the Fill dialog. Set the fill to black and click OK. You now have a solid black layer sitting on top of your photo. It’ll block out everything underneath for now, but don’t worry - that goes away in the last step.
Step 4: Re-apply the Lens Flare Using the Filter Shortcut
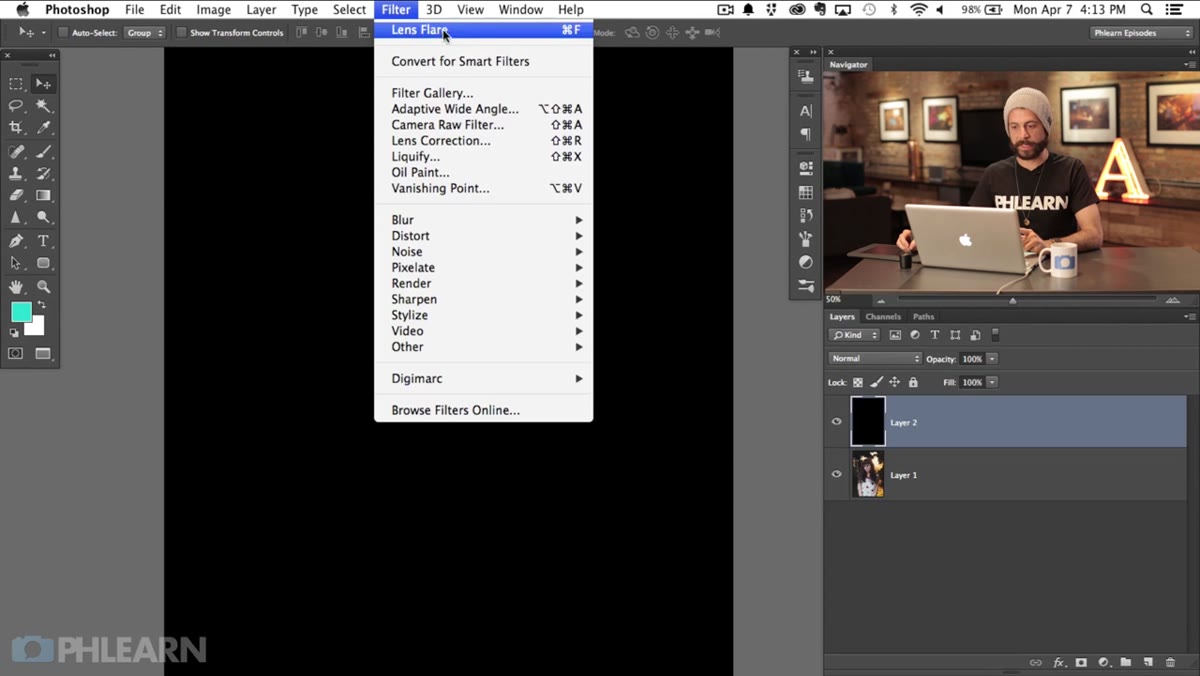 Filter menu showing the cached Lens Flare at the top
Here’s where it clicks. With your black layer selected, go to the Filter menu. At the very top, right above the Render submenu, you’ll see the name of the last filter you ran listed as a shortcut. Click that directly. Do not go back through Filter, Render, Lens Flare, because that would reopen the dialog and you’d have to reposition everything manually. The shortcut re-runs the filter with your saved settings, placing the flare in the exact same position at the exact same intensity, this time onto the black layer.
Filter menu showing the cached Lens Flare at the top
Here’s where it clicks. With your black layer selected, go to the Filter menu. At the very top, right above the Render submenu, you’ll see the name of the last filter you ran listed as a shortcut. Click that directly. Do not go back through Filter, Render, Lens Flare, because that would reopen the dialog and you’d have to reposition everything manually. The shortcut re-runs the filter with your saved settings, placing the flare in the exact same position at the exact same intensity, this time onto the black layer.
Step 5: Change the Blending Mode to Screen
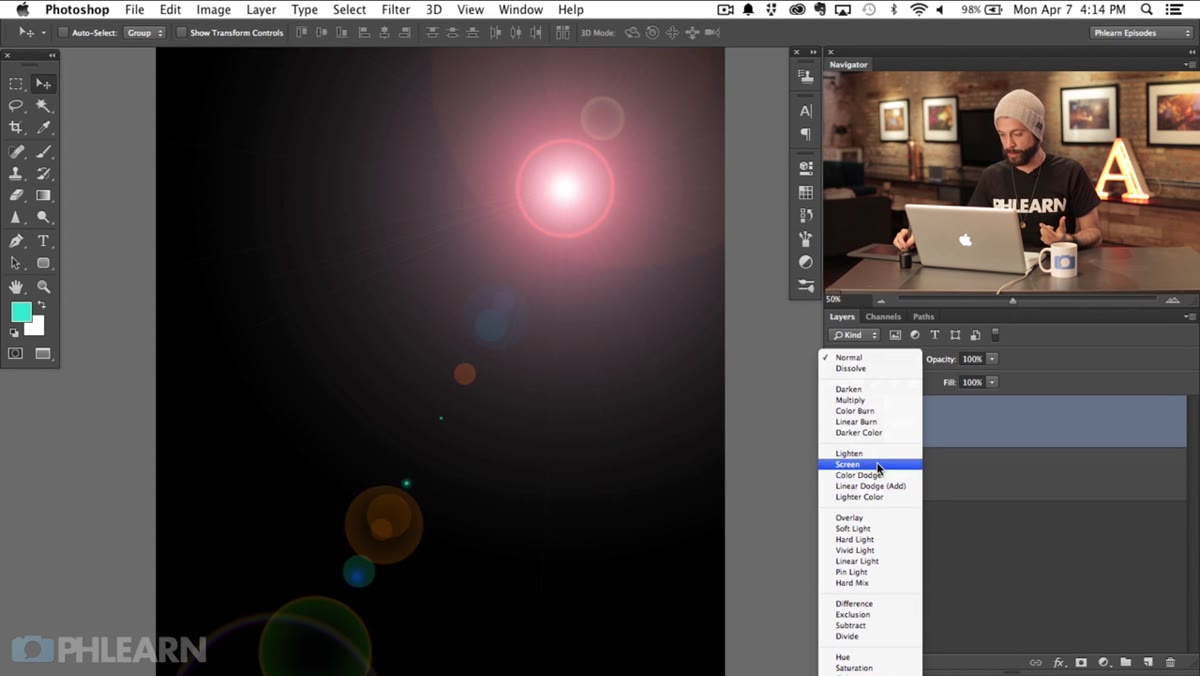 Layer blending mode dropdown set to Screen
With the black lens flare layer still selected, go to the blending mode dropdown at the top of the Layers panel (it defaults to Normal) and switch it to Screen. Screen mode mathematically drops out all the black pixels and only lets the brighter values show through. The black disappears and your lens flare floats over the image exactly as it would have looked applied directly, except now it’s sitting on its own independent layer.
Layer blending mode dropdown set to Screen
With the black lens flare layer still selected, go to the blending mode dropdown at the top of the Layers panel (it defaults to Normal) and switch it to Screen. Screen mode mathematically drops out all the black pixels and only lets the brighter values show through. The black disappears and your lens flare floats over the image exactly as it would have looked applied directly, except now it’s sitting on its own independent layer.
Step 6: Adjust Opacity, Position, or Hue to Taste
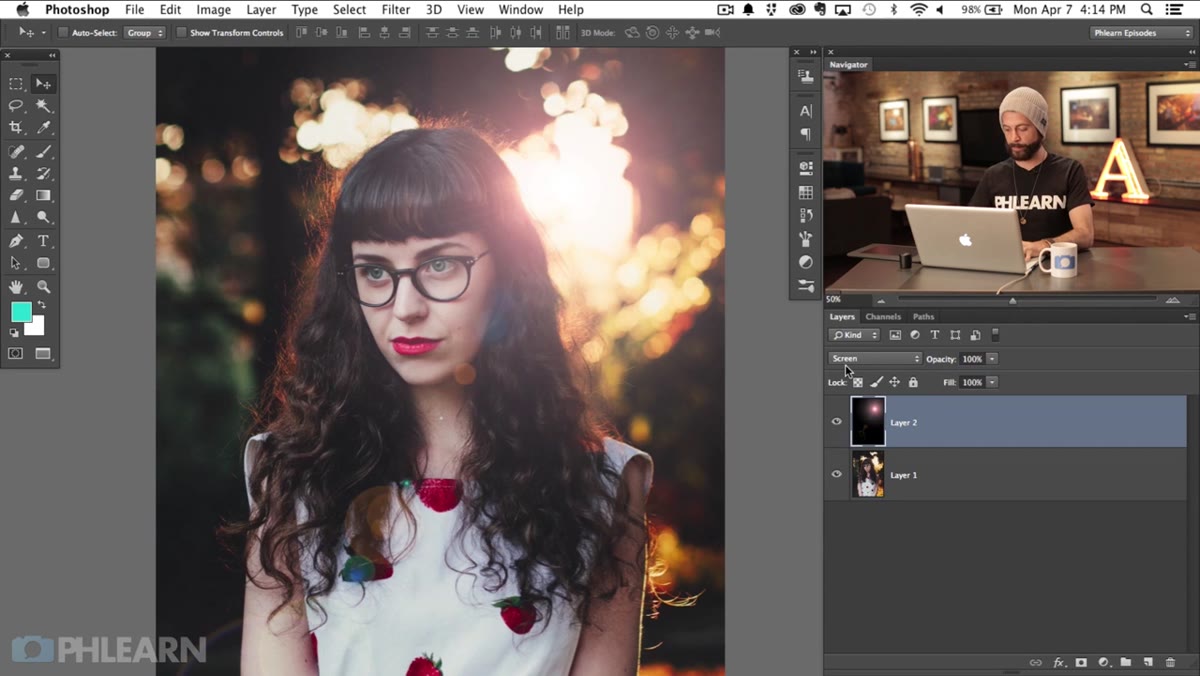 Opacity slider being reduced on the lens flare layer
Now you have real control. Pull the layer’s opacity down if the flare is too strong. Grab the Move tool and reposition it. Add a Hue/Saturation adjustment clipped to the layer if you want to shift its color. You can even mask parts of it out if the flare is bleeding into an area where it doesn’t belong. Everything you’d normally want to do with an effect layer is now available to you because the flare isn’t glued to your image anymore.
Opacity slider being reduced on the lens flare layer
Now you have real control. Pull the layer’s opacity down if the flare is too strong. Grab the Move tool and reposition it. Add a Hue/Saturation adjustment clipped to the layer if you want to shift its color. You can even mask parts of it out if the flare is bleeding into an area where it doesn’t belong. Everything you’d normally want to do with an effect layer is now available to you because the flare isn’t glued to your image anymore.
One Extra Move Worth Adding: Convert It to a Smart Object
Before you start tweaking position and opacity, I’d suggest right-clicking the black layer and converting it to a Smart Object. It only takes a second, and it means if you ever want to re-run the lens flare filter later with different settings, you can do it without losing your blending mode or any adjustments you’ve stacked on top. I started doing this out of habit after I spent 20 minutes carefully setting up a light effect, then realized I’d flipped an image horizontally and the flare source was now on the wrong side. With a Smart Object, re-running the filter is a double-click. Without it, you’re rebuilding from scratch.
The black-fill-plus-Screen-mode combination isn’t exclusive to lens flares either. It works with any filter or painted effect that produces light on a dark background. Glows, light streaks, bokeh overlays from texture packs - if it’s bright detail on black, Screen mode will composite it cleanly. Knowing this pattern opens up a lot of options beyond just this one filter.
The single most important thing to take away from Aaron’s tutorial is the filter shortcut at the top of the Filter menu. Most people have used Photoshop for years without noticing it’s there, and it’s the piece that makes this whole technique work without any guesswork about repositioning. Set your position on the real image, undo, fill with black, fire the shortcut, switch to Screen. That’s the whole sequence.
Watch the full tutorial on YouTube to see Aaron walk through it live on an actual photo - seeing where he places the flare and how it integrates with the image’s existing backlight makes the technique easier to apply to your own work.
Comments
Leave a Comment