
I shoot a lot with budget glass. That’s kind of my whole thing. And one of the honest trade-offs when you’re running a 50mm f/1.8 instead of a $1,400 prime is that your background separation isn’t always going to be as clean. Sometimes the background just sits there competing with your subject, and there’s only so much you can do in-camera when you’re already wide open. For a long time, software blur was the answer I avoided — it always looked fake, smeared, or just obviously wrong around hair and edges.
That changed when I watched Aaron Nace’s PHLEARN tutorial on Lightroom’s new Lens Blur tool. Watch the full tutorial on YouTube. What Aaron demonstrates is genuinely different from the blur tools I’d written off years ago. Lightroom now uses AI to analyze depth in a flat JPEG, figure out what’s subject versus background, and apply a blur that actually mimics how a real lens renders out-of-focus areas, including bokeh shape and highlight behavior. No depth camera required. No special RAW metadata. It works on regular photos.
Here’s the full walkthrough based on that tutorial, written so you can follow along without pausing the video every 30 seconds.
Step 1: Update Lightroom and Find the Lens Blur Panel
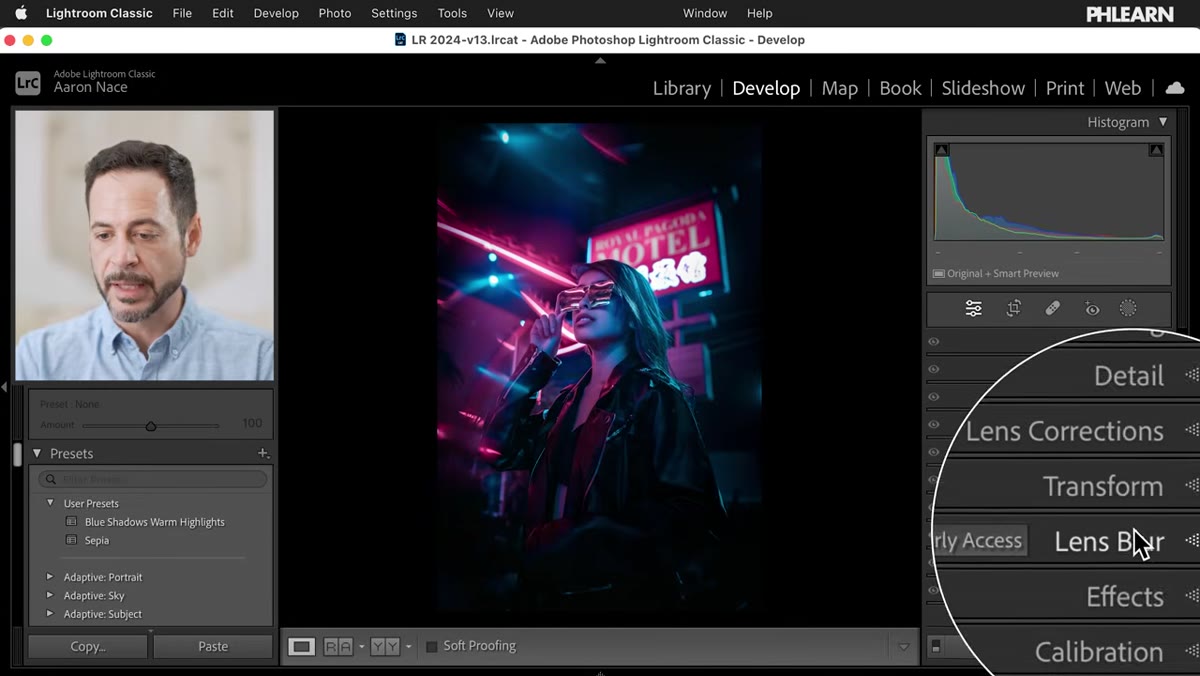 Lightroom Classic develop module with Lens Blur panel visible
Before anything else, make sure your version of Lightroom Classic is current. The Lens Blur tool is listed as Early Access, which means it showed up in a recent update and won’t be there if you’re running an older build. Open Creative Cloud, check for updates, and install whatever’s pending. Once you’re up to date, open any image in the Develop module and look for the Lens Blur section in the right-hand panel. It sits in its own dedicated block, separate from the standard Effects panel blur you may have ignored before.
Step 2: Hit Apply and Let the AI Do the First Pass
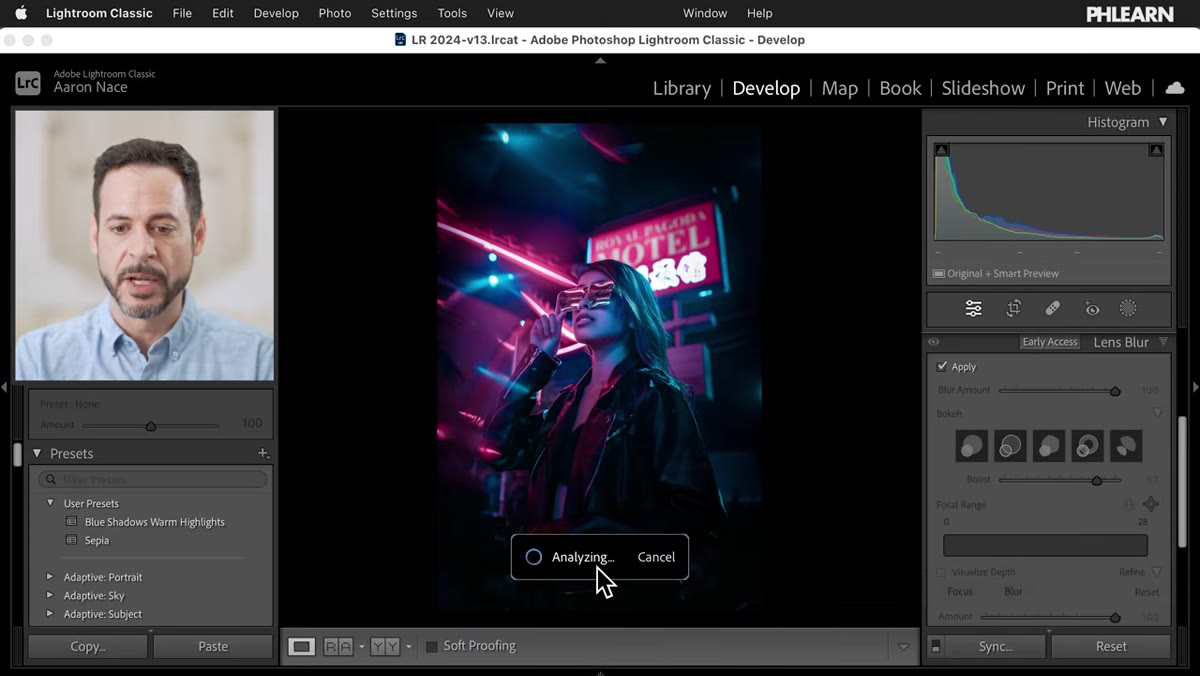 Lightroom analyzing image after clicking Apply button
This is the part that still kind of surprises me every time. Click the Apply button inside the Lens Blur panel and just wait a few seconds. Lightroom’s AI reads the image, estimates a depth map, identifies the subject, and applies the blur automatically. For a lot of photos, especially portraits with a reasonably distinct subject, the first pass is already usable. The separation between subject and background is cleaner than I expected from a fully automated process.
Once it applies, you’ll see the blur rendered on your image in real time. Aaron demos this on four different portrait-style images and the results hold up across all of them, which tells me the AI is doing more than a simple center-weighted guess.
Step 3: Adjust Blur Amount and Focal Range
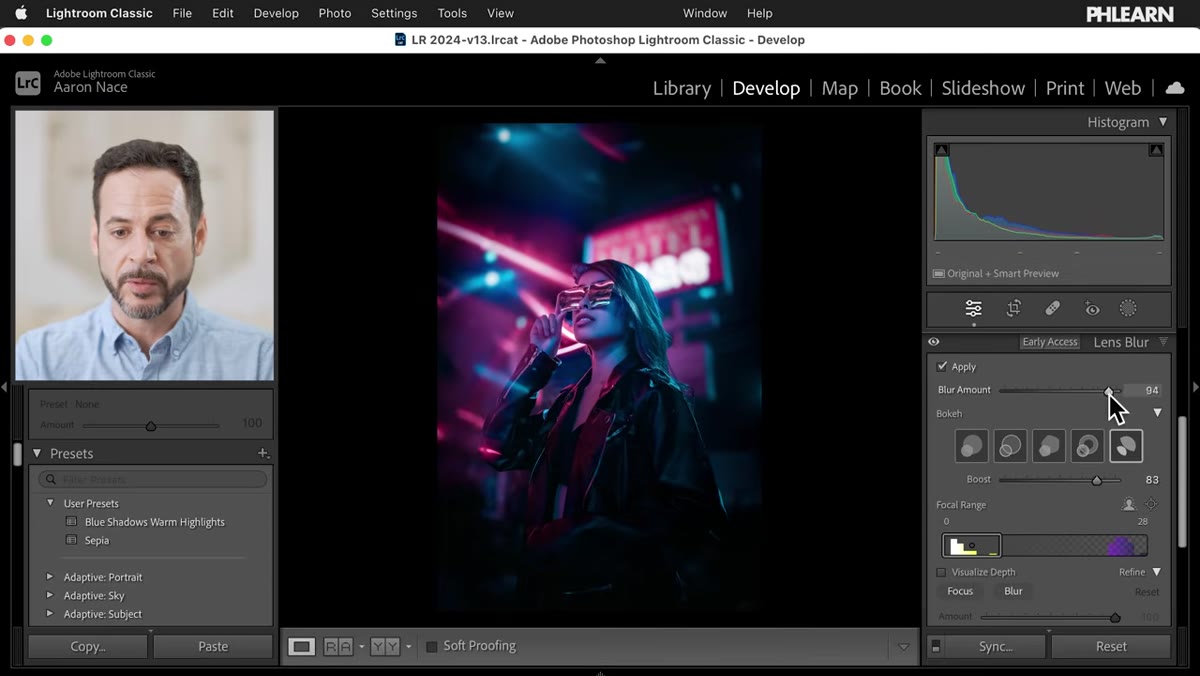 Blur amount slider and focal range control in Lens Blur panel
With the blur applied, you have a slider to control the intensity of the effect. Pull it left for subtle separation, push it right for a more aggressive background melt. This part is straightforward. What’s more interesting is the focal range control, which lets you shift which depth zone stays sharp. By default it protects your subject, but you can slide it to change what Lightroom treats as the in-focus plane. Practically speaking, most portraits won’t need much tweaking here, but it’s useful for scenes where depth layering is more complex, like someone standing near foreground objects.
Step 4: Choose Your Bokeh Type and Use the Boost Option
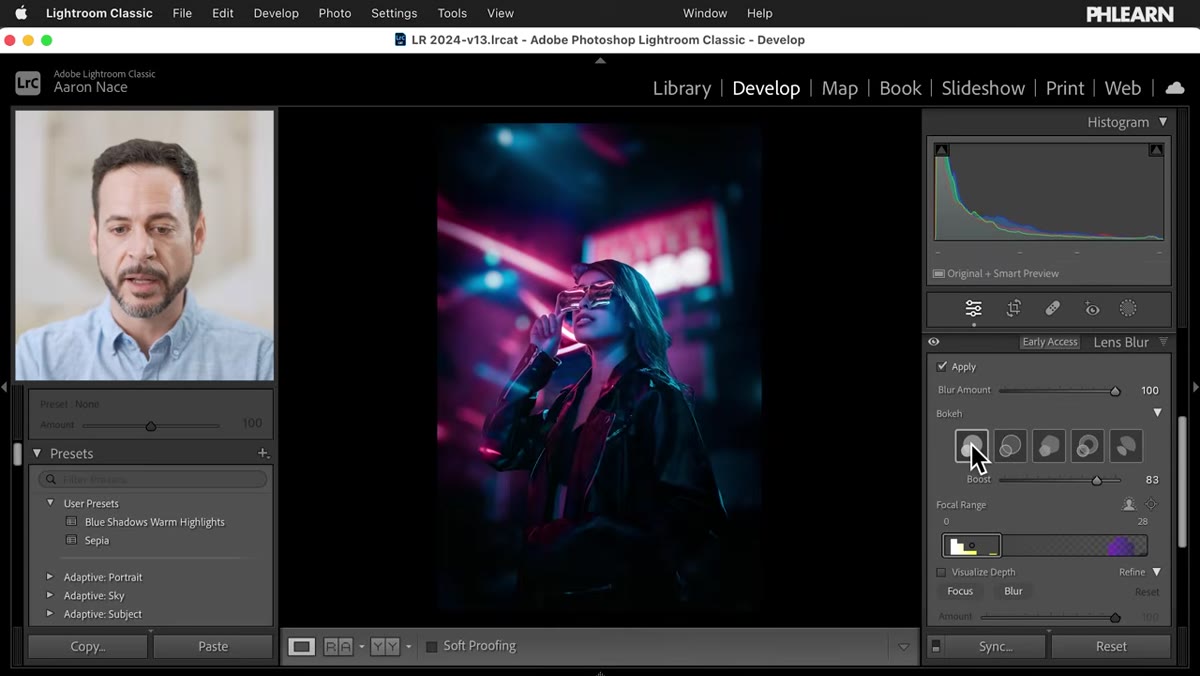 Bokeh shape selector with multiple options displayed
Lightroom gives you several bokeh shape presets that change how out-of-focus highlights render. These mimic the aperture blade geometry of different lens types, so you can dial in something that looks like a fast portrait lens versus a more mechanical, geometric blur. Click through the options and look at how the background highlights change shape. For most portrait work I’d lean toward the rounder, smoother options, but if you’re going for a specific aesthetic, the choices are actually meaningful rather than decorative.
The Boost slider is worth a mention here. It increases the brightness of bokeh highlights in the background, giving you that glowing, luminous look that fast primes produce wide open. Don’t overdo it, but a small bump can make the blur feel more optically realistic.
Step 5: Use Visualize Depth to Check the AI’s Work
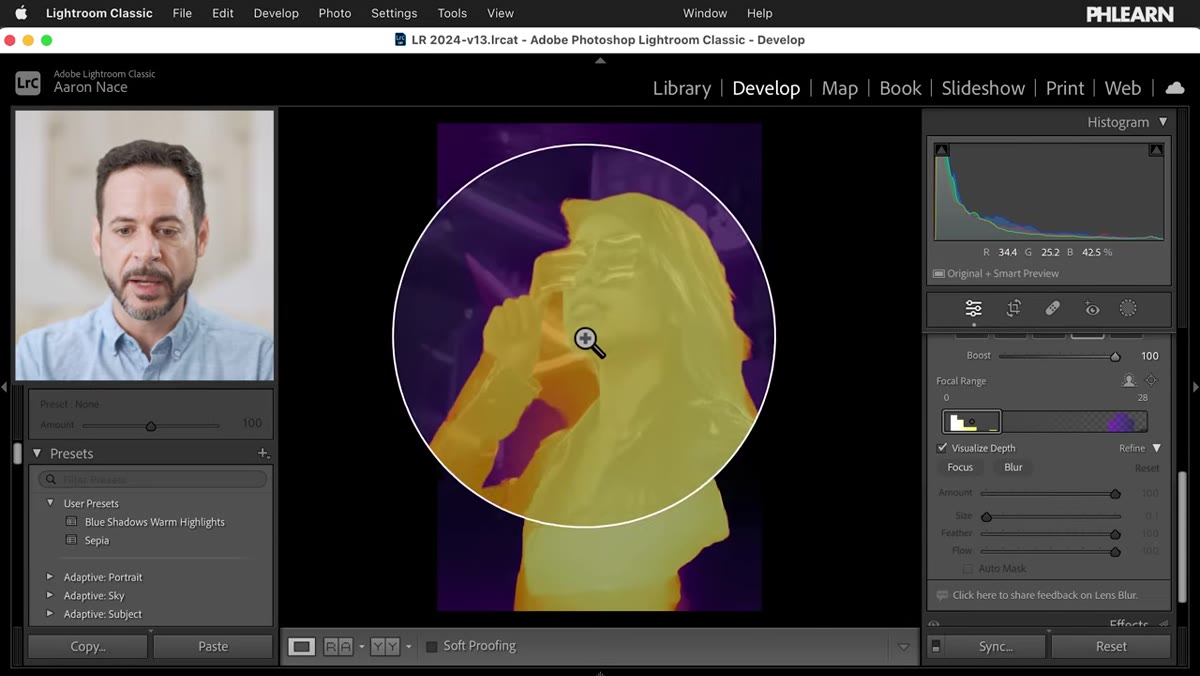 Visualize Depth mode showing depth map overlay on subject
Scroll down in the Lens Blur panel and toggle on Visualize Depth. This switches your image to a grayscale depth map view, showing you exactly what the AI decided to keep sharp versus blur. White areas are treated as near/in-focus, dark areas are far/blurred. This is where you’ll catch mistakes. Aaron points out a specific gap between his subject’s arm and face where the AI left an unblurred patch that shouldn’t be there. You wouldn’t necessarily notice it just looking at the final result, but the depth map makes it obvious.
Get in the habit of checking this view before you consider the edit done. It takes five seconds and saves you from shipping a photo with a weird unblurred halo somewhere you missed.
Step 6: Refine the Blur Mask With the Brush Tool
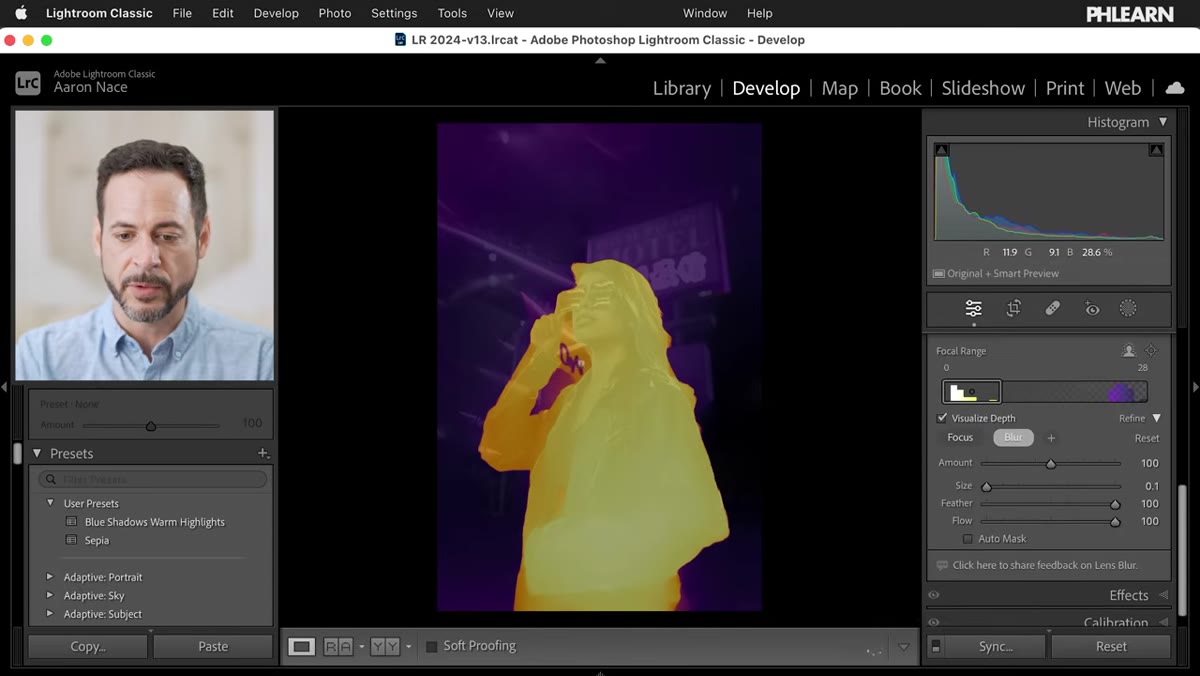 Refine panel open with Blur brush painting on depth map
Open the Refine panel inside Lens Blur and you’ll find two brush modes: Focus and Blur. Select Blur and paint over any areas the AI missed that should be out of focus. Select Focus and paint over anything that got blurred that shouldn’t have, like stray marks on your subject’s face or hair. The brush works like any other masking brush in Lightroom. Use the bracket keys to resize it, zoom in with Command/Ctrl+Plus for detail work, and paint in short strokes so you can undo cleanly if you overshoot.
Aaron demos painting directly on the subject’s face after accidentally clipping it with the blur brush, then switching to Focus to restore it instantly. The edge detection is smart enough that you’re mostly nudging corrections rather than doing precise cutout work.
What I’d Add From My Own Experience
The Lens Blur tool is a legitimate editing tool, not a gimmick, but it works best when you give it a fighting chance. Images where the subject is clearly separated from the background even before the blur, whether by lighting, color contrast, or distance, will get cleaner AI results on the first pass. Images where the subject blends into a similarly toned background will need more refine work. It’s still faster than masking by hand, but go in knowing that the more complex the scene, the more time you’ll spend in the Refine panel. I’ve also found it pairs well with a little targeted sharpening on the subject after the fact, since the contrast between a sharp subject and a blurred background reads better when the subject itself has crisp edges.
The real value of this tool isn’t that it replaces good glass. It’s that it gives your JPEG from a kit zoom a fighting chance in post when the shot itself is solid but the background is distracting. For anyone shooting on a budget, that’s meaningful. Master the refine brush and you’ll get results that most viewers won’t question.
Watch the full tutorial on YouTube to see Aaron walk through all four example images and demonstrate the full range of what this tool can do.
Comments (3)
This is going in my reference folder. Incredibly useful.
Shared this with my photography group. Everyone loved it.
Couldn't agree more. I've seen this make a huge difference in photography work specifically.
Leave a Comment