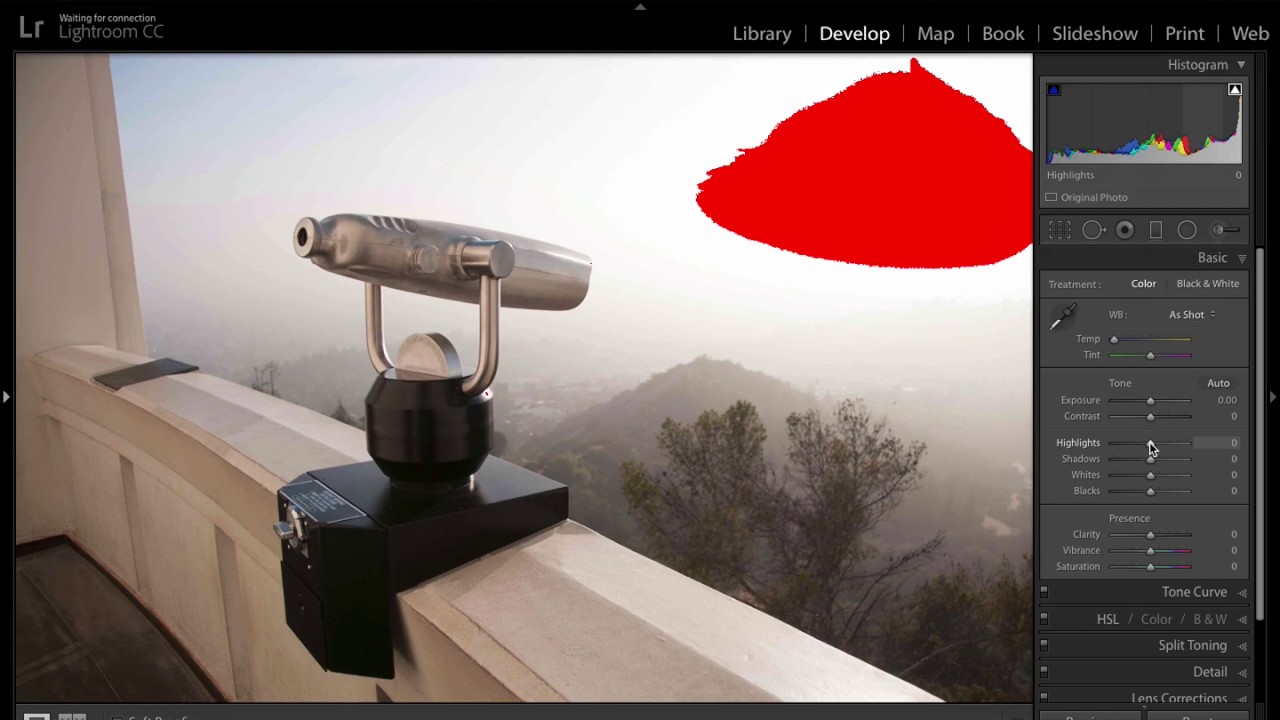
Blown-out highlights are one of those problems that can quietly ruin an otherwise great shot. You nail the composition, the light is interesting, and then you open the file in Lightroom and there’s a dead white patch eating through the brightest part of the frame. No detail. No texture. Just nothing. I’ve trashed more keepers than I’d like to admit because I didn’t have a clean, fast workflow for handling this, and I kept reaching for the wrong tool first.
In this KelbyOne tutorial, Scott Kelby walks through exactly how to identify and fix clipping in Lightroom, including one detail about RAW files that I genuinely didn’t know when I was starting out. Watch the full tutorial on YouTube – it’s short, focused, and cuts straight to the technique. Below I’ve broken it down into steps you can follow alongside your own images right now.
Step 1: Understand What Clipping Actually Is
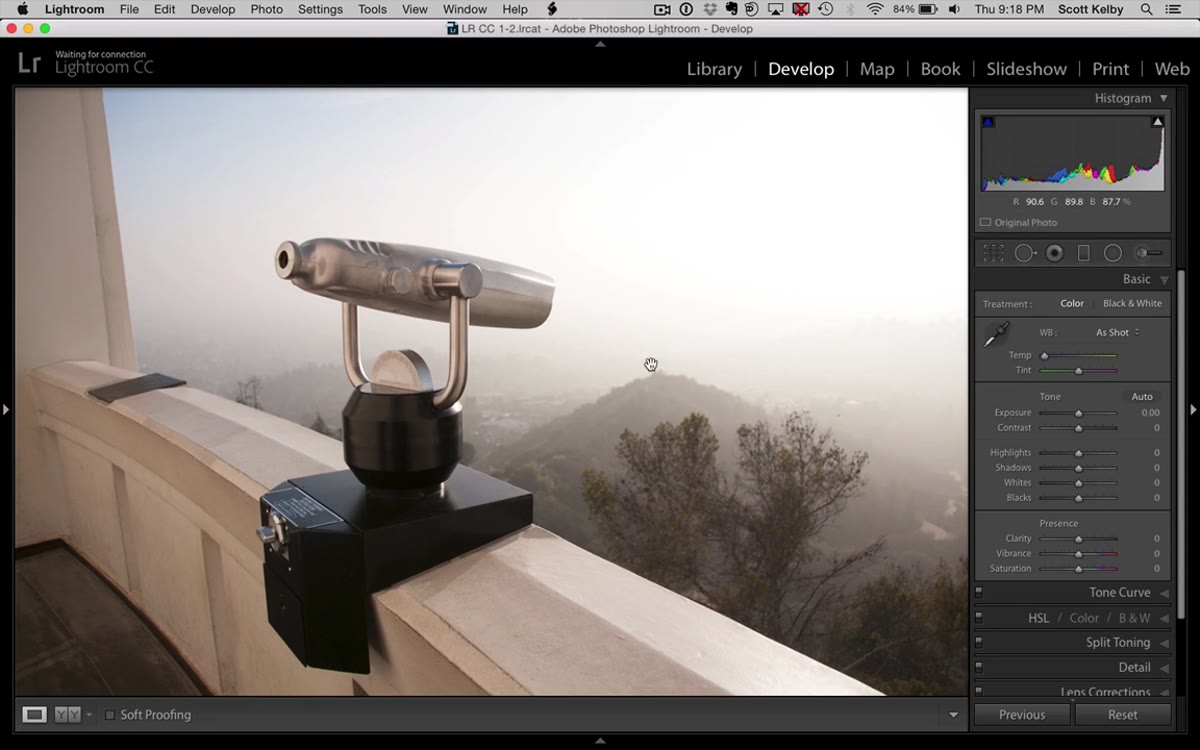 Bright clipped area visible in example photo
Clipping happens when the brightness values in part of your image exceed what the file can record. The highlight data is just gone. Those pixels have no tonal information left in them – if you printed the image, that area would literally be blank white paper. It’s not a matter of adjusting brightness after the fact. The detail was never captured, or it was processed out. Kelby describes it as pixels that have “died,” which is a bit dramatic but honestly accurate.
Bright clipped area visible in example photo
Clipping happens when the brightness values in part of your image exceed what the file can record. The highlight data is just gone. Those pixels have no tonal information left in them – if you printed the image, that area would literally be blank white paper. It’s not a matter of adjusting brightness after the fact. The detail was never captured, or it was processed out. Kelby describes it as pixels that have “died,” which is a bit dramatic but honestly accurate.
It’s worth separating this from images that are just bright. A slightly overexposed sky still has recoverable data. A clipped sky does not. Knowing the difference changes how you approach the fix.
Step 2: Check the Histogram Warning Triangle
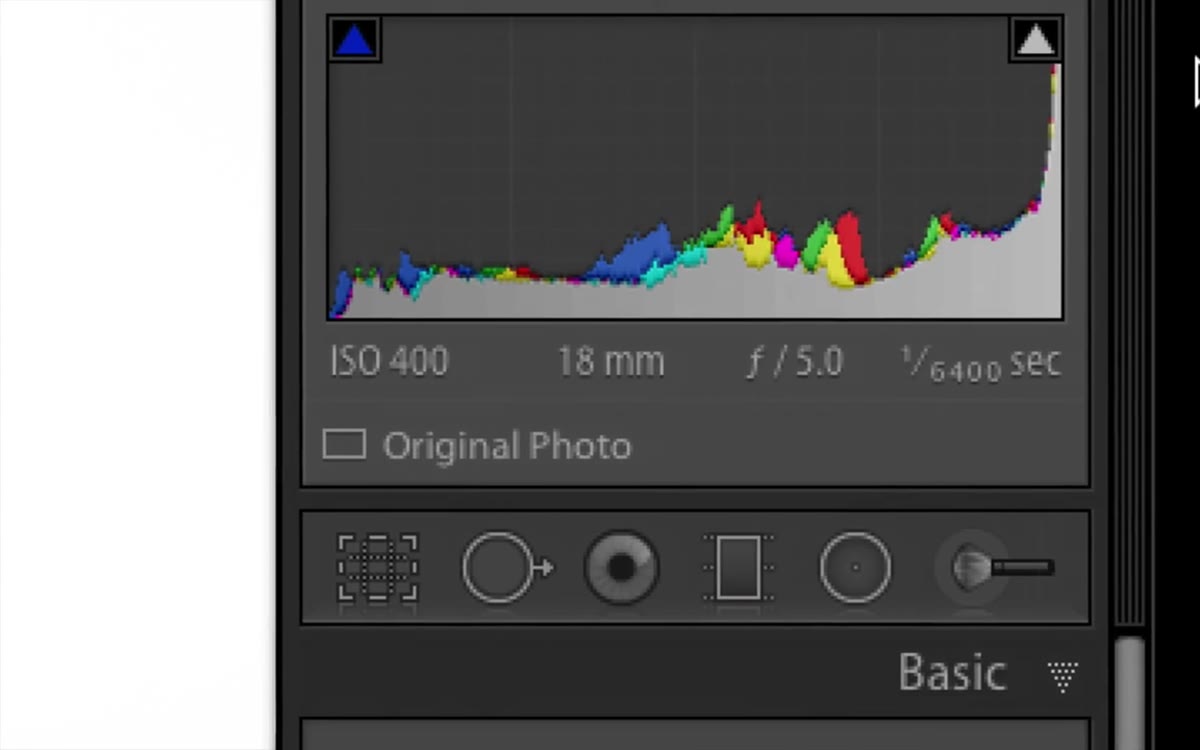 Histogram panel showing white triangle in top-right corner
The fastest way to know if you have a clipping problem is to look at the top-right corner of the histogram in Lightroom’s Develop module. There’s a small triangle there. When it’s black, you’re fine. When it turns white, solid highlights are being clipped across all three color channels. When it shows a color – red, blue, or green – only that individual channel is clipping, which is less critical.
Histogram panel showing white triangle in top-right corner
The fastest way to know if you have a clipping problem is to look at the top-right corner of the histogram in Lightroom’s Develop module. There’s a small triangle there. When it’s black, you’re fine. When it turns white, solid highlights are being clipped across all three color channels. When it shows a color – red, blue, or green – only that individual channel is clipping, which is less critical.
The white triangle is your red flag. It tells you that some pixels in the image have no recoverable highlight detail. At this point you haven’t done anything yet, you’re just diagnosing.
Step 3: Click the Triangle to See Exactly Where Clipping Occurs
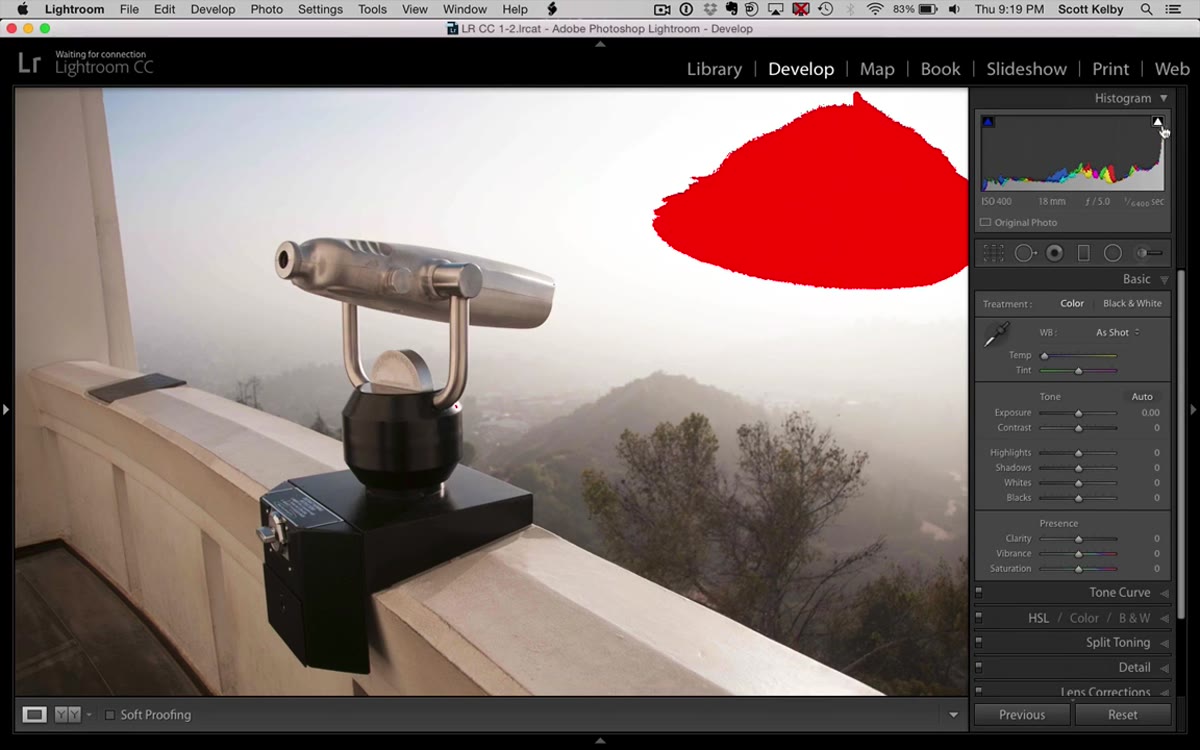 Red overlay showing clipped areas on the photo
Click the triangle and Lightroom will overlay the clipped areas directly on your image, usually shown in red. This is where the tutorial gets genuinely useful, because it lets you make a judgment call. If the clipped area is the sun itself, or a specular highlight off a metal surface, that’s often acceptable. The human eye expects those things to be blown out.
Red overlay showing clipped areas on the photo
Click the triangle and Lightroom will overlay the clipped areas directly on your image, usually shown in red. This is where the tutorial gets genuinely useful, because it lets you make a judgment call. If the clipped area is the sun itself, or a specular highlight off a metal surface, that’s often acceptable. The human eye expects those things to be blown out.
But if the clipping is in a face, a bright dress, a product shot, or anywhere that should have visible texture – that’s where you need to act. The overlay tells you whether this is a “fix it” problem or a “live with it” situation.
Step 4: Don’t Reach for the Exposure Slider First
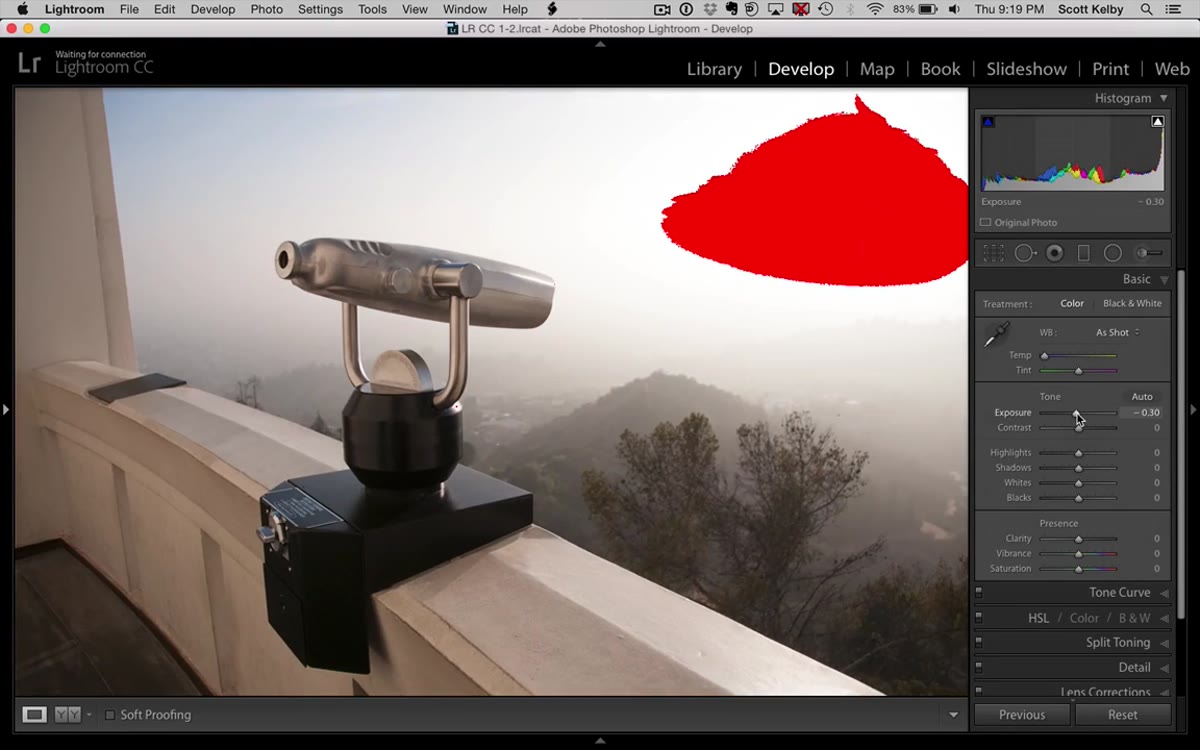 Exposure slider shown reducing overall image brightness
This is the mistake I made constantly early on. When I saw clipping, I’d drag Exposure down until the warning triangle turned black. It worked, technically – but it also made the whole image darker and flat. You’re essentially penalizing every pixel in the photo to fix a problem that exists in only a few of them.
Exposure slider shown reducing overall image brightness
This is the mistake I made constantly early on. When I saw clipping, I’d drag Exposure down until the warning triangle turned black. It worked, technically – but it also made the whole image darker and flat. You’re essentially penalizing every pixel in the photo to fix a problem that exists in only a few of them.
Kelby demonstrates this directly: lowering overall exposure does kill the clipping warning, but it wrecks the rest of the image in the process. There’s a better tool for this specific job.
Step 5: Use the Highlights Slider to Target Just the Problem Area
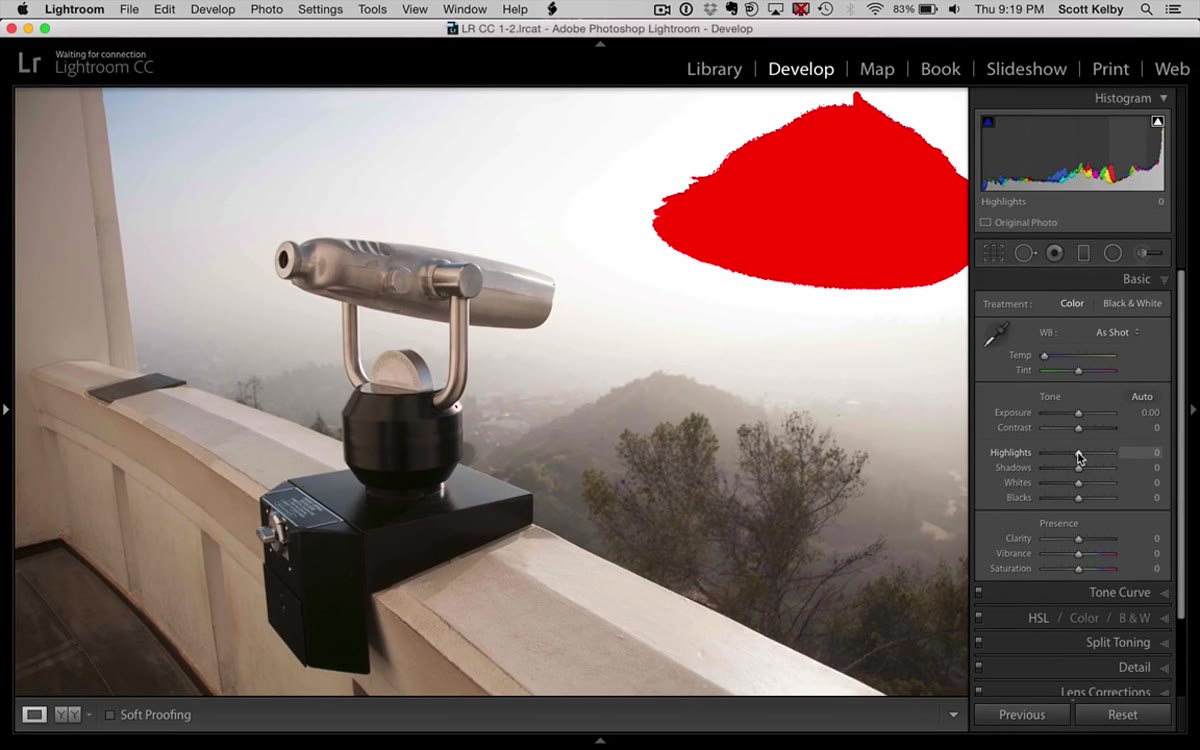 Highlights slider being dragged left in the Basic panel
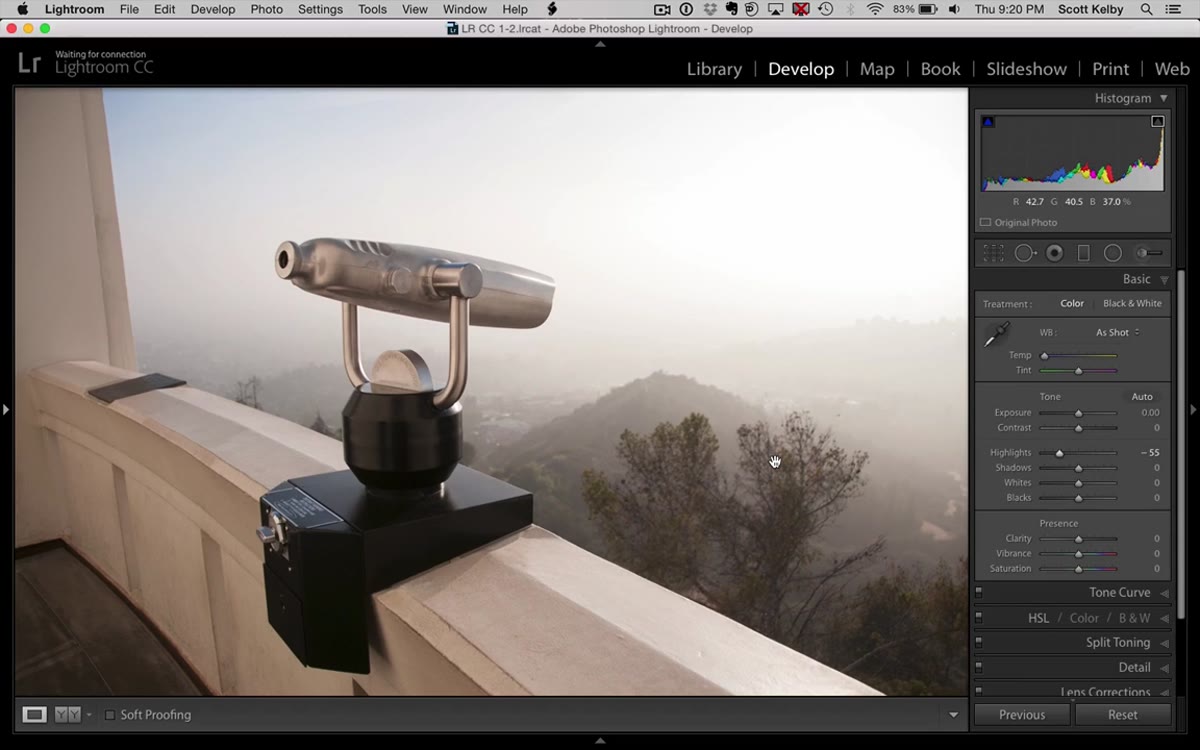
The Highlights slider in the Basic panel is built for exactly this situation. Drag it to the left and watch what happens – it pulls down the brightest tonal values in the image without flattening the midtones or shadows the way the Exposure slider does. The rest of your photo stays intact.
Highlights slider being dragged left in the Basic panel
The Highlights slider in the Basic panel is built for exactly this situation. Drag it to the left and watch what happens – it pulls down the brightest tonal values in the image without flattening the midtones or shadows the way the Exposure slider does. The rest of your photo stays intact.
Kelby drags the slider left and the clipping warning disappears from most of the image immediately. A small cluster of pixels is still flagging, so he nudges the slider a bit further, and the warning clears entirely. The fix takes maybe five seconds and doesn’t compromise the overall exposure. This is the slider you should be reaching for first any time you’re dealing with hot highlights.
Step 6: Understand Why Your Camera’s Preview Might Be Wrong
 Camera shooting in RAW with JPEG preview on rear LCD
Here’s the part that surprised me when I first heard it explained clearly. When you shoot RAW and check the image on the back of your camera, you are not looking at the RAW file. You are looking at a JPEG preview the camera generates on the fly. And JPEGs clip faster than RAW files do – they have a narrower tonal range.
Camera shooting in RAW with JPEG preview on rear LCD
Here’s the part that surprised me when I first heard it explained clearly. When you shoot RAW and check the image on the back of your camera, you are not looking at the RAW file. You are looking at a JPEG preview the camera generates on the fly. And JPEGs clip faster than RAW files do – they have a narrower tonal range.
What this means practically: your camera might show blinking highlights (the “blinkies” that indicate clipping) on a shot that is actually perfectly fine when you open the RAW file in Lightroom. The RAW file captured more highlight data than the JPEG preview shows. This doesn’t mean you should ignore the blinkies entirely – they’re still a useful warning – but it does mean you shouldn’t immediately assume the shot is ruined based on what the LCD is telling you.
One Thing I’d Add From My Own Experience
The Highlights slider does most of the heavy lifting, but sometimes it’s not enough on its own – especially if the clipping is significant. When I’ve hit that ceiling, I combine the Highlights slider with a small Whites adjustment. The Whites slider in Lightroom controls the absolute brightest point of the image, and pulling it down slightly alongside Highlights can recover detail that neither slider gets to on its own.
If the clipping is isolated to a specific part of the frame – a window in a portrait, say, or a patch of sky in an otherwise dark composition – a radial or gradient mask lets you apply Highlights recovery only to that region. That keeps the rest of the image completely untouched. It’s a two-minute fix that solves a problem that used to make me consider reshootsing entirely.
The single most important takeaway here is this: the Highlights slider is a targeted tool, and the Exposure slider is a blunt one. Use the right one for the job. Most highlight clipping in a RAW file is fixable in under a minute without touching anything else in your edit.
Watch the full tutorial on YouTube to see Kelby walk through the fix on a real image – seeing the histogram triangle respond in real time makes the whole workflow click faster than reading about it.
Comments (3)
Simple but effective. Sometimes that's all you need.
The before and after really sells it. Incredible difference.
Really solid breakdown. This pairs perfectly with the business work I've been writing about.
Leave a Comment