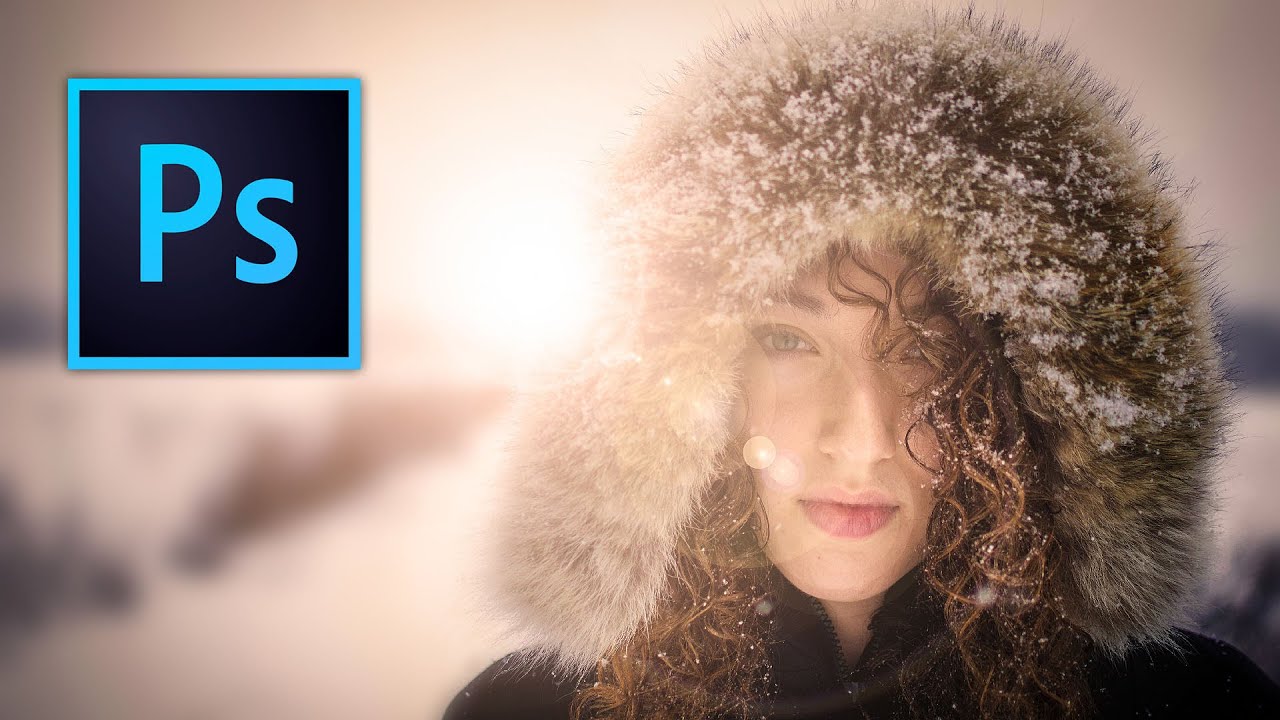
Lens flares are one of those effects that photographers either overuse into oblivion or avoid entirely because they’ve seen too many bad examples. I’ve been guilty of both. The overuse phase hit me hard around year two of shooting, and the avoidance phase lasted a lot longer than it should have. What changed my mind was stumbling across a technique that treats the lens flare not as a gimmick slapped on top of a photo, but as a lighting tool that earns its place in the image.
In this Kelvin Designs tutorial, Watch the full tutorial on YouTube, Kelvin walks through how to add lens flares in Photoshop in a way that actually looks intentional. He covers two different images, a portrait in snow and an urban landscape, which is smart because the approach shifts depending on what you’re working with. The key insight running through the whole tutorial is that the default way most people apply lens flares in Photoshop is destructive and inflexible. There’s a better path.
The reason this matters to me practically: I shoot a lot of backlit stuff. Denver gets these intense late-afternoon sun angles that should translate beautifully in photos, but the camera flattens it. A well-placed lens flare can restore some of that drama without making the image look like a J.J. Abrams production. Kelvin’s method gave me a workflow I could actually trust.
Step 1: Darken the Image Before You Do Anything Else
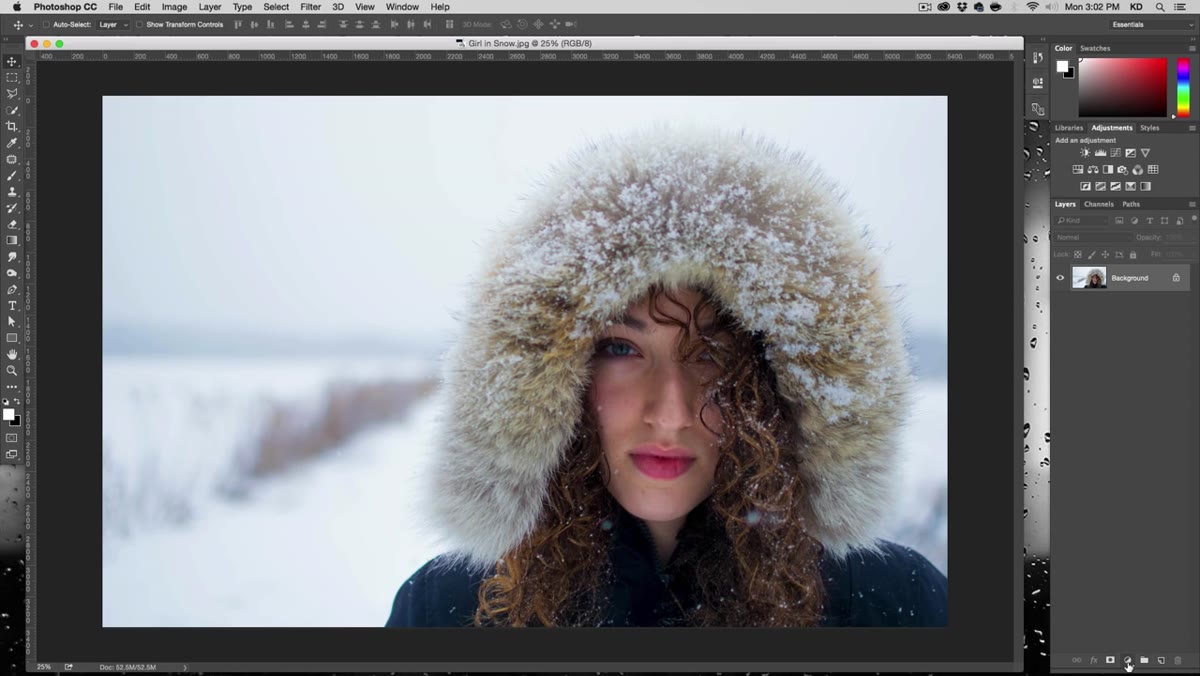 Curves adjustment layer darkening a high-key portrait
The portrait Kelvin uses is very high-key, meaning the background is blown out and bright. Before touching the lens flare tools, he adds a Curves adjustment layer and pulls the overall exposure down significantly. The logic here is solid: a lens flare adds light, so if your image is already overexposed, adding more light just creates a blown-out mess. You need contrast and shadow for a flare to read as dramatic rather than washed out.
Curves adjustment layer darkening a high-key portrait
The portrait Kelvin uses is very high-key, meaning the background is blown out and bright. Before touching the lens flare tools, he adds a Curves adjustment layer and pulls the overall exposure down significantly. The logic here is solid: a lens flare adds light, so if your image is already overexposed, adding more light just creates a blown-out mess. You need contrast and shadow for a flare to read as dramatic rather than washed out.
Don’t worry about perfectly preserving tones at this stage. The goal is to bring back some of that lost detail in the highlights, especially in the background, so the flare has somewhere to live visually.
Step 2: Mask the Curves Adjustment to Protect Your Subject
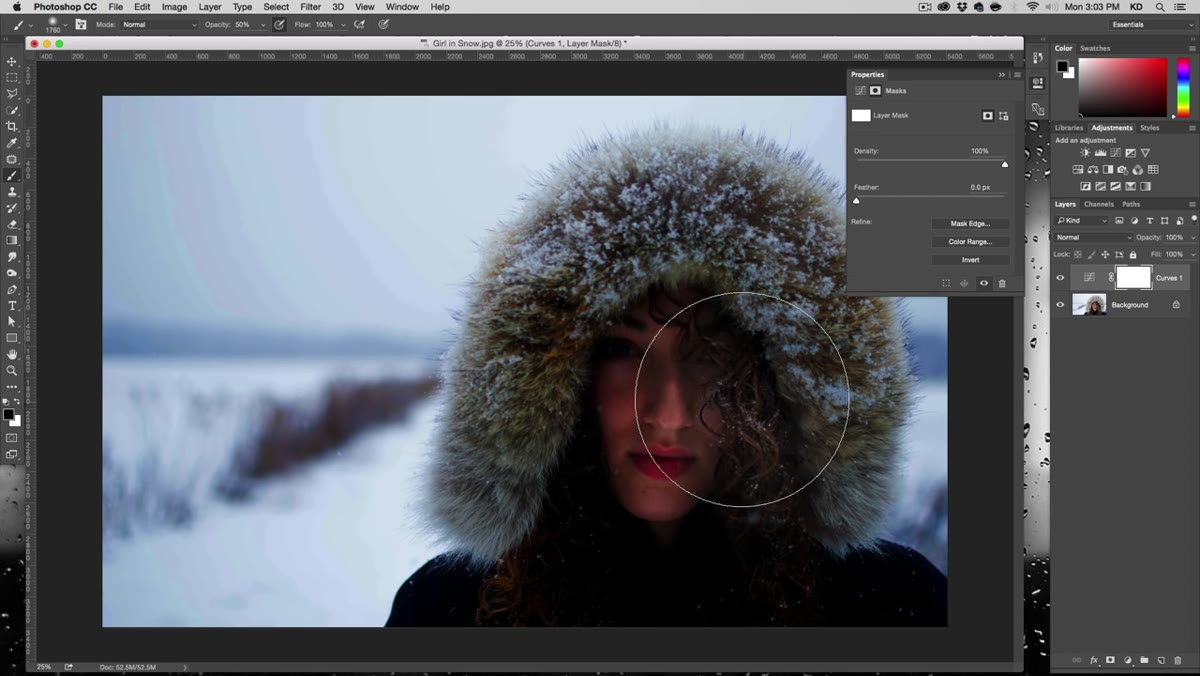 Black brush painting on Curves mask over subject’s face
Once the image is darkened, Kelvin uses a large, soft brush on the Curves adjustment layer’s mask to paint back the subject’s face. The brush settings he uses are around 1760 pixels wide with 0% hardness and 50% opacity. These numbers aren’t sacred, but the softness matters. You want a gradual transition, not a hard edge that makes it obvious where the adjustment starts and stops.
Black brush painting on Curves mask over subject’s face
Once the image is darkened, Kelvin uses a large, soft brush on the Curves adjustment layer’s mask to paint back the subject’s face. The brush settings he uses are around 1760 pixels wide with 0% hardness and 50% opacity. These numbers aren’t sacred, but the softness matters. You want a gradual transition, not a hard edge that makes it obvious where the adjustment starts and stops.
Paint with black on the mask over your subject’s face and any area you want to protect from the darkening. What you’re left with is a background that has depth and detail while your subject stays properly exposed. This is the foundation the lens flare will sit on top of.
Step 3: Understand Why You Can’t Apply Lens Flare to an Empty Layer
 Photoshop error when applying lens flare to transparent layer
Here’s where most people hit a wall. If you create a new blank layer and try to go to Filter > Render > Lens Flare, Photoshop throws an error. It refuses because there’s no pixel data to render onto. The obvious workaround, applying it directly to the background layer, works but locks the flare permanently into your image. That’s destructive editing, and it means you can’t reposition or remove the flare later without losing other work.
Photoshop error when applying lens flare to transparent layer
Here’s where most people hit a wall. If you create a new blank layer and try to go to Filter > Render > Lens Flare, Photoshop throws an error. It refuses because there’s no pixel data to render onto. The obvious workaround, applying it directly to the background layer, works but locks the flare permanently into your image. That’s destructive editing, and it means you can’t reposition or remove the flare later without losing other work.
Kelvin flags this clearly as the problem to solve. The rest of the technique is essentially the answer to this one limitation.
Step 4: Fill a New Layer with Black and Change the Blend Mode
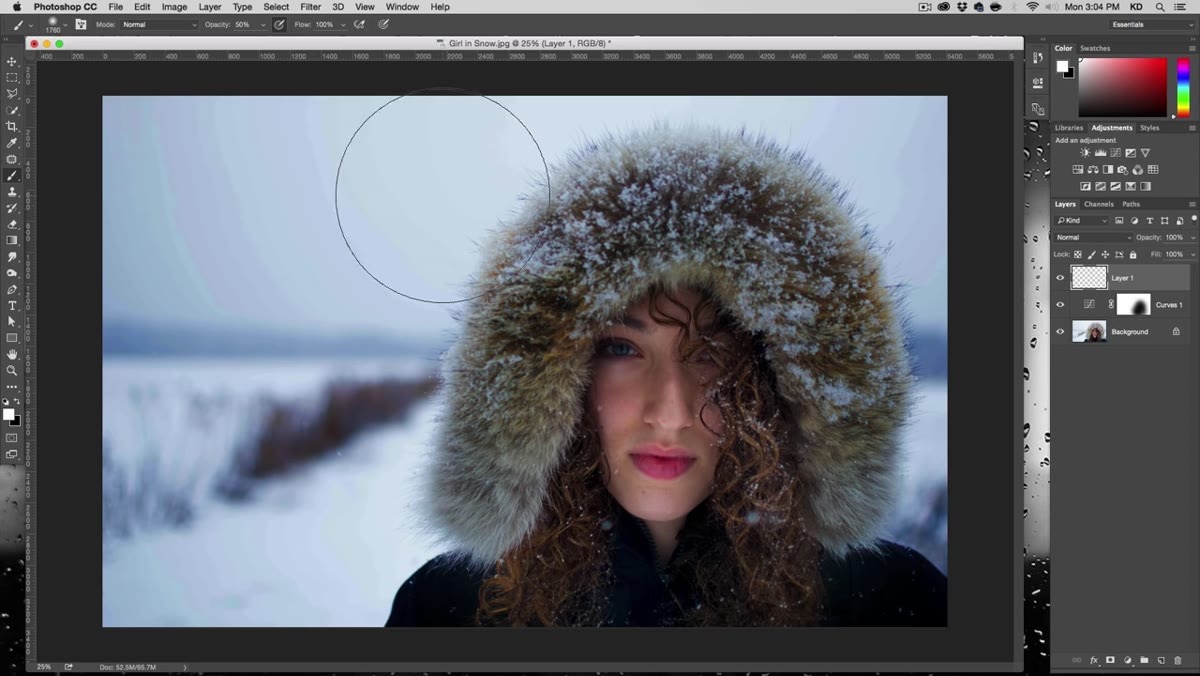 New layer filled with black set to Screen blend mode
The workaround is clever and simple. Create a new layer above your image, then fill it with solid black using Edit > Fill. Set that layer’s blend mode to Screen. In Screen mode, black becomes completely invisible while anything lighter than black starts to show through. This means you now have a layer that looks like nothing is there, but it actually contains pixel data that Photoshop can render onto.
New layer filled with black set to Screen blend mode
The workaround is clever and simple. Create a new layer above your image, then fill it with solid black using Edit > Fill. Set that layer’s blend mode to Screen. In Screen mode, black becomes completely invisible while anything lighter than black starts to show through. This means you now have a layer that looks like nothing is there, but it actually contains pixel data that Photoshop can render onto.
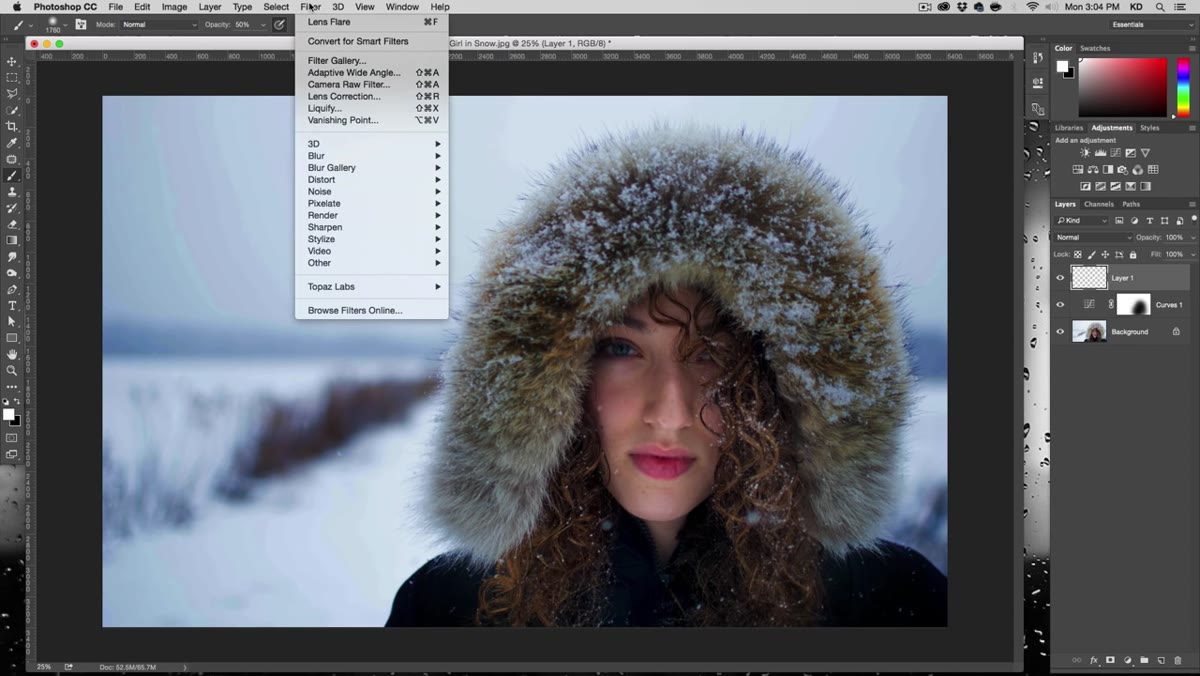
Go to Filter > Render > Lens Flare on this black layer and the effect applies cleanly, sitting on its own independent layer. You can reposition it, lower the opacity, mask it, or delete it entirely without touching anything underneath.
Step 5: Position the Flare and Choose Your Lens Type
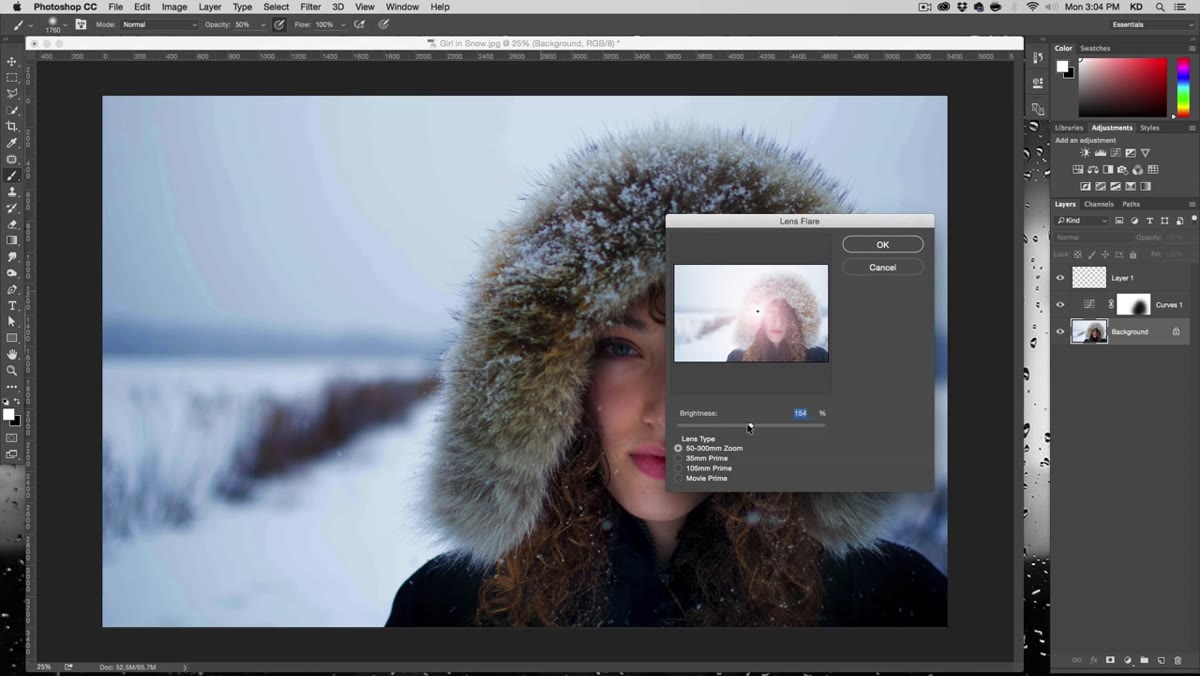 Lens Flare dialog box with crosshair positioned in image
Inside the Lens Flare dialog, you drag the crosshair to set where the flare originates. Kelvin places it near a light source in the image, which is the only rule that matters for realism: the flare should appear to come from somewhere logical, a sun, a streetlight, a window. Placing it in the middle of a shadow region immediately reads as fake.
Lens Flare dialog box with crosshair positioned in image
Inside the Lens Flare dialog, you drag the crosshair to set where the flare originates. Kelvin places it near a light source in the image, which is the only rule that matters for realism: the flare should appear to come from somewhere logical, a sun, a streetlight, a window. Placing it in the middle of a shadow region immediately reads as fake.
Photoshop gives you a few lens type options: 50-300mm Zoom, 35mm Prime, 105mm Prime, and Movie Prime. Each produces a different flare character. The zoom options tend to be busier with more artifacts, while the prime options are cleaner. Kelvin experiments with these, and I’d recommend doing the same on a duplicate layer rather than committing to one immediately.
Step 6: Blur and Blend for a Natural Look
 Urban landscape with multiple blended lens flares applied
For the urban landscape portion of the tutorial, Kelvin takes the technique further by adding multiple flares and applying blur effects to soften their edges into the scene. A lens flare that’s too crisp and defined reads as composited. Blurring it slightly, even just a few pixels of Gaussian Blur, helps it integrate with the existing light in the frame.
Urban landscape with multiple blended lens flares applied
For the urban landscape portion of the tutorial, Kelvin takes the technique further by adding multiple flares and applying blur effects to soften their edges into the scene. A lens flare that’s too crisp and defined reads as composited. Blurring it slightly, even just a few pixels of Gaussian Blur, helps it integrate with the existing light in the frame.
He also adjusts layer opacity per flare rather than using a single opacity setting for everything. This gives you granular control, letting some flares read as dominant light sources while others feel like secondary reflections. The result in the urban image is layered and cinematic rather than one-note.
One Thing I’d Add: Try This on RAW Files First
Kelvin himself mentions that the portrait he’s working with is a JPEG, and you can see some compression artifacts surface when he darkens the highlights in Step 1. That’s not a knock on the tutorial, it’s just real. JPEG compression throws away data, and when you push a heavily compressed file in post, you get blocky artifacts in areas that should be smooth.
If you’re planning to practice this technique, use a RAW file. The extra dynamic range means your darkening step in Step 1 will produce cleaner results, and the flare will have richer shadow tones to contrast against. I ran this same workflow on a RAW portrait from a backlit evening shoot and the difference was significant. The flare looked like it belonged there. On a JPEG of the same shot, I had to be much more conservative with the darkening just to avoid visible artifacting.
The single most important thing this tutorial teaches isn’t which settings to use. It’s the principle of keeping your effects on their own layer so you can change your mind later. The black-layer-with-Screen-mode trick applies beyond lens flares to fire effects, light leaks, and any other render-based effect in Photoshop. Learn the workaround once and it pays off constantly.
Watch the full tutorial on YouTube to see Kelvin work through both the portrait and the urban landscape from start to finish. His pacing is good and watching the before-and-after comparisons in motion makes the payoff obvious.
Comments (5)
The before and after really sells it. Incredible difference.
Great breakdown. The step-by-step approach really helps.
This is fantastic. I've been recommending this approach to my readers too.
Tried this technique this morning. Game changer for real.
Printing this out and pinning it next to my monitor. That good.
Leave a Comment