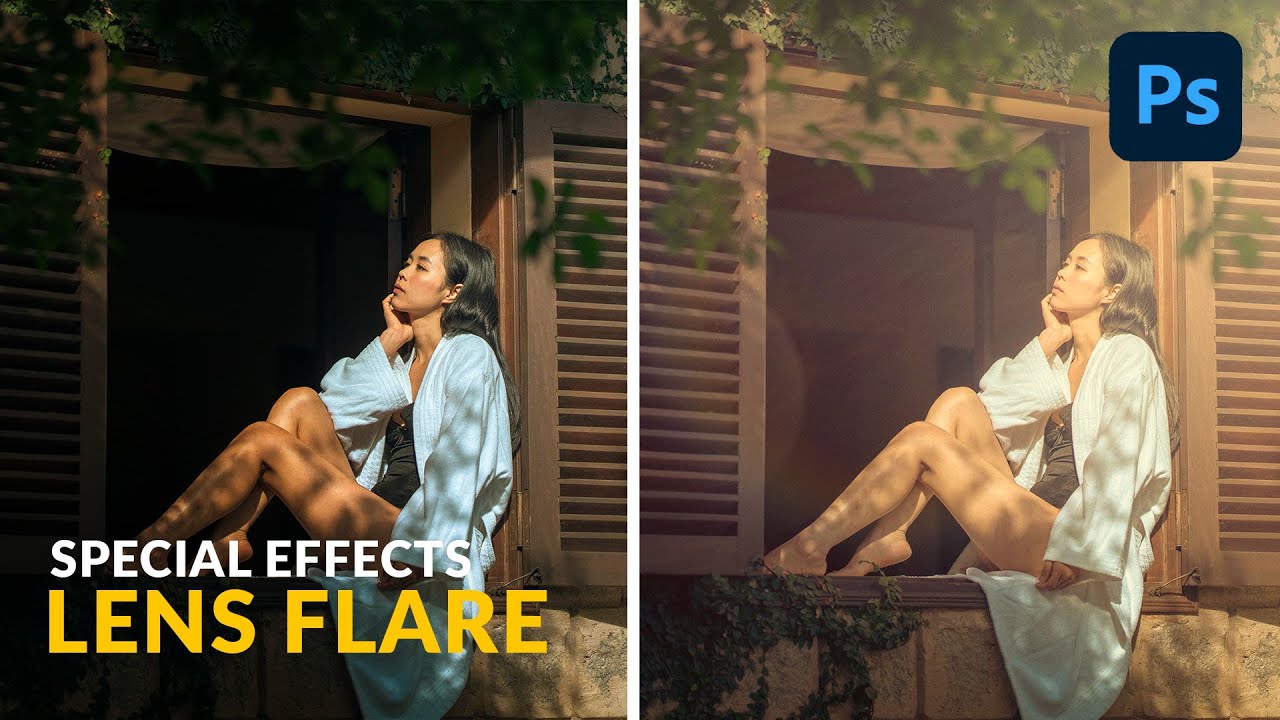
There’s a specific look that makes a portrait feel like it was shot on a perfect July afternoon, golden light bleeding in from one side, a soft haze washing out the corner, warmth you can practically feel. Clients love it. The problem is you can’t always manufacture that on location, and buying a dedicated lens just to get natural flare is the kind of gear logic I’ve been arguing against since I started this site. The good news is Photoshop can get you most of the way there for exactly zero dollars, and in this Aaron Nace (PHLEARN) tutorial, the whole effect is built from a free Adobe Stock asset and two Camera Raw adjustments.
What makes this tutorial worth breaking down isn’t just the lens flare itself. It’s the workflow underneath it. Aaron uses Smart Objects throughout, which means every adjustment stays editable long after you’ve moved on. I’ve wasted too many hours flattening layers prematurely and then wishing I hadn’t. This approach locks in flexibility from the start, and once you internalize it, you’ll use it on everything.
The full effect has two parts: a stock lens flare image composited over the photo, and a Camera Raw light haze built into the original image layer. Together they sell the illusion. Here’s how to build it.
Step 1: Source a Free Lens Flare Asset from Adobe Stock
 Adobe Stock panel open with “lens flare” search results
Inside Photoshop, open the Adobe Stock panel and filter by “Free.” Search for lens flare and you’ll find a solid selection of PNG-style flare images on black backgrounds. The black background is key, because it disappears when you change the blend mode later. Download and open the one that fits your light direction, then use the Move tool to drag it from its document window directly onto your base image as a new layer.
Adobe Stock panel open with “lens flare” search results
Inside Photoshop, open the Adobe Stock panel and filter by “Free.” Search for lens flare and you’ll find a solid selection of PNG-style flare images on black backgrounds. The black background is key, because it disappears when you change the blend mode later. Download and open the one that fits your light direction, then use the Move tool to drag it from its document window directly onto your base image as a new layer.
Pick an asset where the light source sits near one corner or edge. A centered flare is harder to work with and tends to look artificial. Think about where your sun or key light would realistically be coming from in the shot.
Step 2: Set the Blend Mode to Screen and Position the Flare
 Blend mode dropdown changing from Normal to Screen
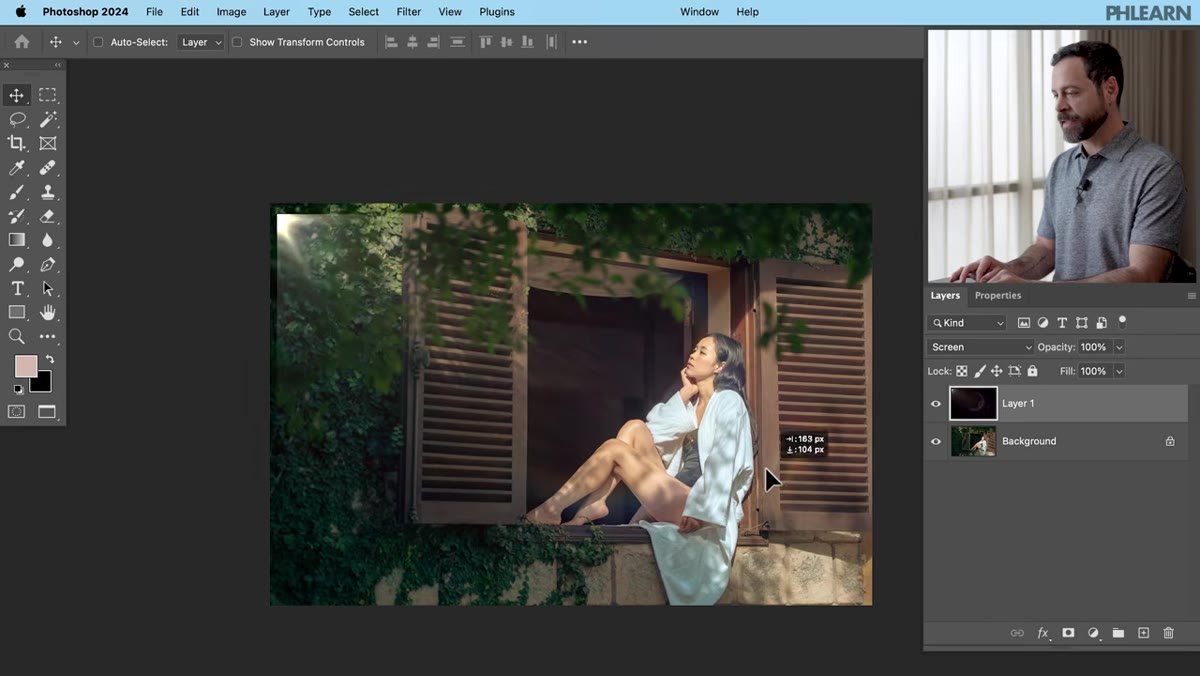
With the lens flare layer selected, change the blend mode from Normal to Screen. This makes the black parts of the flare completely transparent, leaving only the light streaks and glow visible over your image. It’s one of those Photoshop tricks that feels like magic the first time you see it.
Blend mode dropdown changing from Normal to Screen
With the lens flare layer selected, change the blend mode from Normal to Screen. This makes the black parts of the flare completely transparent, leaving only the light streaks and glow visible over your image. It’s one of those Photoshop tricks that feels like magic the first time you see it.
Now use Transform (Ctrl/Cmd + T) to position and scale the flare. If your asset is coming from the wrong side, flip it horizontally using the contextual taskbar at the top of the screen. Drag it so the main light source sits just outside or right at the edge of the frame. You don’t need the full flare in the shot. Cropping it at the border actually makes it look more natural, like the sun is just off-camera.
Step 3: Convert the Flare Layer to a Smart Object
 Right-click menu showing “Convert to Smart Object” option
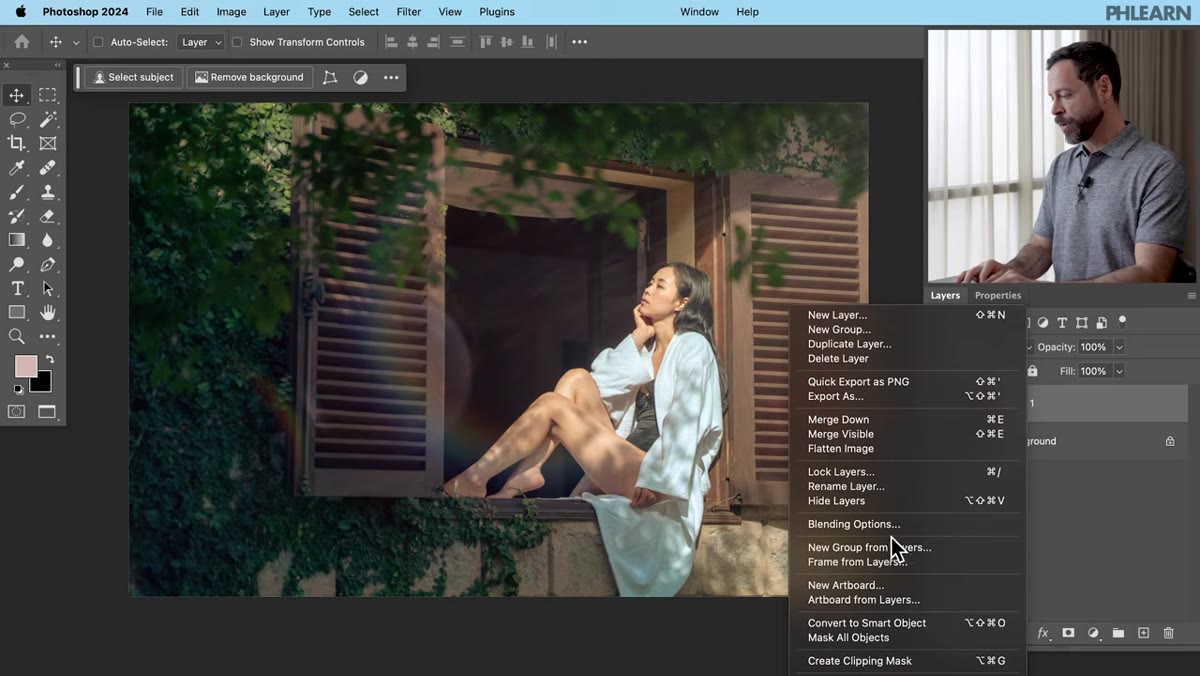
Before you touch any filters, right-click the lens flare layer and choose “Convert to Smart Object.” Aaron makes a point of doing this every single time before applying a filter, and he’s right to. Smart Objects let you go back and change filter settings later instead of committing to them permanently. It takes two seconds and saves real headaches.
Right-click menu showing “Convert to Smart Object” option
Before you touch any filters, right-click the lens flare layer and choose “Convert to Smart Object.” Aaron makes a point of doing this every single time before applying a filter, and he’s right to. Smart Objects let you go back and change filter settings later instead of committing to them permanently. It takes two seconds and saves real headaches.
Once the Smart Object icon appears in the layer thumbnail, you’re ready to adjust the color.
Step 4: Warm the Flare Using the Camera Raw Filter
 Camera Raw filter open with Temperature slider being adjusted
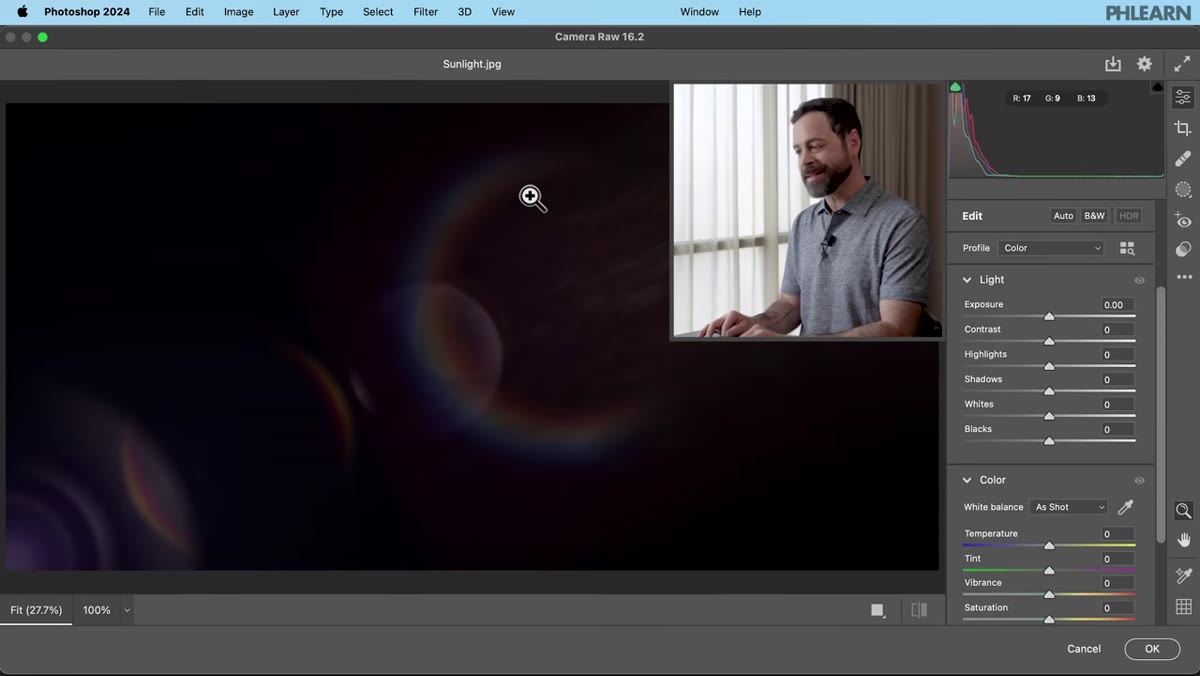
Go to Filter, then Camera Raw Filter. Inside Camera Raw, find the Color Temperature slider and drag it toward the warm/yellow end. How far you go depends on your image, but for a golden hour look, you want it noticeably warm without going orange. Aaron also adds a touch of magenta on the Tint slider, which pushes the flare toward that pinkish-gold tone you see in late-afternoon sun. Hit OK.
Camera Raw filter open with Temperature slider being adjusted
Go to Filter, then Camera Raw Filter. Inside Camera Raw, find the Color Temperature slider and drag it toward the warm/yellow end. How far you go depends on your image, but for a golden hour look, you want it noticeably warm without going orange. Aaron also adds a touch of magenta on the Tint slider, which pushes the flare toward that pinkish-gold tone you see in late-afternoon sun. Hit OK.
Because the layer is a Smart Object, the Camera Raw adjustment appears as a sub-layer you can double-click at any time to reopen and tweak. Change your mind about the warmth level tomorrow? Two clicks and you’re back in.
Step 5: Add a Radial Gradient Haze to the Background Layer
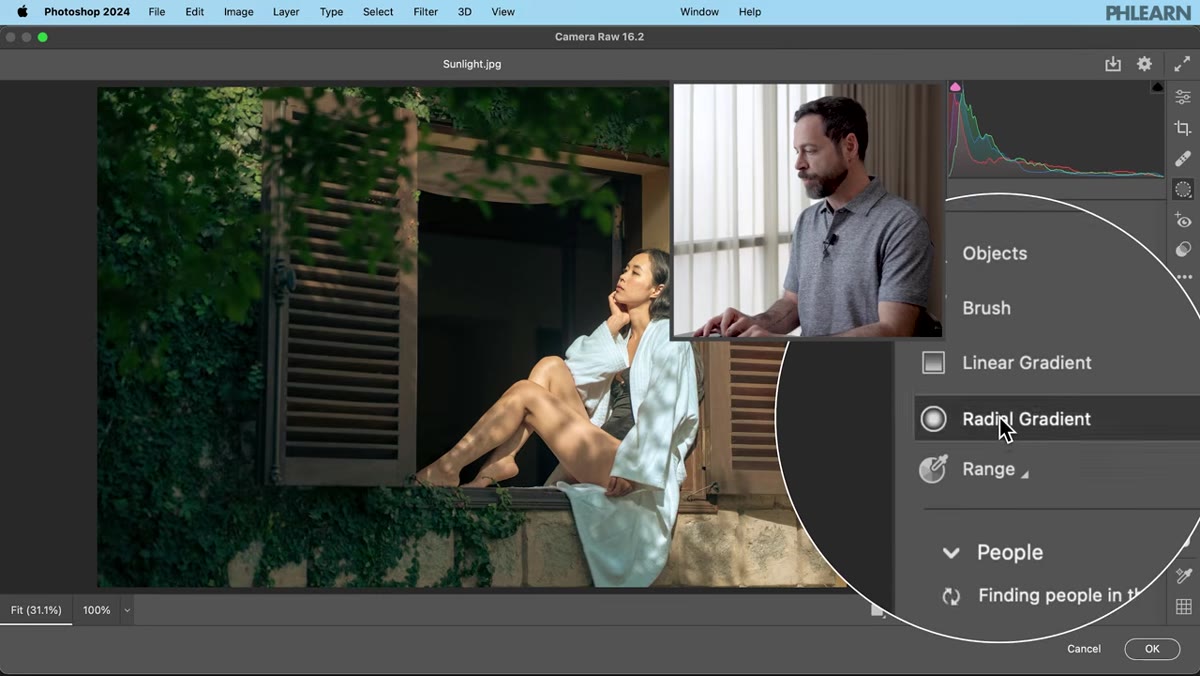 Radial gradient being dragged from upper-right corner in Camera Raw
Now shift focus to the background (original photo) layer. Right-click it and convert it to a Smart Object as well, then open Camera Raw Filter again. This time, you’re not editing the whole image. Click the Masking icon in the toolbar and choose Radial Gradient. Click and drag from the upper-right corner outward to create a gradient that covers roughly a quarter of the frame. This masks your adjustments to just that region.
Radial gradient being dragged from upper-right corner in Camera Raw
Now shift focus to the background (original photo) layer. Right-click it and convert it to a Smart Object as well, then open Camera Raw Filter again. This time, you’re not editing the whole image. Click the Masking icon in the toolbar and choose Radial Gradient. Click and drag from the upper-right corner outward to create a gradient that covers roughly a quarter of the frame. This masks your adjustments to just that region.
Inside this masked area, bring the Contrast down, lift the Shadows and Blacks, and push the Temperature warm. The goal is a soft, blown-out haze that looks like the camera sensor is getting kissed by light from off-frame. Add a small amount of magenta here too so it matches the flare layer you already built.
Step 6: Stack a Second Mask for Brightness Punch
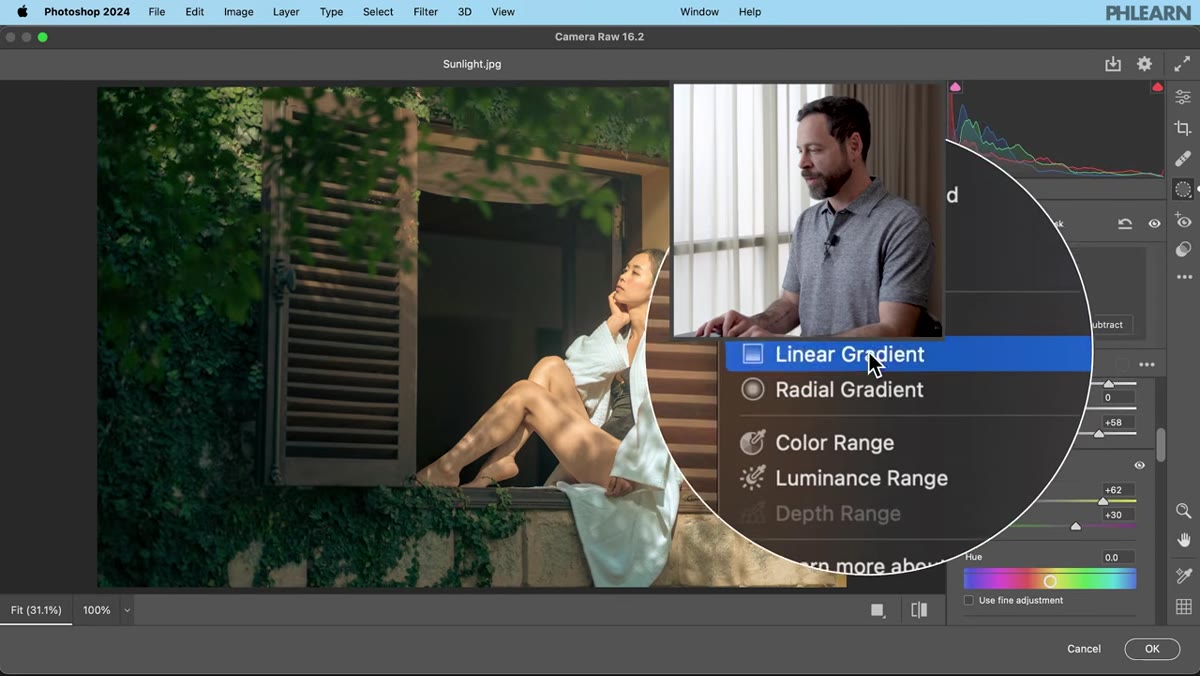 Second radial gradient mask being created in Camera Raw masking panel
Still inside Camera Raw on the background layer, create a second mask by clicking “Create New Mask” and choosing Radial Gradient again. Draw it from the same upper-right corner, roughly covering a similar but slightly smaller area. This time, bump the Exposure up and raise the Blacks. The idea is to add a bright core to the haze, so there’s a graduation from intensely bright at the corner to softly glowing further in.
Second radial gradient mask being created in Camera Raw masking panel
Still inside Camera Raw on the background layer, create a second mask by clicking “Create New Mask” and choosing Radial Gradient again. Draw it from the same upper-right corner, roughly covering a similar but slightly smaller area. This time, bump the Exposure up and raise the Blacks. The idea is to add a bright core to the haze, so there’s a graduation from intensely bright at the corner to softly glowing further in.
Two masks in one Camera Raw filter pass. Both are fully editable any time you double-click that filter in the layers panel.
Why I’d Push This Even Further With a Gradient Map
The technique Aaron teaches gets you most of the way to a convincing effect, but I’d add one more optional step for images where the subject’s skin tones feel disconnected from the warm flare. Drop a Gradient Map adjustment layer above everything, set it to map to a warm amber-to-white range, and drop the opacity down to 5-10%. It’s subtle, but it ties the overall color palette together so the flare doesn’t look pasted on. This is the kind of micro-adjustment that makes the difference between “nice edit” and “how did you shoot that?” I use it on almost every composite I do, whether I’m adding light effects or just color grading.
One thing worth noting for anyone running an older version of Photoshop: the contextual taskbar Aaron uses for the horizontal flip shortcut might not be visible in your interface. You can still flip horizontally through Edit, Transform, Flip Horizontal. Same result, just a couple more clicks.
The single biggest takeaway from this whole workflow is the Smart Object habit. Convert before you filter, every time, without exception. The lens flare technique itself is repeatable in under ten minutes once you’ve done it once, but Smart Objects are what make your editing non-destructive in a way that actually holds up when a client asks for a revision two weeks later. Everything else in this tutorial is in service of that principle.
Watch the full tutorial on YouTube to see Aaron walk through every step in real time. His pacing is good, and seeing the blend mode switch happen live is worth the watch even if you already follow the steps above.
Comments
Leave a Comment