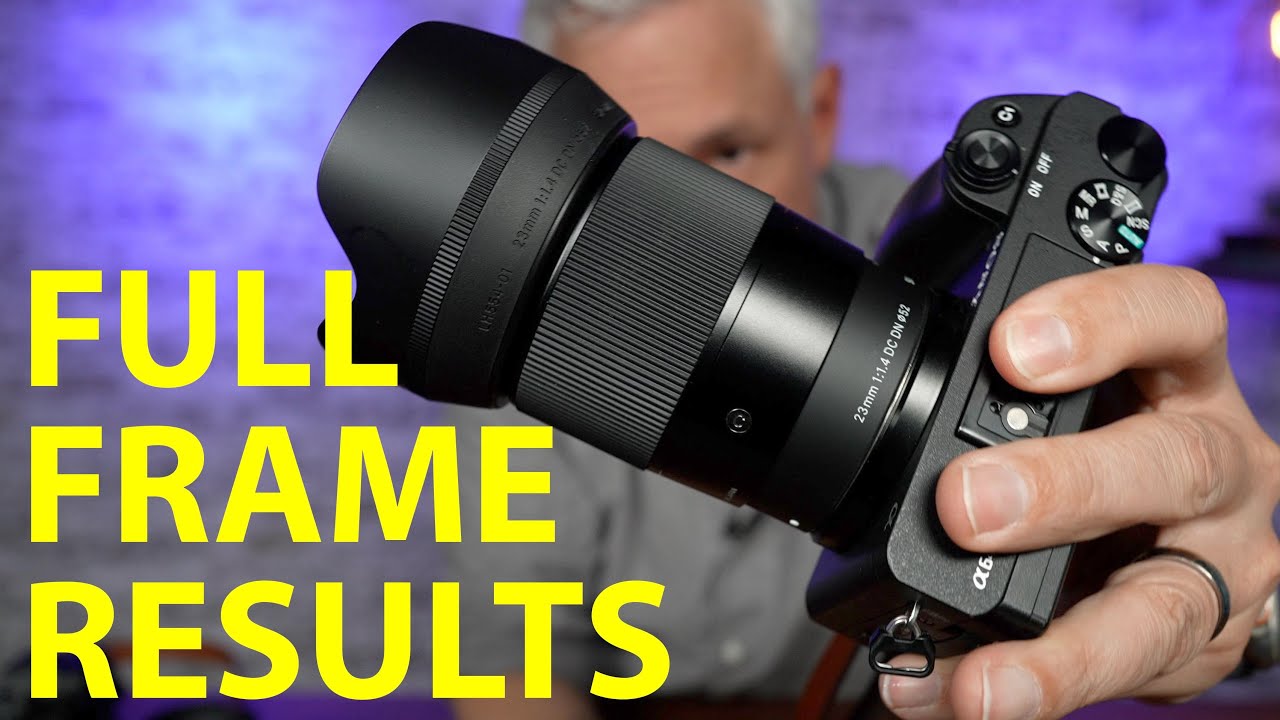
If you shoot Sony APS-C, you already know the frustration. The camera bodies are excellent, the ecosystem is open, but the native prime lens selection for crop-sensor shooters has always felt like an afterthought. I’ve had the same conversation a dozen times at local meetups: someone picks up a Sony ZV-E10 or an a6400 and immediately asks what lens to put on it. My spreadsheet of budget lenses has a long list of compromises in that category. That’s why when I saw Tony and Chelsea Northrup drop a full breakdown of the Sigma 23mm f/1.4, I paid attention.
Watch the full tutorial on YouTube
In this Tony and Chelsea Northrup tutorial, they run the Sigma 23mm f/1.4 through a structured gauntlet: studio sharpness tests, contrast and flare evaluation, bokeh quality, starburst rendering, and real-world video autofocus performance. What makes it worth your time is that they’re not just shooting pretty pictures. They’re comparing the Sigma directly against the Sony 24mm f/1.4 GM, a full-frame lens that costs significantly more, which gives you a real benchmark instead of vibes. Here’s how they built each test and what you should take away from each one.
Step 1: Establish Your Benchmark Lens
 Side-by-side Sigma and Sony 24mm lenses on screen
Before you can evaluate any new glass, you need something to measure it against. Since there’s no direct APS-C prime competitor at this focal length, the Northrups used the Sony 24mm f/1.4 GM as the comparison point. It’s not a perfect apples-to-apples match, but it’s the closest option available and it’s a lens most photographers consider a gold standard. The takeaway here is methodological: when you’re reviewing gear, pick the best available benchmark even if it’s not identical. A result that beats a more expensive lens tells you something real.
Side-by-side Sigma and Sony 24mm lenses on screen
Before you can evaluate any new glass, you need something to measure it against. Since there’s no direct APS-C prime competitor at this focal length, the Northrups used the Sony 24mm f/1.4 GM as the comparison point. It’s not a perfect apples-to-apples match, but it’s the closest option available and it’s a lens most photographers consider a gold standard. The takeaway here is methodological: when you’re reviewing gear, pick the best available benchmark even if it’s not identical. A result that beats a more expensive lens tells you something real.
Step 2: Test Center and Edge Sharpness at 100 Megapixels
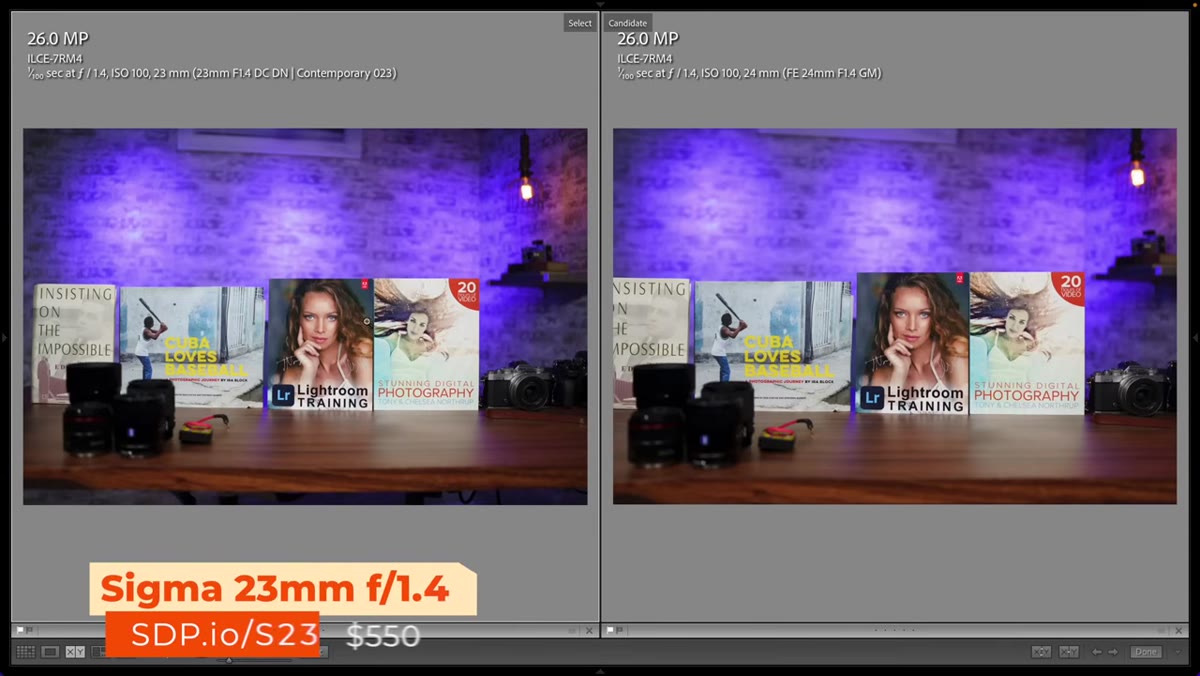 Center frame crop comparison of Sigma vs Sony sharpness
The sharpness test uses high-resolution studio captures and crops into both the center and the edges of the frame. In the center, the two lenses perform similarly. That’s actually a good sign for the Sigma because the Sony GM is optically excellent, and matching it in the center is no small thing. Where the Sigma separates itself is toward the edges and corners. The Sigma’s APS-C-specific optical design means its engineers weren’t trying to cover a full-frame image circle, so they could optimize the glass for exactly the sensor size it’s meant to serve. Edge sharpness on the Sigma pulls ahead of the Sony, which is the kind of result that should make any crop-sensor shooter stop and reconsider what “designed for your camera” actually means in practice.
Center frame crop comparison of Sigma vs Sony sharpness
The sharpness test uses high-resolution studio captures and crops into both the center and the edges of the frame. In the center, the two lenses perform similarly. That’s actually a good sign for the Sigma because the Sony GM is optically excellent, and matching it in the center is no small thing. Where the Sigma separates itself is toward the edges and corners. The Sigma’s APS-C-specific optical design means its engineers weren’t trying to cover a full-frame image circle, so they could optimize the glass for exactly the sensor size it’s meant to serve. Edge sharpness on the Sigma pulls ahead of the Sony, which is the kind of result that should make any crop-sensor shooter stop and reconsider what “designed for your camera” actually means in practice.
Step 3: Evaluate Contrast and Flare Resistance with a Backlit Subject
 Mannequin backlit in studio with strobe firing behind
For the contrast test, the Northrups position a mannequin with a strobe firing from behind to create a challenging backlit scenario. This is a smart setup because backlit portraits are one of the most common real-world situations where lens flare becomes a visible problem. Both lenses show some bloom around the bright areas, but the Sony produces a distinct purple flare spot. The Sigma has minor purple fringing on edges but no equivalent blob of colored flare. For portrait and event shooters who regularly deal with mixed or backlit light, flare resistance isn’t a vanity metric. It’s the difference between a usable frame and a throwaway.
Mannequin backlit in studio with strobe firing behind
For the contrast test, the Northrups position a mannequin with a strobe firing from behind to create a challenging backlit scenario. This is a smart setup because backlit portraits are one of the most common real-world situations where lens flare becomes a visible problem. Both lenses show some bloom around the bright areas, but the Sony produces a distinct purple flare spot. The Sigma has minor purple fringing on edges but no equivalent blob of colored flare. For portrait and event shooters who regularly deal with mixed or backlit light, flare resistance isn’t a vanity metric. It’s the difference between a usable frame and a throwaway.
Step 4: Assess Bokeh Quality and Shape
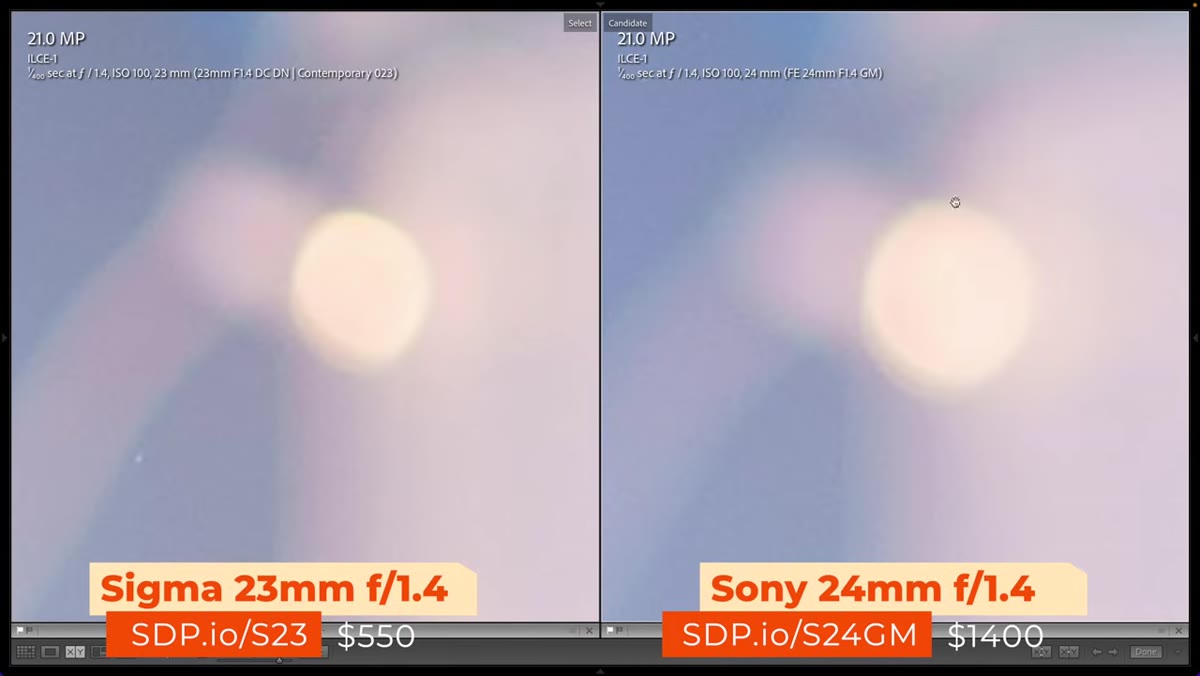 Out-of-focus background lights showing bokeh comparison
Bokeh testing here uses lights in the background thrown out of focus, which reveals the shape and character of the lens’s out-of-focus rendering. Both lenses produce well-shaped bokeh circles without major edge distortion or nervousness. The Sony’s bokeh is slightly larger at the same aperture setting. That’s a function of full-frame coverage and how the depth of field math works across sensor sizes. If buttery-soft background separation is your top priority, the Sony technically wins this round. For most shooters, though, the Sigma’s bokeh is genuinely attractive and for an APS-C lens it delivers background blur that will surprise anyone used to kit zoom results.
Out-of-focus background lights showing bokeh comparison
Bokeh testing here uses lights in the background thrown out of focus, which reveals the shape and character of the lens’s out-of-focus rendering. Both lenses produce well-shaped bokeh circles without major edge distortion or nervousness. The Sony’s bokeh is slightly larger at the same aperture setting. That’s a function of full-frame coverage and how the depth of field math works across sensor sizes. If buttery-soft background separation is your top priority, the Sony technically wins this round. For most shooters, though, the Sigma’s bokeh is genuinely attractive and for an APS-C lens it delivers background blur that will surprise anyone used to kit zoom results.
Step 5: Shoot into Direct Sun at Maximum Aperture for Starburst Quality
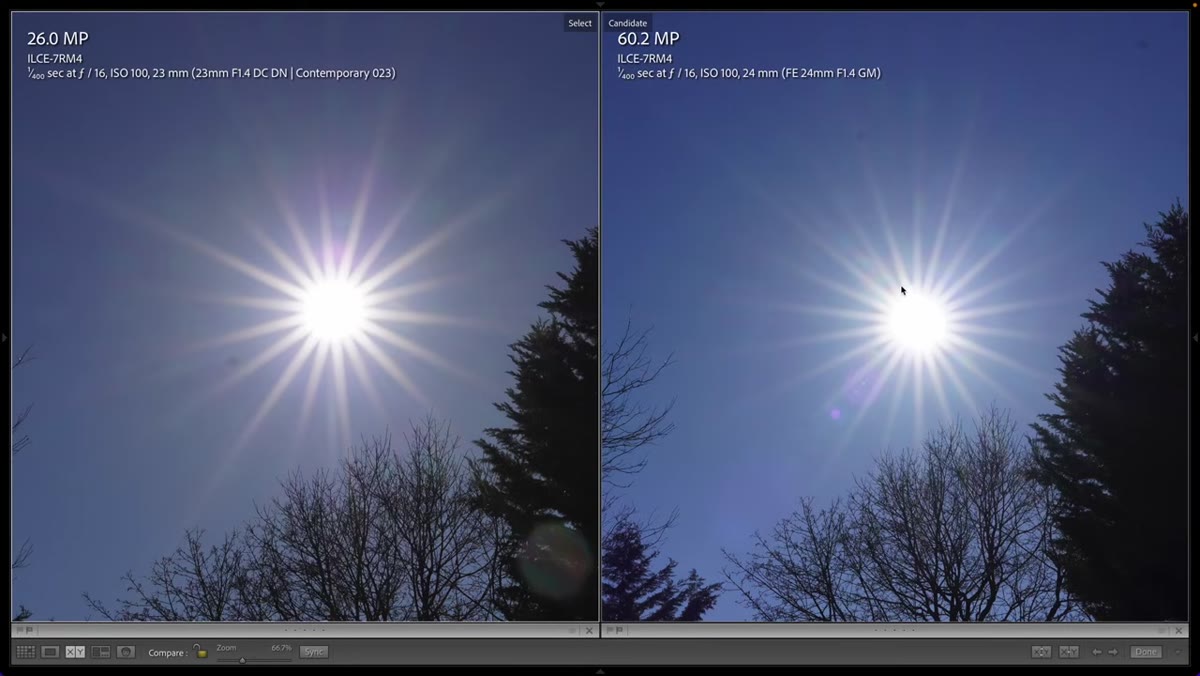 Direct sun shot at f/16 showing starburst rendering
This test involves stopping the lens all the way down to f/16 and pointing it directly at the sun to evaluate starburst rendering. The number and sharpness of starburst points is determined by the number of aperture blades in the lens. The Sony GM, with more blades, produces a starburst with more points and cleaner, sharper rays. The Sigma’s starburst is decent but shows more overall flaring around the light source in this extreme scenario. If you’re a landscape or architecture photographer who regularly incorporates sun stars as a compositional element, this is worth knowing. For everyone else shooting portraits or street work, this test is unlikely to affect your buying decision.
Direct sun shot at f/16 showing starburst rendering
This test involves stopping the lens all the way down to f/16 and pointing it directly at the sun to evaluate starburst rendering. The number and sharpness of starburst points is determined by the number of aperture blades in the lens. The Sony GM, with more blades, produces a starburst with more points and cleaner, sharper rays. The Sigma’s starburst is decent but shows more overall flaring around the light source in this extreme scenario. If you’re a landscape or architecture photographer who regularly incorporates sun stars as a compositional element, this is worth knowing. For everyone else shooting portraits or street work, this test is unlikely to affect your buying decision.
Step 6: Test Video Autofocus on a Sony Body
 Video autofocus test with Sony a7S III in cluttered studio
The final test moves into video autofocus performance, attaching the lens to a Sony body and shooting a talking-head style clip in a cluttered environment. The cluttered studio background is intentional: it gives the autofocus system plenty of competing subjects to potentially latch onto, which is where weaker AF implementations fall apart. The Sigma handles it smoothly. For creators using Sony APS-C cameras like the ZV-E10 or FX30 for YouTube, social content, or event coverage, this matters more than any MTF chart. A lens that hunts or pumps during a take is unusable regardless of its optical quality. The Sigma passes this test cleanly.
Video autofocus test with Sony a7S III in cluttered studio
The final test moves into video autofocus performance, attaching the lens to a Sony body and shooting a talking-head style clip in a cluttered environment. The cluttered studio background is intentional: it gives the autofocus system plenty of competing subjects to potentially latch onto, which is where weaker AF implementations fall apart. The Sigma handles it smoothly. For creators using Sony APS-C cameras like the ZV-E10 or FX30 for YouTube, social content, or event coverage, this matters more than any MTF chart. A lens that hunts or pumps during a take is unusable regardless of its optical quality. The Sigma passes this test cleanly.
What I’d Add: Check the Equivalent Field of View Before You Buy
The Northrups mention it briefly but it’s worth dwelling on: 23mm on APS-C gives you an equivalent field of view of roughly 35mm on full frame. That’s one of the most useful and versatile focal lengths in photography. I’ve shot everything from street work to product flats to quick environmental portraits with a 35mm equivalent. If you’re coming from a kit zoom and have spent most of your shooting life at the long end, 23mm on crop will feel wide at first. Spend a day with it before committing, if you can. But if you already know you love the 35mm perspective, the Sigma makes that focal length available with f/1.4 light-gathering at a price that doesn’t require selling anything.
The bottom line here is straightforward. Sony APS-C shooters have had limited options for fast, purpose-built primes, and the Sigma 23mm f/1.4 fills that gap with optical performance that beats a more expensive full-frame lens in several real-world categories. It’s not perfect at everything, but it’s excellent at the things that matter most for the people most likely to buy it. If your camera body deserves a lens that was actually designed for it, this one belongs on your short list.
Watch the full tutorial on YouTube
Comments
Leave a Comment