I spend a lot of mornings doing something most photographers don’t bother with: running the actual math on gear before I get excited about it. Manufacturer spec sheets are written to make things sound impressive, and that gap between “sounds impressive” and “is actually worth your money” is exactly where bad purchasing decisions live. When I watched the latest Tony & Chelsea Northrup tutorial covering Olympus’s final-ever lens release and the newly announced Sony FX6, I had that familiar feeling of someone else doing the homework I would have done anyway. Watch the full tutorial on YouTube before or after reading this, because the visual comparisons they run are worth seeing firsthand.
What makes this particular video useful isn’t just the news. It’s that Tony walks through the reasoning process step by step, and that process applies every time a new lens or camera body drops. You can use it to evaluate anything. Here’s how to follow that same logic yourself.
Step 1: Start With the Headline Spec, Then Ask Who It’s Actually For
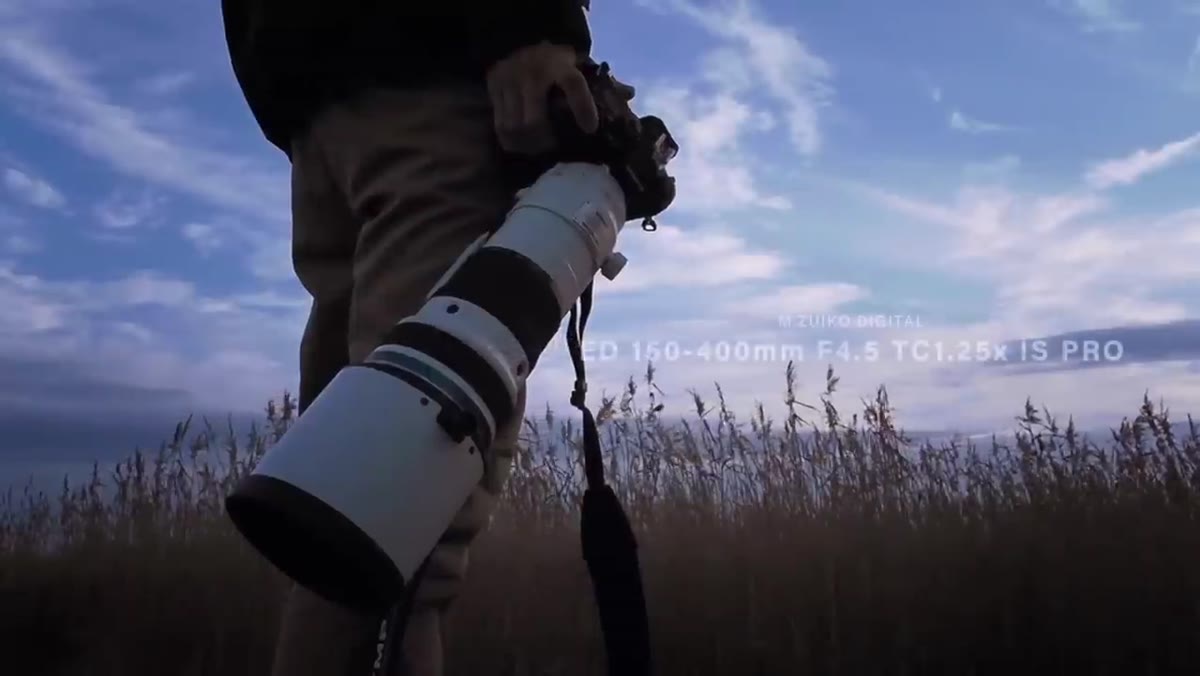 Tony holding up the Olympus 150-400mm f/4.5 lens
The Olympus 150-400mm f/4.5 with a built-in 1.25x teleconverter sounds like a wildlife photographer’s dream on paper. It even physically resembles the Canon 200-400mm f/4 with its own built-in teleconverter, down to the placement of the switch. Canon’s version costs $11,000. Olympus comes in at $7,500. That alone has people calling it a bargain.
Tony holding up the Olympus 150-400mm f/4.5 lens
The Olympus 150-400mm f/4.5 with a built-in 1.25x teleconverter sounds like a wildlife photographer’s dream on paper. It even physically resembles the Canon 200-400mm f/4 with its own built-in teleconverter, down to the placement of the switch. Canon’s version costs $11,000. Olympus comes in at $7,500. That alone has people calling it a bargain.
Before you get there, ask one question: who is this lens actually designed to serve? The Canon 200-400 is built for professional sports photographers working field sports and motorsports. That’s a specific, well-defined use case. Matching a lens to its intended use case before comparing prices is the first filter you should run, every time.
Step 2: Apply the Crop Factor to Both Focal Length AND Aperture
 On-screen text showing 35mm equivalent conversion math
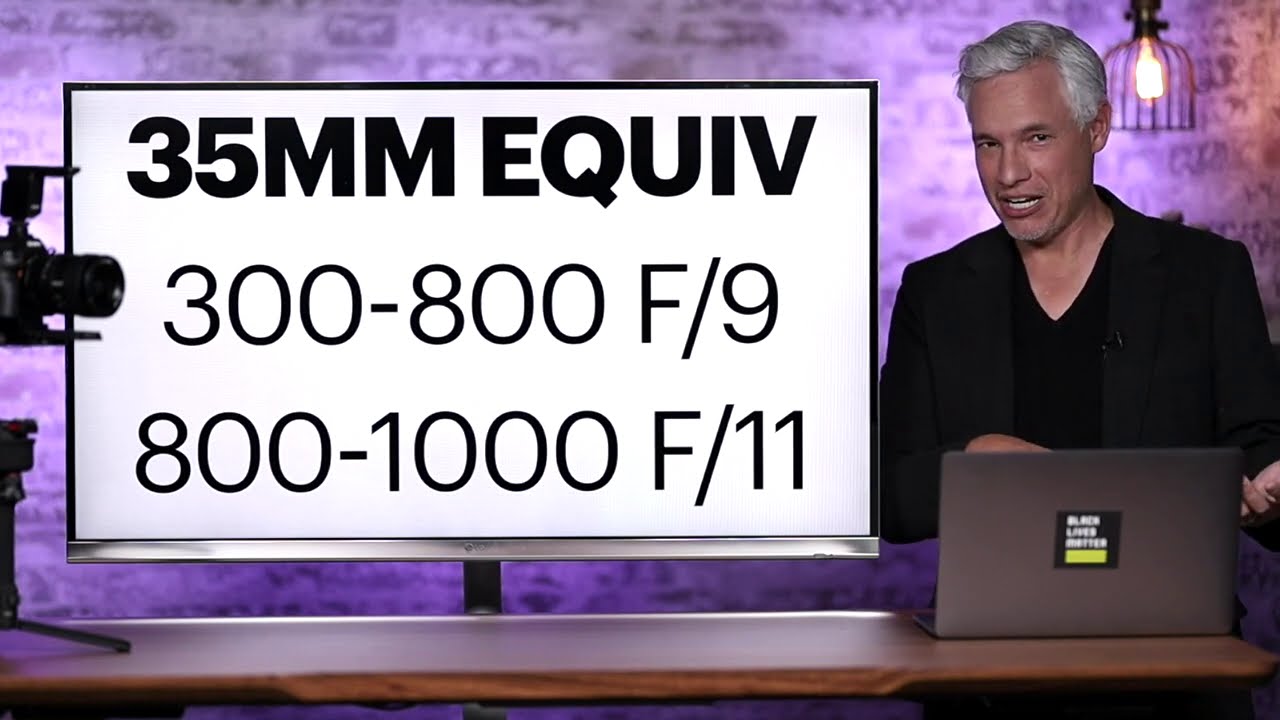
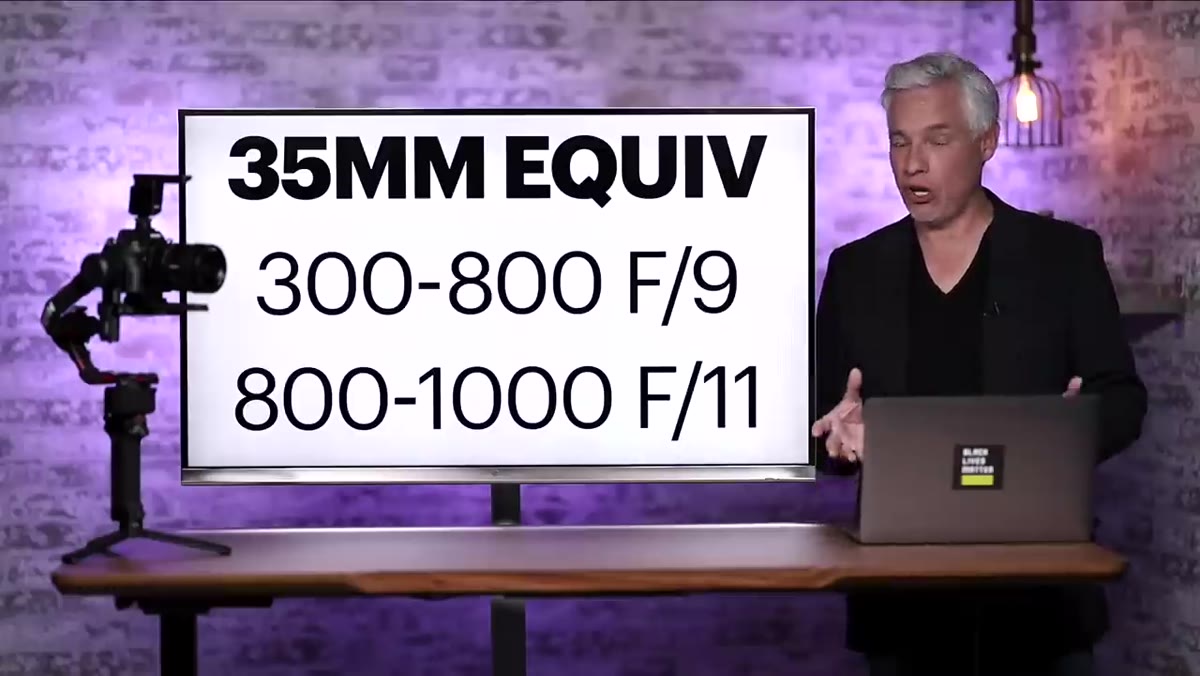
This is where a lot of buyers get tripped up, and where the Olympus lens starts to look a lot less interesting. Micro Four Thirds sensors are roughly a quarter the size of full frame sensors, which means you apply a 2x crop factor to understand the equivalent field of view. The Olympus 150-400mm becomes a 300-800mm equivalent. With the teleconverter engaged, you’re looking at up to 1000mm equivalent.
On-screen text showing 35mm equivalent conversion math
This is where a lot of buyers get tripped up, and where the Olympus lens starts to look a lot less interesting. Micro Four Thirds sensors are roughly a quarter the size of full frame sensors, which means you apply a 2x crop factor to understand the equivalent field of view. The Olympus 150-400mm becomes a 300-800mm equivalent. With the teleconverter engaged, you’re looking at up to 1000mm equivalent.
Here’s the part that often gets skipped: the crop factor also applies to the aperture when you’re comparing total light gathered. The f/4.5 becomes effectively f/9 in full-frame terms. Engaged teleconverter pushes that to f/11. That’s not a complaint about the lens itself. It’s just the physics of a smaller sensor. If you want to dig deeper into why this math matters and how it affects exposure, Tony references his own educational resource at fcp.io/crop, which is worth bookmarking.
Step 3: Compare Against the Right Competitors, Not the Obvious Ones
 Side-by-side comparison graphic of Olympus vs Sony 200-600mm
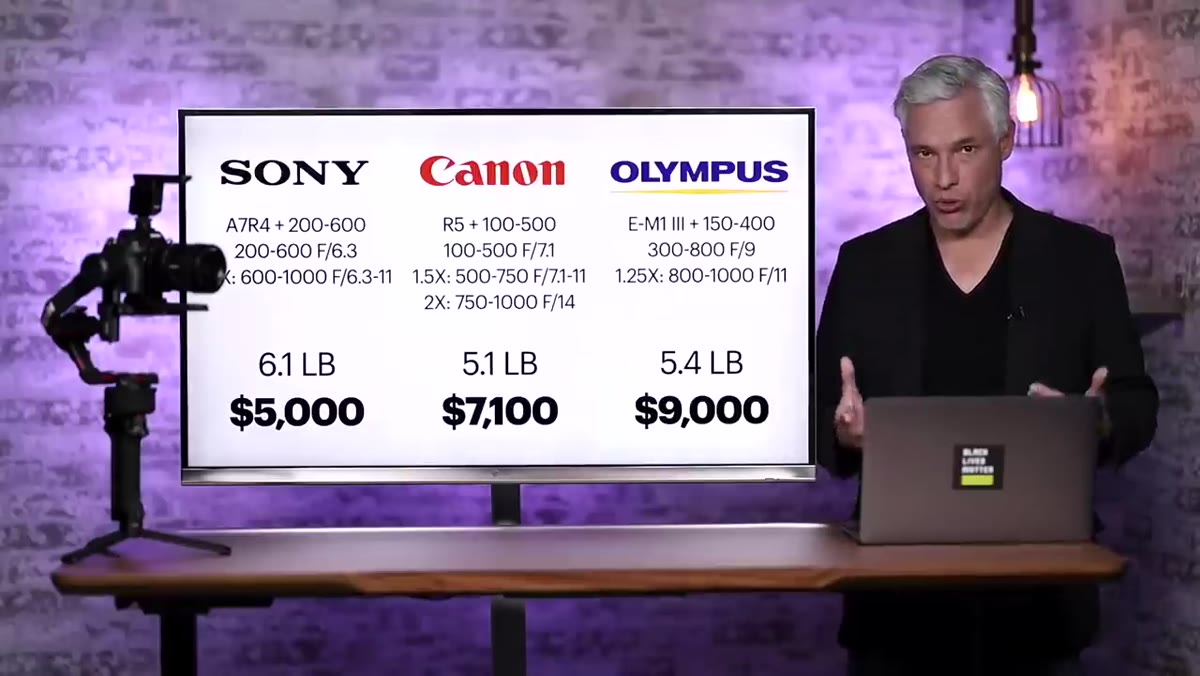
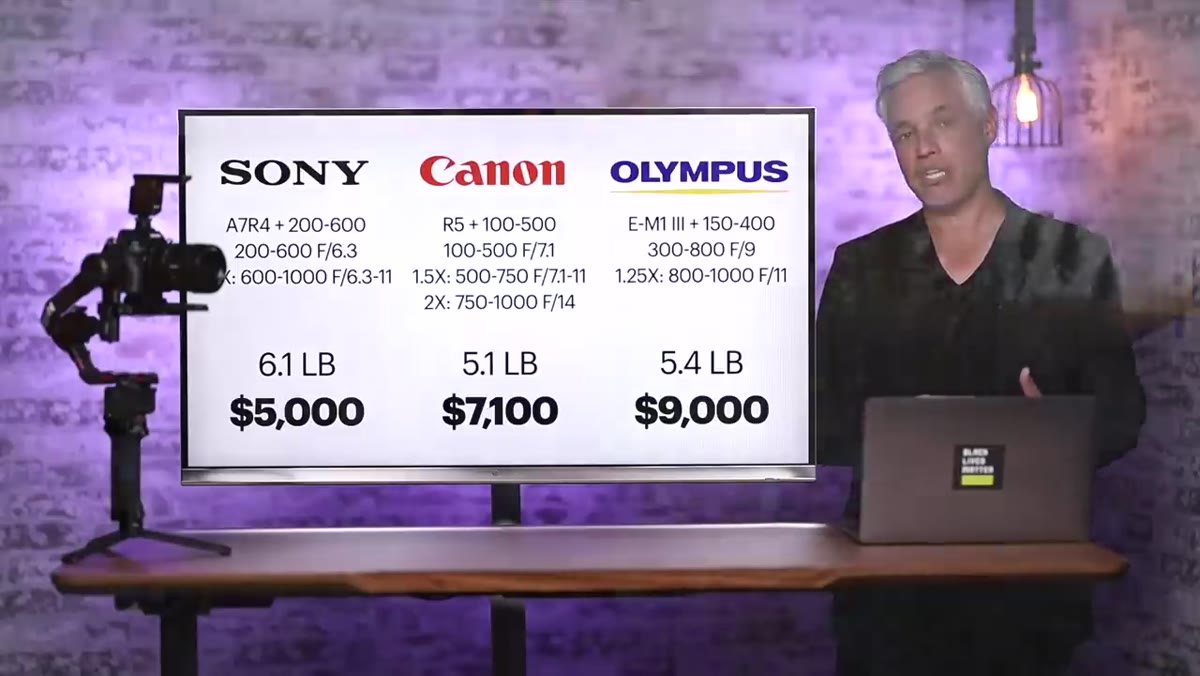
Once you’ve done the crop factor conversion, the Olympus 150-400 is no longer competing with the Canon 200-400. It’s competing with super-telephoto zooms like the Sony 200-600mm f/6.3 and the Canon RF 100-500mm. Those are the lenses a wildlife photographer would realistically cross-shop. And when you line them up that way, the value case collapses pretty quickly.
Side-by-side comparison graphic of Olympus vs Sony 200-600mm
Once you’ve done the crop factor conversion, the Olympus 150-400 is no longer competing with the Canon 200-400. It’s competing with super-telephoto zooms like the Sony 200-600mm f/6.3 and the Canon RF 100-500mm. Those are the lenses a wildlife photographer would realistically cross-shop. And when you line them up that way, the value case collapses pretty quickly.
The Sony 200-600 is a full-frame lens. In the overlapping range where both lenses operate, the Sony is pulling in roughly a stop more light and doing it on a sensor with significantly better high-ISO performance. For wildlife shooting, which almost always means low light, fast subjects, and needing every pixel you can get, that matters. The real comparison isn’t even close on value.
Step 4: Factor In the Sensor Ecosystem, Not Just the Lens
 Canon R5 and Sony a7R IV shown side by side with wildlife test shots
This is a point the video makes clearly: when Tony and Chelsea were out testing the Sony a7R IV and the Canon R5 with top wildlife glass, both cameras impressed them. High-resolution full-frame sensors give you something critical for wildlife work: cropping headroom. When your subject is 200 meters away and you’ve already maxed out your focal length, having 45 or 61 megapixels to crop into is the difference between a usable shot and a soft mess.
Canon R5 and Sony a7R IV shown side by side with wildlife test shots
This is a point the video makes clearly: when Tony and Chelsea were out testing the Sony a7R IV and the Canon R5 with top wildlife glass, both cameras impressed them. High-resolution full-frame sensors give you something critical for wildlife work: cropping headroom. When your subject is 200 meters away and you’ve already maxed out your focal length, having 45 or 61 megapixels to crop into is the difference between a usable shot and a soft mess.
A Micro Four Thirds sensor, even a good one, can’t match that cropping latitude. So the reach advantage the Olympus lens appears to offer on paper gets partially offset by the sensor underneath it. Evaluate lenses inside their ecosystem, not in isolation.
Step 5: Evaluate the Sony FX6 as a Dedicated Tool, Not a Swiss Army Knife
 Sony FX6 body shown on screen next to Sony a7S III
The second half of the video shifts to the Sony FX6, which Tony describes as a larger, more expensive sibling to the Sony a7S III. At first glance it seems redundant. The a7S III is already a phenomenal low-light video camera. But the FX6 is built around a different philosophy: it’s a dedicated cinema camera, not a hybrid stills-and-video body.
Sony FX6 body shown on screen next to Sony a7S III
The second half of the video shifts to the Sony FX6, which Tony describes as a larger, more expensive sibling to the Sony a7S III. At first glance it seems redundant. The a7S III is already a phenomenal low-light video camera. But the FX6 is built around a different philosophy: it’s a dedicated cinema camera, not a hybrid stills-and-video body.
What that means practically is better heat management for longer recording sessions, a body designed for rigging with proper mounting points and physical controls, and an internal ND filter system that shooters working solo in run-and-gun situations will genuinely appreciate. Tony’s point is that if video is your primary output and you’re billing clients for it, the FX6 justifies its price premium not through specs on a chart but through how it actually behaves on a real shoot.
Step 6: Price Premium Needs a Professional Justification
 Tony gesturing while explaining the FX6 price point
Both the Olympus lens and the Sony FX6 sit at price points that require serious justification. The difference is that the FX6 has one. If you’re doing paid video work where reliability and workflow efficiency translate directly into income, spending more on a camera that handles professional conditions better is rational. It’s an investment in your output quality and your time.
Tony gesturing while explaining the FX6 price point
Both the Olympus lens and the Sony FX6 sit at price points that require serious justification. The difference is that the FX6 has one. If you’re doing paid video work where reliability and workflow efficiency translate directly into income, spending more on a camera that handles professional conditions better is rational. It’s an investment in your output quality and your time.
The Olympus lens doesn’t have that justification. The wildlife photographers it’s aimed at would get better results spending less money on a full-frame Sony or Canon body paired with competitive glass. The lens isn’t bad. It’s just priced and positioned in a way that doesn’t serve its own target audience well.
What I’d Add From My Own Testing Experience
I’ve run this same comparison framework on budget glass for years, and the most important thing I’ve learned is that “value” is not the same as “cheap.” I’ve got a spreadsheet with dozens of lenses I’ve tested at various price points, and the pattern is consistent: the lenses that offer real value are the ones where the price reflects what the target shooter actually needs, not what sounds impressive in a product announcement. The Olympus 150-400 would be a more defensible purchase at $3,500. At $7,500, it’s asking you to pay a premium for a system that is, at this point in the market, fighting upstream against full-frame competition on almost every metric that matters to its intended users.
The Sony FX6 is the opposite situation. It’s expensive, yes. But for a working video professional, it’s priced appropriately for the problem it solves. That’s the distinction worth holding onto: not whether a product is expensive, but whether the price matches the problem it actually fixes for the person buying it.
The single most important takeaway from this tutorial is that spec comparisons only mean something after you’ve applied the right conversion math and matched the product to its real-world competitors. A lens that looks like a bargain next to a $11,000 Canon looks very different next to a $2,000 Sony. Always run the full comparison before you get excited. Watch the full tutorial on YouTube to see Tony and Chelsea walk through the comparisons with actual footage and visuals.
Comments (4)
Tried this technique this morning. Game changer for real.
Finally someone explains this in a way that actually makes sense.
Applied this to my portfolio shots and the improvement is noticeable.
Great breakdown. The step-by-step approach really helps.
Leave a Comment