
I have a spreadsheet. It has 47 lenses on it. And for a long time, the 35mm focal length column was a mess of compromises: sharp but slow, fast but soft wide open, affordable but plasticky. The 35mm is my go-to for environmental work because it keeps the subject grounded in the scene without the distortion you get from a wider angle. The problem is finding one that performs at f/1.4 without charging you first-party prime prices. That’s exactly why I paid close attention when JP Morgan over at The Slanted Lens put the Tamron 35mm f/1.4 SP through its paces in a real-world beach shoot with model Brianna White.
Watch the full tutorial on YouTube
In this The Slanted Lens tutorial, JP isn’t pixel-peeping charts in a studio. He’s shooting in harsh backlight, on rocks, near water, with a moving subject in a scarf mid-jump. That’s the kind of test that actually tells me something. Here’s what he found, broken down into the specific things you’d want to evaluate before spending money on this glass.
Step 1: Evaluate Wide-Open Sharpness First
 Close-up portrait shot at f/1.4 showing skin texture detail
The first thing JP checks is how the lens performs at its widest aperture, f/1.4, because that’s where most lenses fall apart. He shoots a saturated, well-lit portrait of Brianna and pulls it up at 100%. The verdict: tack sharp. Not “pretty good for f/1.4” sharp. Uncomfortably sharp, to use his word, in the sense that you can see every detail of the subject’s skin. If you’re shooting portraits wide open, you may actually want to soften in post, because the lens isn’t going to do it for you. That’s a quality problem, not a flaw.
Close-up portrait shot at f/1.4 showing skin texture detail
The first thing JP checks is how the lens performs at its widest aperture, f/1.4, because that’s where most lenses fall apart. He shoots a saturated, well-lit portrait of Brianna and pulls it up at 100%. The verdict: tack sharp. Not “pretty good for f/1.4” sharp. Uncomfortably sharp, to use his word, in the sense that you can see every detail of the subject’s skin. If you’re shooting portraits wide open, you may actually want to soften in post, because the lens isn’t going to do it for you. That’s a quality problem, not a flaw.
When you’re testing any fast prime for the first time, shoot your first frame at maximum aperture in decent light before you do anything else. That establishes your baseline. If it can’t nail focus and hold sharpness there, nothing else about the lens matters.
Step 2: Check the Vignette at f/1.4 and f/2.8
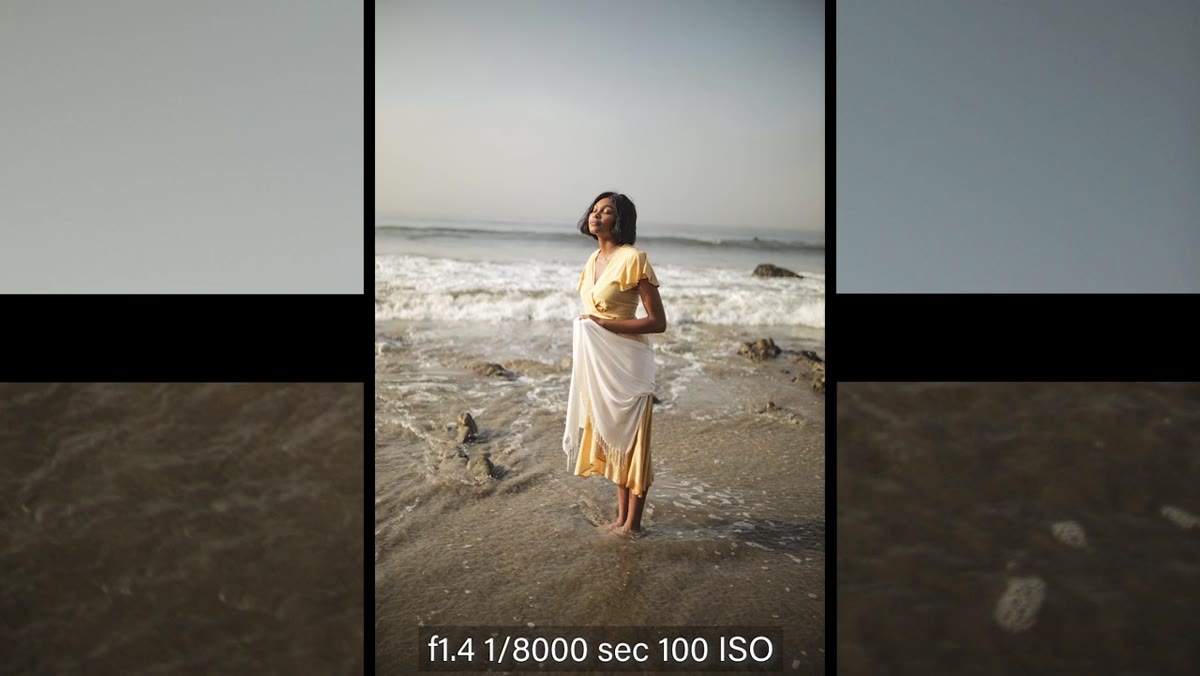 Full-frame image showing corner vignetting at f/1.4
JP notes there is a slight vignette in the corners at f/1.4. It’s not dramatic, and he makes a point that it didn’t bother him during the shoot because the overall image quality was strong enough that the corners still looked good. By f/2.8, the vignetting clears up completely. This is worth knowing because vignette at f/1.4 is extremely common in fast primes across all price points.
Full-frame image showing corner vignetting at f/1.4
JP notes there is a slight vignette in the corners at f/1.4. It’s not dramatic, and he makes a point that it didn’t bother him during the shoot because the overall image quality was strong enough that the corners still looked good. By f/2.8, the vignetting clears up completely. This is worth knowing because vignette at f/1.4 is extremely common in fast primes across all price points.
Whether this matters to you depends entirely on what you’re shooting. Environmental portraits? A subtle vignette can actually direct the eye toward your subject. Flat-lay product photography? Stop down to f/2.8 and it’s gone. Factor that into your workflow before you write off the lens over something a half-stop of aperture fixes.
Step 3: Stress-Test It in Backlight
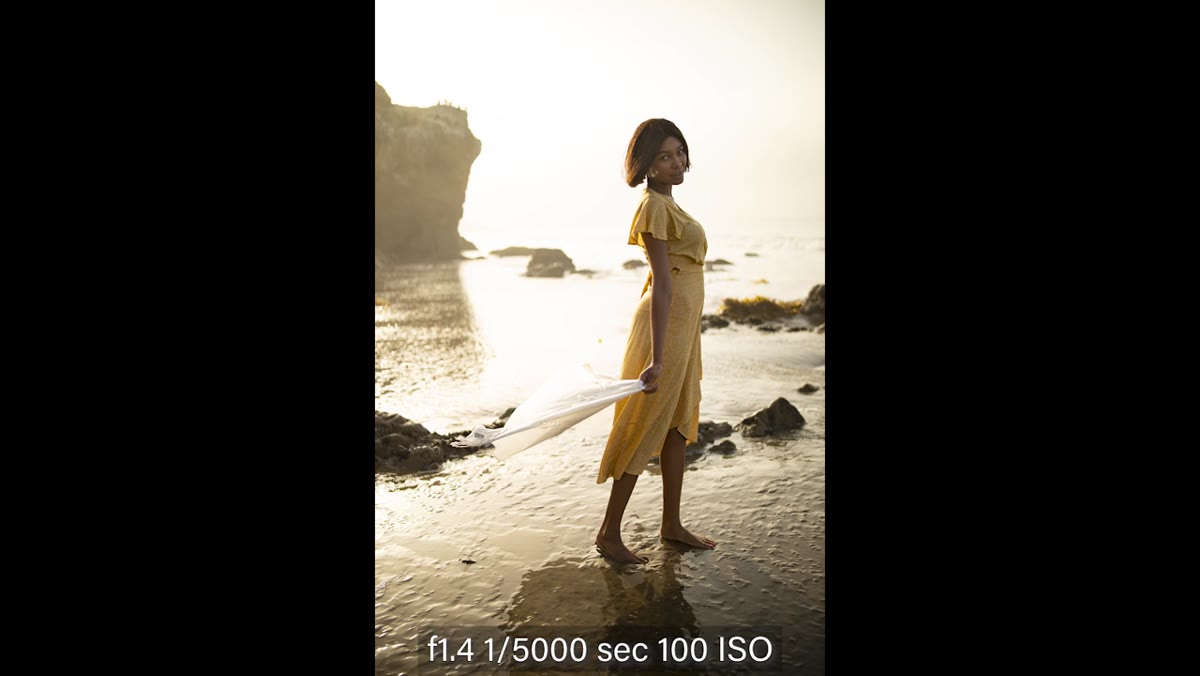 Backlit portrait showing lens flare and chromatic aberration control
This is the step I care most about in any lens review, because backlight is where cheap glass completely falls apart. JP puts Brianna directly in front of a strong light source and looks for chromatic aberration along the high-contrast edges in the background. At f/1.4 in a heavy backlight scenario, he finds the lines stay clean. There’s a trace of ghosting if you look hard, but for a lens at this price point performing wide open in that kind of light, it holds up impressively.
Backlit portrait showing lens flare and chromatic aberration control
This is the step I care most about in any lens review, because backlight is where cheap glass completely falls apart. JP puts Brianna directly in front of a strong light source and looks for chromatic aberration along the high-contrast edges in the background. At f/1.4 in a heavy backlight scenario, he finds the lines stay clean. There’s a trace of ghosting if you look hard, but for a lens at this price point performing wide open in that kind of light, it holds up impressively.
Chromatic aberration shows up as colored fringing, usually purple or green, along edges where bright and dark areas meet. If you want to check this yourself, shoot a backlit subject with a bright sky or light source behind them, then zoom into the edges in Lightroom. Any fringing you see at 100% in a backlit shot is the real story on how the lens handles contrast.
Step 4: Freeze Motion at High Shutter Speeds
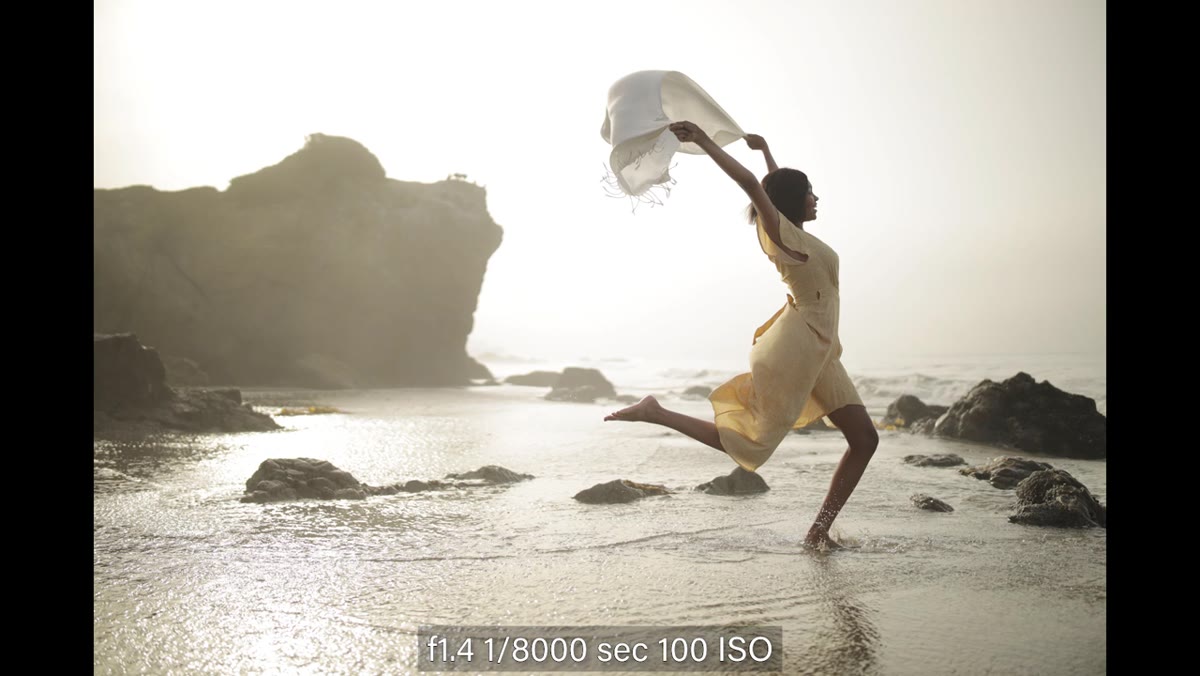 Model jumping mid-air with scarf frozen at 1/8000s
JP shoots Brianna jumping with a flowing scarf at 1/8000s, ISO 100, f/1.4. Every strand of fabric is frozen. The image is clean. This tells you two things: the lens focuses fast enough to capture unpredictable movement, and the optics hold together even at the combination of maximum aperture and extreme shutter speed. Not every lens behaves cleanly when you push both ends at once.
Model jumping mid-air with scarf frozen at 1/8000s
JP shoots Brianna jumping with a flowing scarf at 1/8000s, ISO 100, f/1.4. Every strand of fabric is frozen. The image is clean. This tells you two things: the lens focuses fast enough to capture unpredictable movement, and the optics hold together even at the combination of maximum aperture and extreme shutter speed. Not every lens behaves cleanly when you push both ends at once.
If your camera tops out at 1/4000s, that’s still enough to freeze most real-world motion in bright daylight. The point here isn’t the specific shutter speed. It’s that the lens didn’t introduce any softness, flare, or focus failure under pressure.
Step 5: Add Off-Camera Flash for Backlit Subjects
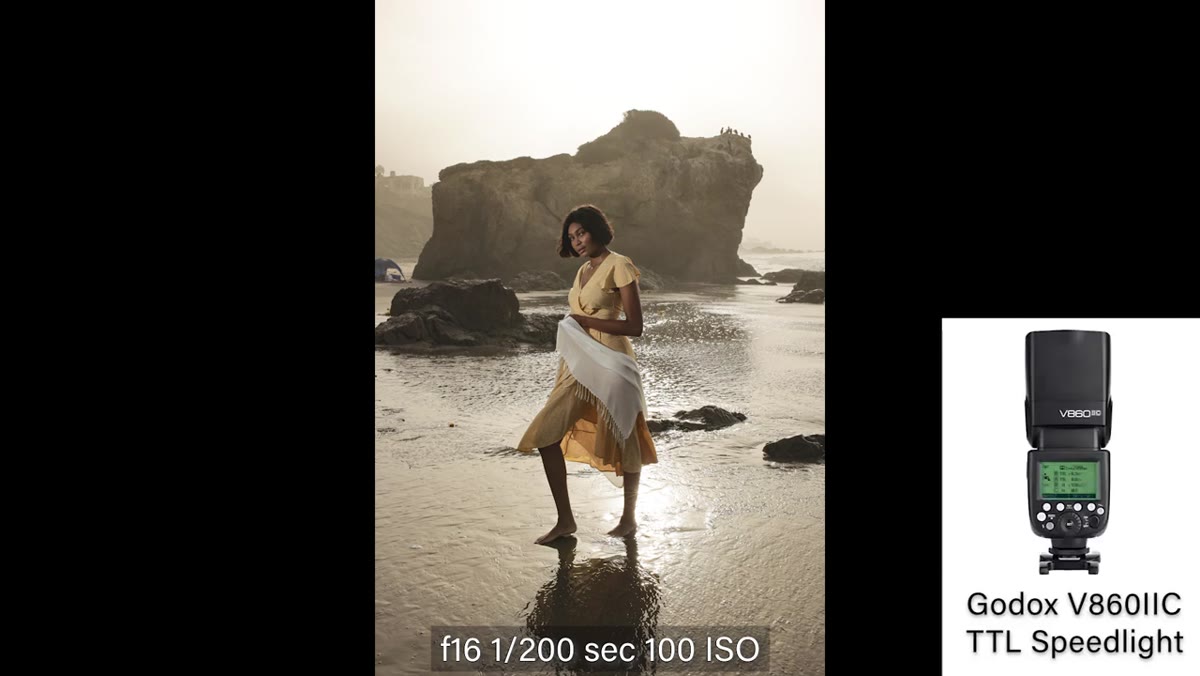 Deep backlit shot with Godox V862 fill light on subject’s face
When the backlight gets heavy enough that the subject’s face goes dark, JP pulls out a Godox V862 flash to add fill. He drops into a deeper depth of field for these shots and puts just enough light on Brianna’s face to balance the exposure. The results look polished without looking lit, which is the whole point of fill flash in environmental work.
Deep backlit shot with Godox V862 fill light on subject’s face
When the backlight gets heavy enough that the subject’s face goes dark, JP pulls out a Godox V862 flash to add fill. He drops into a deeper depth of field for these shots and puts just enough light on Brianna’s face to balance the exposure. The results look polished without looking lit, which is the whole point of fill flash in environmental work.
This is a technique that scales down to any budget flash. You don’t need expensive studio strobes for outdoor portrait work. A single speedlight with a cheap diffuser, placed slightly off-axis from the subject, does most of what you need. The Tamron’s clean backlight performance means the flash is doing a small correction job, not a rescue operation.
Step 6: Assess Edge-to-Edge Sharpness on a Real Scene
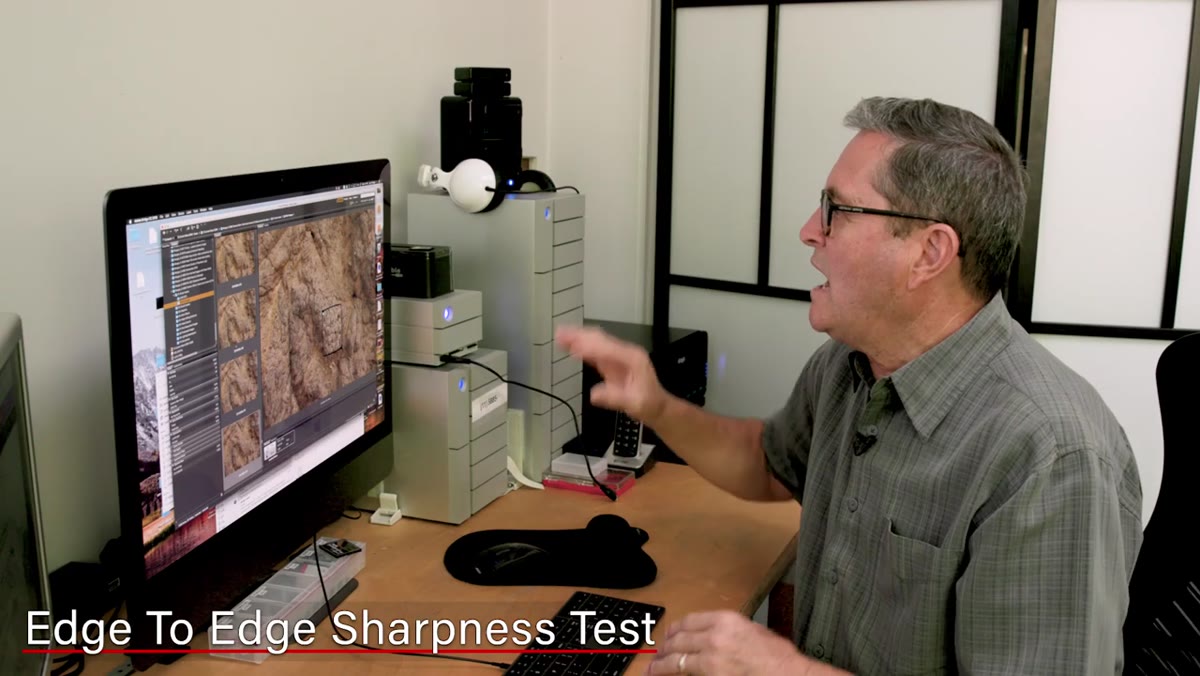 Wide shot of rocky beach testing edge sharpness across frame
JP turns the lens away from the subject entirely and shoots the rock formations at the beach, checking whether sharpness holds into the corners of the frame. He’s upfront that rocks on a beach aren’t a controlled resolution chart, but even in that informal test, the corners are holding up. For an environmental lens, this is the practical test that matters most. You want your background to look intentional, not like it was an afterthought.
Wide shot of rocky beach testing edge sharpness across frame
JP turns the lens away from the subject entirely and shoots the rock formations at the beach, checking whether sharpness holds into the corners of the frame. He’s upfront that rocks on a beach aren’t a controlled resolution chart, but even in that informal test, the corners are holding up. For an environmental lens, this is the practical test that matters most. You want your background to look intentional, not like it was an afterthought.
Step 7: Evaluate the Bokeh Quality
 Close-up bokeh with twinkle lights showing circular nine-blade rendering
The Tamron uses a nine-blade circular diaphragm, and JP shoots it wide open against string lights to show the bokeh rendering. The out-of-focus highlights are round, smooth, and consistent across the frame. As he pulls focus slightly, the bokeh circles get larger and more distinct without becoming polygon-shaped or harsh at the edges.
Close-up bokeh with twinkle lights showing circular nine-blade rendering
The Tamron uses a nine-blade circular diaphragm, and JP shoots it wide open against string lights to show the bokeh rendering. The out-of-focus highlights are round, smooth, and consistent across the frame. As he pulls focus slightly, the bokeh circles get larger and more distinct without becoming polygon-shaped or harsh at the edges.
Bokeh quality at this price point is not a given. Nine rounded blades is the number you want on the spec sheet. Fewer blades or straight-edged blades give you hexagonal or octagonal highlights, which look noticeably mechanical in photos that feature a lot of out-of-focus light sources.
What I’d Add From My Own Testing
JP’s real-world methodology is exactly how I evaluate lenses too, but there’s one thing I’d layer on top: shoot the same scene with your current lens before you switch. I’ve saved myself from plenty of “upgrades” by doing a side-by-side test and realizing the difference was smaller than I expected. If you can rent the Tamron 35mm f/1.4 for a weekend before buying, do it. Put it against whatever you’re shooting with now. The gap may convince you to buy, or it may tell you your current glass has more left in it than you thought.
The single most important thing this tutorial demonstrates is that “environmental” lens performance is about more than focal length. It’s about backlight resistance, wide-open sharpness, and how the lens handles the chaos of a real shoot rather than a lab setup. The Tamron 35mm f/1.4 SP earns its place on the short list. Watch the full tutorial on YouTube to see the actual image comparisons and the full giveaway details from JP and The Slanted Lens.
Comments (2)
The tip about tamron 35mm f14 sp review why was the missing piece for me. Thank you.
Excellent tutorial. I'd add that from a landscape standpoint, this technique is incredibly versatile.
Leave a Comment