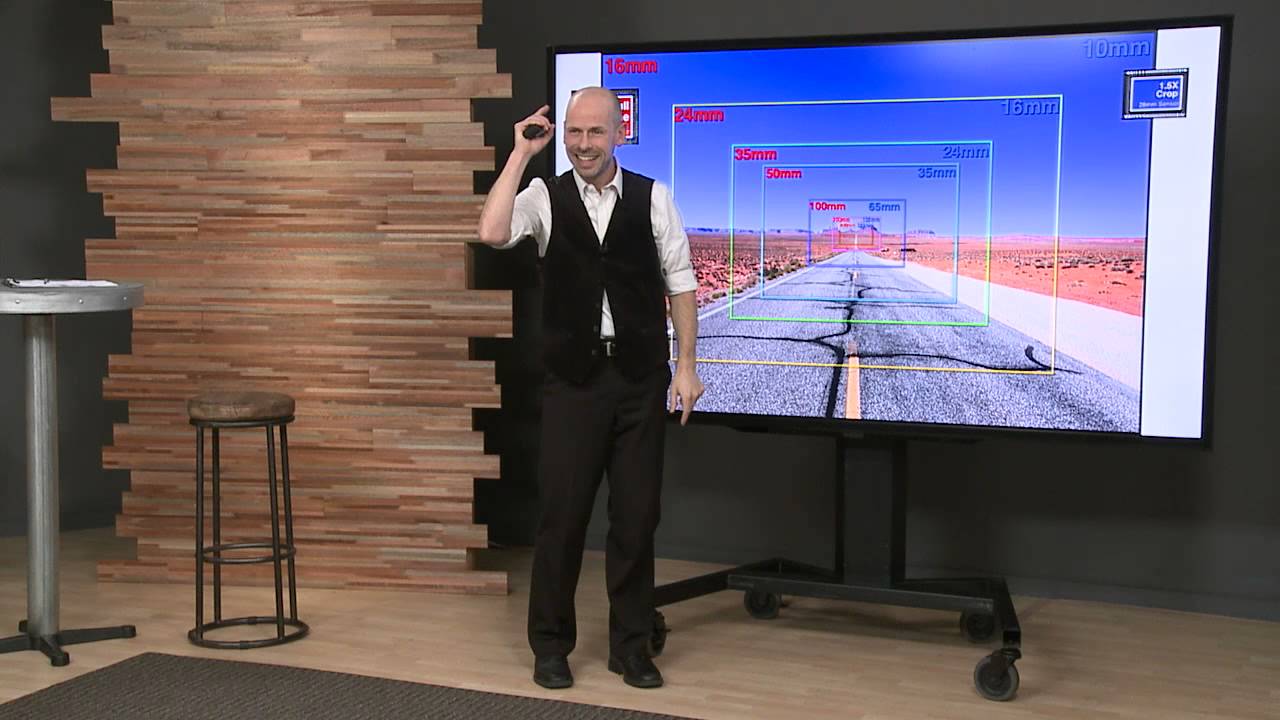
Most photographers buy lenses based on specs and reviews. I used to do the same thing, cross-referencing MTF charts and pixel-peeping sample images before I’d even thought about what I actually needed the lens to do. What changed my thinking wasn’t a spec sheet. It was watching a photographer stand in the same spot and shoot the same scene across a full range of focal lengths, from ultra-wide to 400mm telephoto, so you could see exactly how the image transforms with each swap. In this CreativeLive tutorial, Watch the full tutorial on YouTube, John Greengo does exactly that from a single roadside location in Arizona, and the results are genuinely eye-opening.
The reason this tutorial stuck with me is because it solves a problem I’ve run into over and over when helping newer photographers pick their second or third lens: they can’t visualize what a focal length will actually give them. They hear “24mm is wide” but that doesn’t mean anything until you see it side by side with 16mm, 35mm, and 50mm from the same position. Greengo’s comparison removes the guesswork entirely. Here’s how to walk through it yourself and what to take away at each stage.
Step 1: Anchor Yourself at a Repeatable Location
 Photographer standing in middle of Arizona desert road
Before any focal length comparison is useful, you need a fixed shooting position. Greengo chose a straight desert road with strong leading lines and a distant hillside, both of which become critical reference points later. The key isn’t the scenery itself but the structure: a strong foreground element, a clear midground, and a distant background. That layered depth is what makes the differences between focal lengths visible and meaningful.
Photographer standing in middle of Arizona desert road
Before any focal length comparison is useful, you need a fixed shooting position. Greengo chose a straight desert road with strong leading lines and a distant hillside, both of which become critical reference points later. The key isn’t the scenery itself but the structure: a strong foreground element, a clear midground, and a distant background. That layered depth is what makes the differences between focal lengths visible and meaningful.
Pick a similar spot when you try this yourself. A straight path, a row of buildings, a pier over water. Stand in one spot and commit to it. If you move forward or backward between shots, you’re no longer comparing focal lengths. You’re comparing different perspectives, which is a different lesson entirely.
Step 2: Start at 50mm to Set Your Baseline
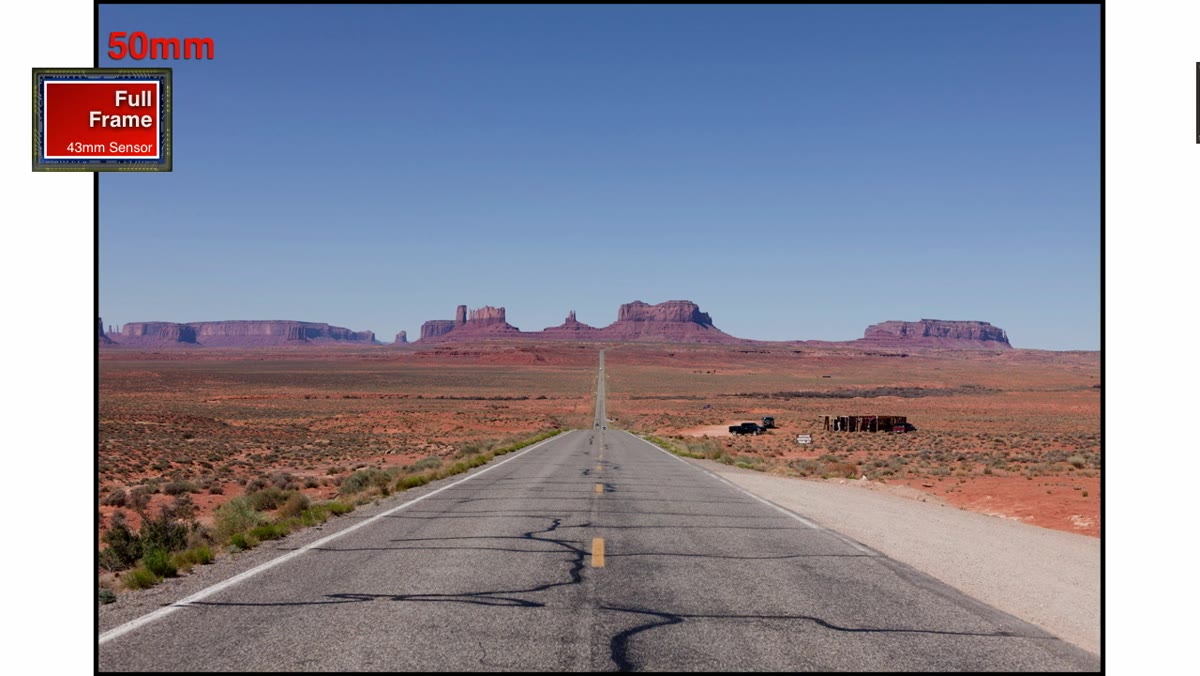 Scene framed through a 50mm lens on full-frame camera
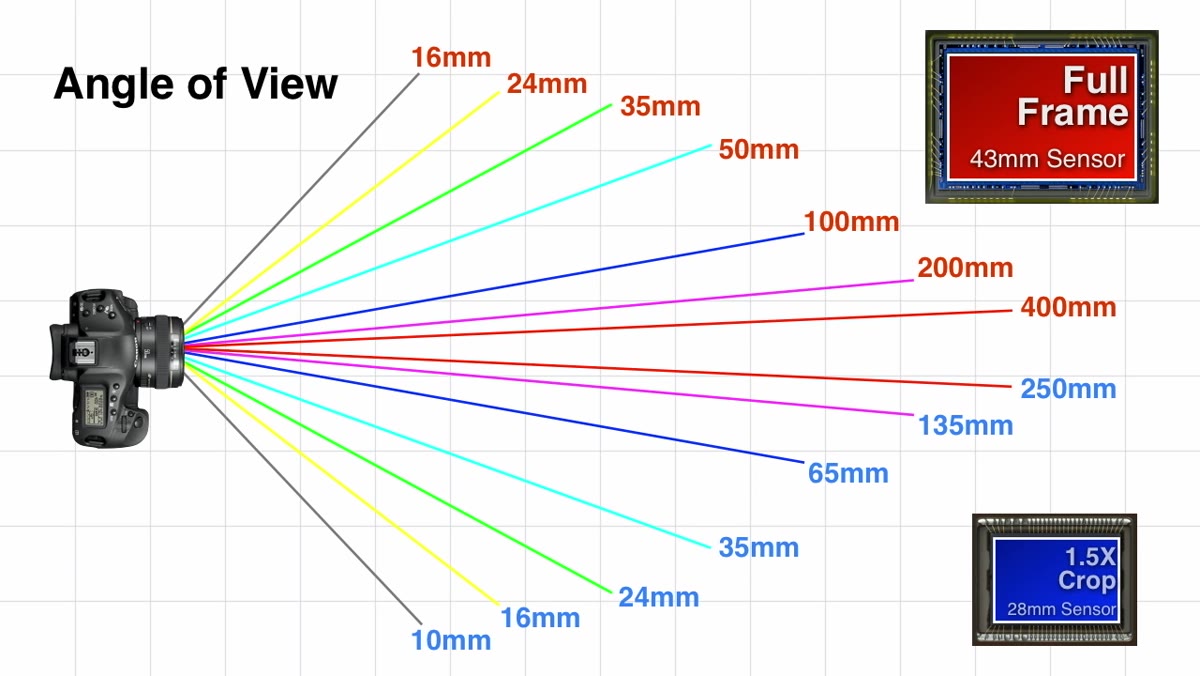
Greengo starts at 50mm on a full-frame camera because it closely approximates what the human eye sees in terms of angle of view. If you’re shooting crop sensor, dial in 35mm to get roughly the same field of view. This is your neutral reference point. Nothing is exaggerated yet. The foreground, midground, and background all feel proportional.
Scene framed through a 50mm lens on full-frame camera
Greengo starts at 50mm on a full-frame camera because it closely approximates what the human eye sees in terms of angle of view. If you’re shooting crop sensor, dial in 35mm to get roughly the same field of view. This is your neutral reference point. Nothing is exaggerated yet. The foreground, midground, and background all feel proportional.
The practical reason to start here is that it gives you a mental anchor before you start stretching the scene in either direction. Every other focal length you try will feel like a deliberate departure from this natural baseline, which is exactly how you want to think about lens choice when you’re planning a shot.
Step 3: Go Ultra-Wide and Watch the Foreground Dominate
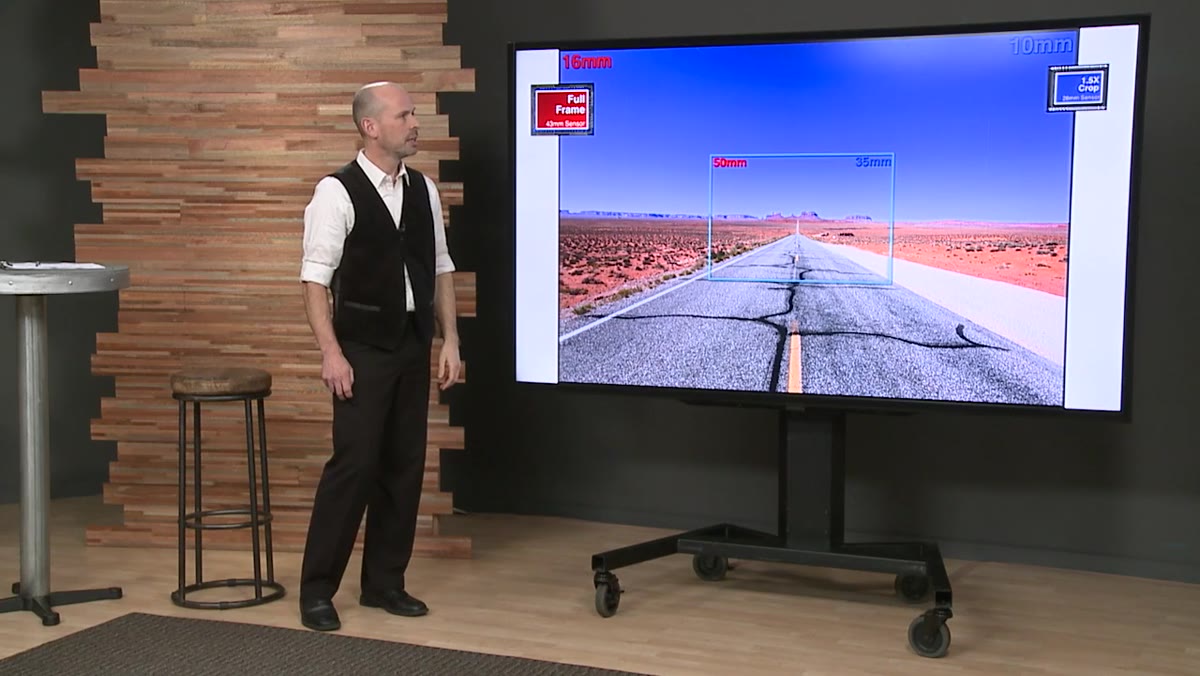 Ultra-wide 16mm view of road with exaggerated foreground lines
At 16mm, the scene shifts dramatically. The road markings closest to the camera balloon in size and take up a substantial portion of the frame, while the background compresses and recedes. Greengo points out how the near yellow line spans roughly a third of the vertical frame, while the far line barely registers as a sliver.
Ultra-wide 16mm view of road with exaggerated foreground lines
At 16mm, the scene shifts dramatically. The road markings closest to the camera balloon in size and take up a substantial portion of the frame, while the background compresses and recedes. Greengo points out how the near yellow line spans roughly a third of the vertical frame, while the far line barely registers as a sliver.
This is the defining characteristic of ultra-wide lenses: they don’t just show more of the scene, they redistribute visual weight toward whatever is closest to the camera. That’s enormously useful for environmental portraits, landscape shots where you want a dramatic sky-to-ground ratio, or any composition where you’re deliberately pulling the viewer’s eye into the frame from the foreground. If your foreground is boring, an ultra-wide will punish you for it.
Step 4: Work Through the Mid-Range Focal Lengths
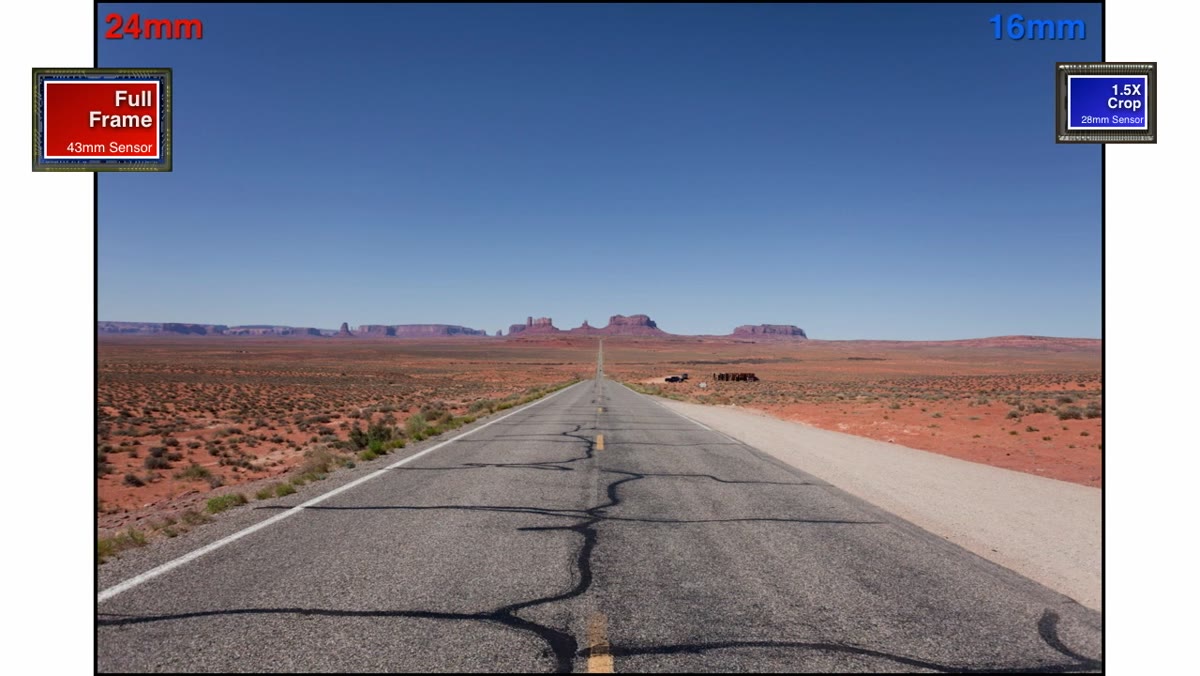 Scene progressively tighter at 24mm and 35mm focal lengths
Moving from 16mm through 24mm and then to 35mm, the foreground emphasis gradually normalizes. At 24mm, there’s still a noticeable wide-angle feel, but the foreground-to-background relationship is less extreme. Greengo mentions 24mm specifically as a focal length he returns to often, and I’d agree. It gives you genuine width without the distortion that makes ultra-wides tricky to use in tight spaces or with human subjects.
Scene progressively tighter at 24mm and 35mm focal lengths
Moving from 16mm through 24mm and then to 35mm, the foreground emphasis gradually normalizes. At 24mm, there’s still a noticeable wide-angle feel, but the foreground-to-background relationship is less extreme. Greengo mentions 24mm specifically as a focal length he returns to often, and I’d agree. It gives you genuine width without the distortion that makes ultra-wides tricky to use in tight spaces or with human subjects.
At 35mm, you’re in what some photographers call “wide normal” territory. It’s close enough to the 43mm diagonal measurement that technically represents a “true” normal lens that the rendering feels natural, but it still gives you more context in the frame than a 50mm. For street photography, documentary work, or run-and-gun shooting where you want a wider view but don’t want the scene to feel distorted, 35mm is often the most versatile single focal length you can own.
Step 5: Enter Telephoto Range and See Compression Kick In
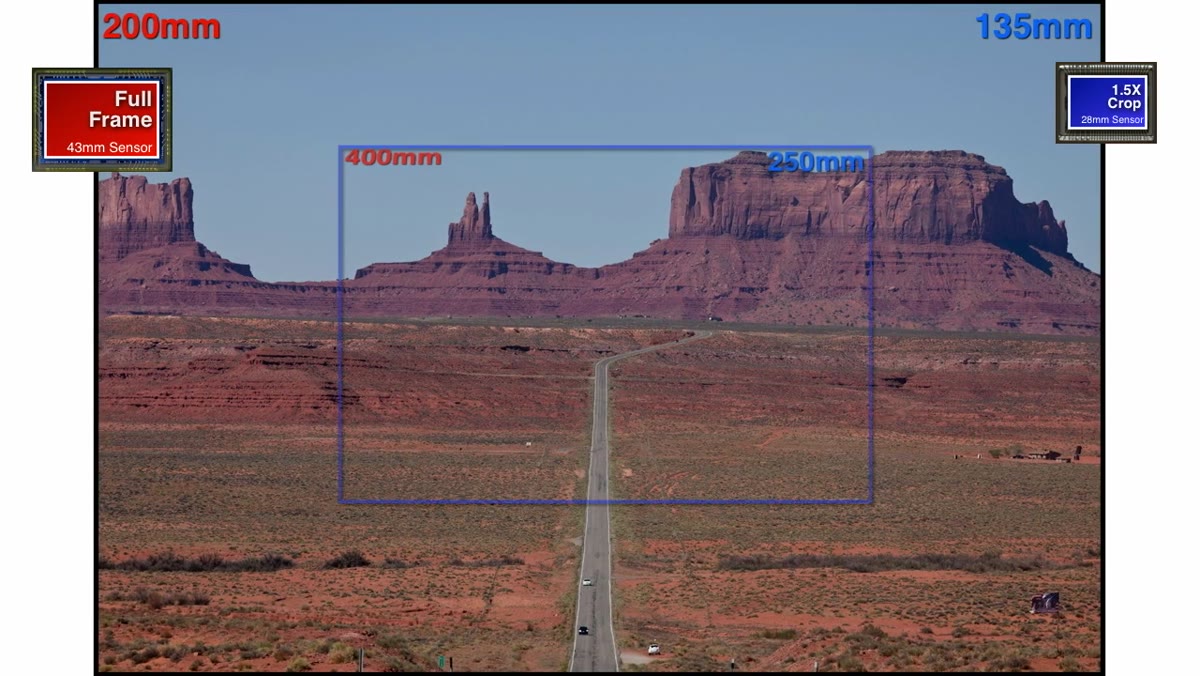 200mm view showing road and hillside compressed together
Once Greengo pushes into telephoto territory, the compression effect becomes obvious. At 200mm, the cars on the road appear to sit almost against the hillside in the background, even though in reality they could be kilometers apart. At 400mm, that stacking effect is even more pronounced.
200mm view showing road and hillside compressed together
Once Greengo pushes into telephoto territory, the compression effect becomes obvious. At 200mm, the cars on the road appear to sit almost against the hillside in the background, even though in reality they could be kilometers apart. At 400mm, that stacking effect is even more pronounced.
This is the concept photographers call telephoto compression, and it’s worth understanding clearly: it’s not magic produced by the lens itself. It’s a function of shooting distance. When you’re far from your subject, everything in the frame, both near and far, looks proportionally closer together. Greengo makes the important point that this effect technically exists at all focal lengths. It’s just so subtle at wide angles that it reads as normal perspective. Understanding this changes how you think about telephoto lenses. You’re not just zooming in. You’re collapsing the apparent distance between elements in your frame.
Step 6: Practice Visualizing the Frame Before You Raise the Camera
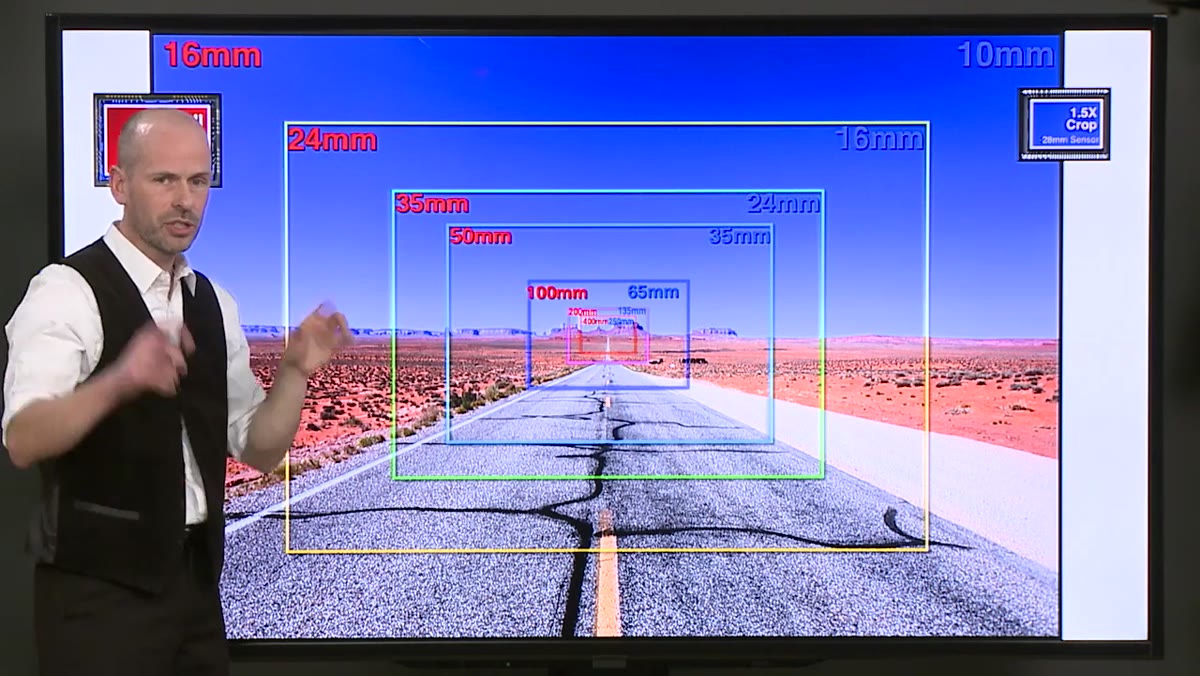 Instructor framing shots mentally before choosing a lens
The final takeaway from Greengo’s walkthrough is a habit, not a setting. He talks about developing the ability to look at a scene and pre-visualize which focal length serves it, the way a film director blocks out a shot before calling action. This sounds abstract, but it becomes concrete fast if you practice intentionally.
Instructor framing shots mentally before choosing a lens
The final takeaway from Greengo’s walkthrough is a habit, not a setting. He talks about developing the ability to look at a scene and pre-visualize which focal length serves it, the way a film director blocks out a shot before calling action. This sounds abstract, but it becomes concrete fast if you practice intentionally.
The method: go out with one lens and spend a full session asking yourself, before every shot, whether you’d want to be wider or longer. You won’t always be able to act on it, but the habit of questioning your framing before you shoot trains your eye faster than any amount of gear research.
What I’d Add: The Budget Case for This Exercise
I’ve run this same kind of comparison using cheap third-party primes, sub-$150 zooms, and even kit lenses, and the focal length behavior is identical to what Greengo shows with professional glass. The optical rendering changes with lens quality. The compositional logic does not. If you’re trying to decide whether a 24mm or a 35mm prime makes more sense as your next purchase, doing this exercise with whatever you already own will tell you more than any review. Stand somewhere with layered depth, shoot across the range, and look at what your eye keeps going back to. That’s the lens you want.
The single most transferable idea from this tutorial is that focal length isn’t about how much you can fit in the frame. It’s about how distance relationships within the frame are rendered, and once you internalize that, every lens choice you make will be more intentional. Watch the full tutorial on YouTube to see Greengo’s side-by-side comparisons in motion. The visual difference between focal lengths is genuinely hard to describe in text, and seeing the same road shift from sprawling to compressed across one continuous sequence makes the lesson click in a way that sticks.
Comments
Leave a Comment