
Wide angle lenses are the ones that separate photographers who “get it” from photographers who just think they do. I spent a solid year shooting wide and wondering why my images looked flat, boring, and weirdly empty despite having more of the scene in frame. More isn’t always more. The problem, almost every time, was the foreground.
I was looking for something concrete to fix this, and I landed on a tutorial from Nigel Danson that clicked immediately. Watch the full tutorial on YouTube before or after reading this, because Danson shoots in the field and the visual examples do a lot of heavy lifting. He’s out in England’s Lake District with a brand new Hasselblad XCD 20-35E lens, but here’s the thing: the techniques he’s demonstrating apply whether you’re shooting on a $200 kit zoom or a medium format system that costs more than my car. The foreground problem is the foreground problem.
What I’m breaking down here is the actual process, step by step, so you can use it on your next shoot without needing to scrub through the video mid-hike.
Step 1: Recognize When a Scene Isn’t a Wide Angle Shot
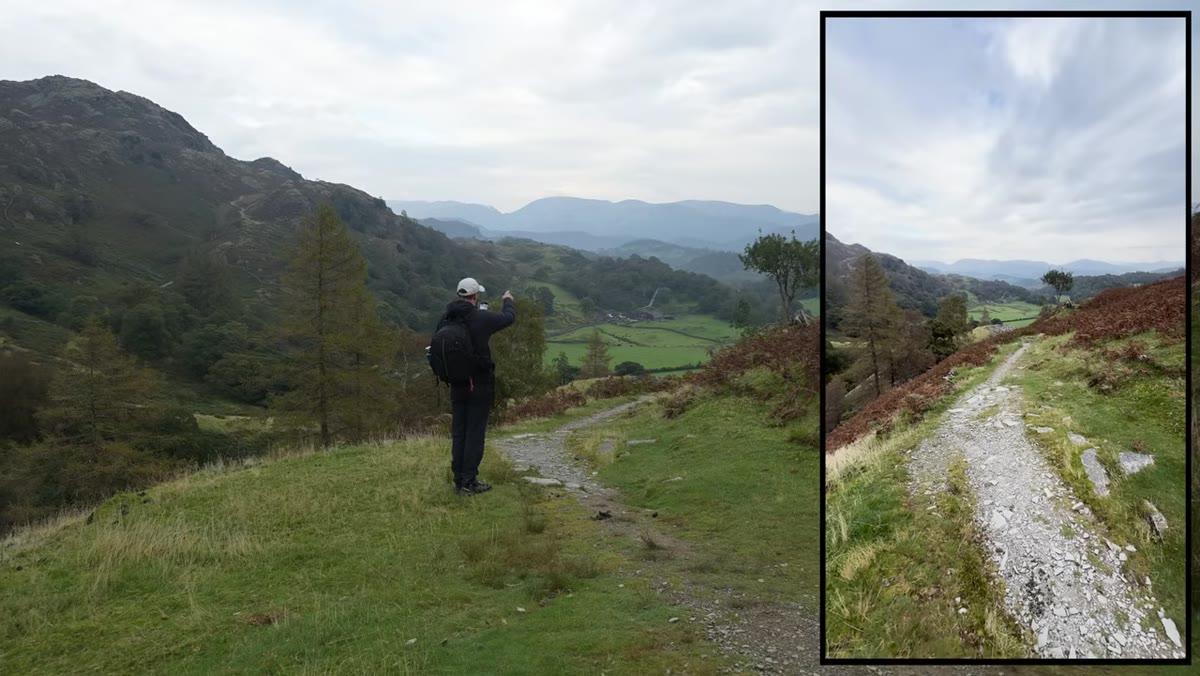
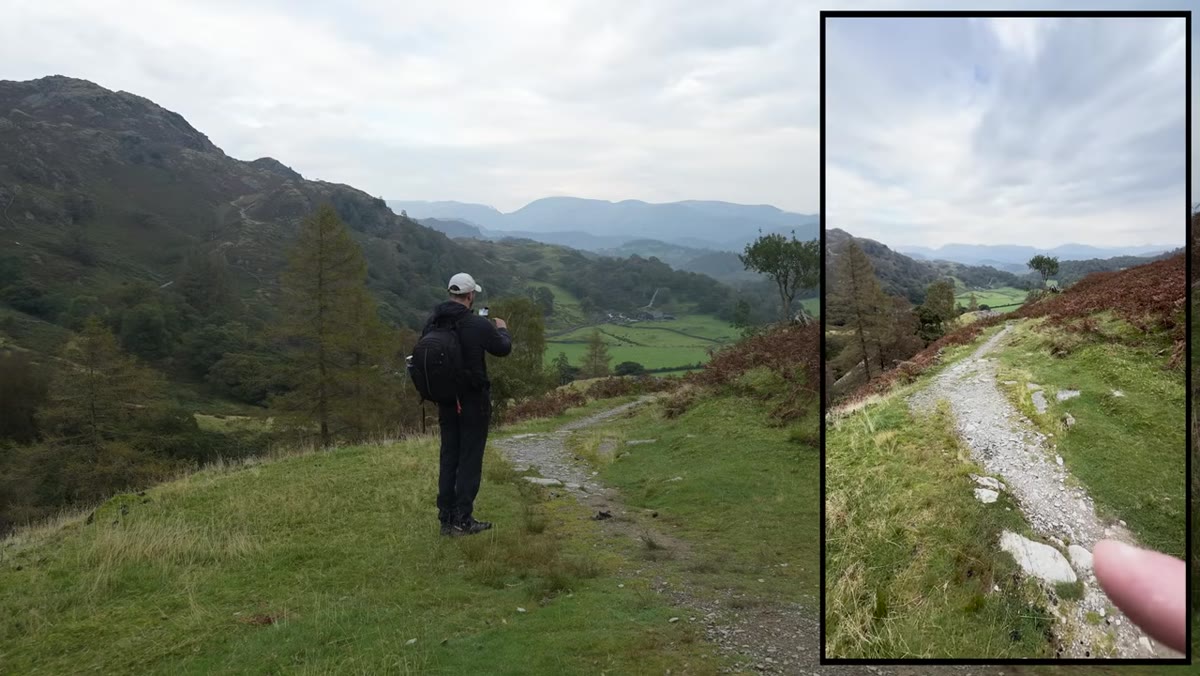
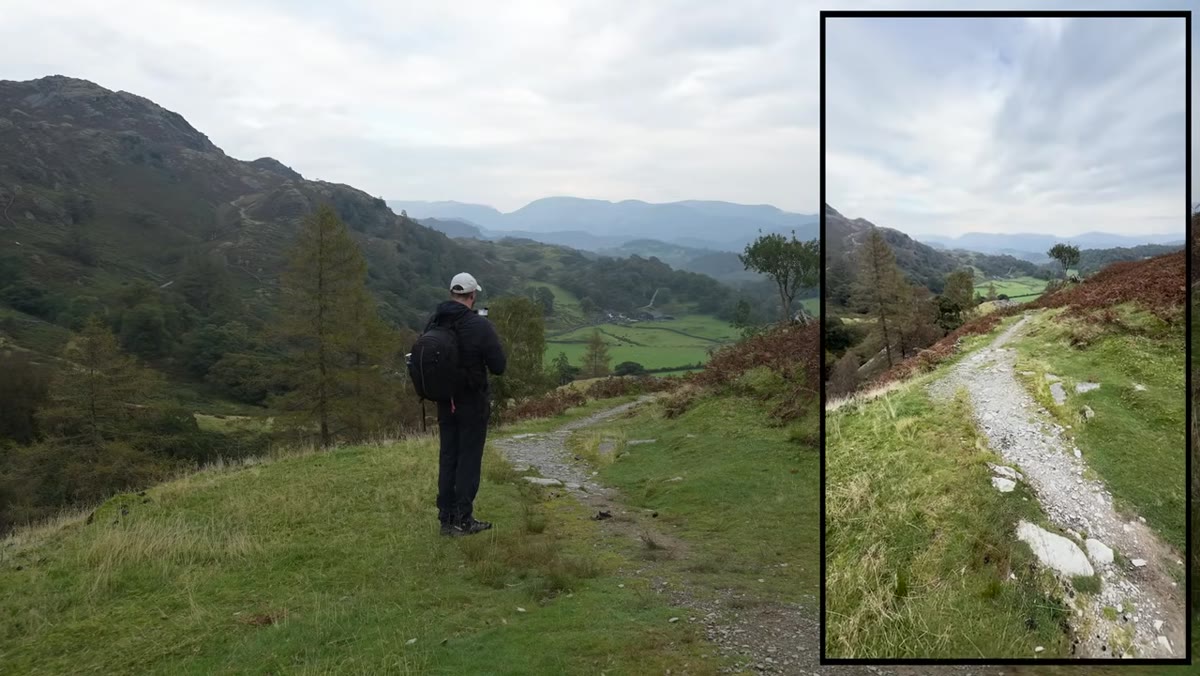
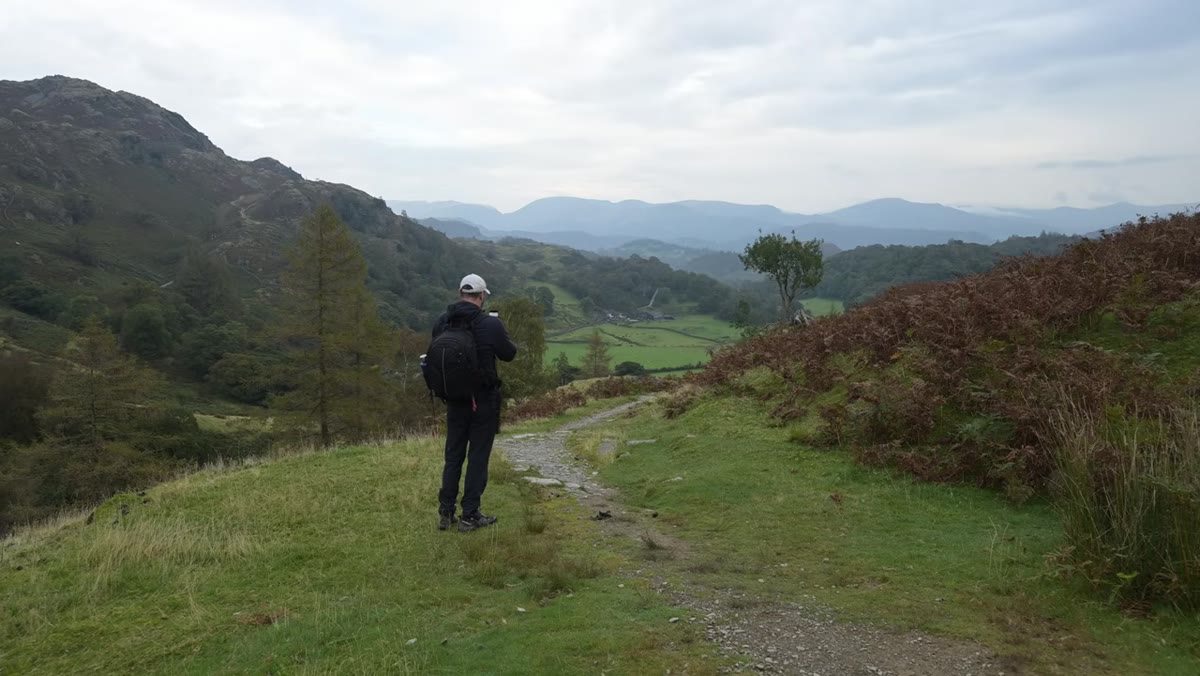 Danson framing a path and tree at 24mm, evaluating the scene
Not every landscape deserves to be shot wide. This sounds obvious but it’s the mistake most people make first. Danson walks up to a scene with a tree, a path, and some rocks and immediately starts testing focal lengths on his camera’s live view. At 24mm, the shot looks decent. The moment he pushes wider, the interesting elements collapse into a narrow slice of the middle third and the foreground becomes a flat, empty void.
Danson framing a path and tree at 24mm, evaluating the scene
Not every landscape deserves to be shot wide. This sounds obvious but it’s the mistake most people make first. Danson walks up to a scene with a tree, a path, and some rocks and immediately starts testing focal lengths on his camera’s live view. At 24mm, the shot looks decent. The moment he pushes wider, the interesting elements collapse into a narrow slice of the middle third and the foreground becomes a flat, empty void.
The fix isn’t always to go wider. Sometimes the right call is to recognize that a scene is a telephoto shot or a standard composition, not a wide angle one. Before you drop to your knees and jam the lens toward the ground, ask: is there anything actually interesting within four feet of me? If the answer is no, either move or change your approach.
Step 2: Move Your Feet Before You Change Your Settings
 Danson stepping forward toward rocks to evaluate foreground options
Danson’s immediate instinct when the foreground reads as empty is to physically move toward the rocks he spotted in the scene. This is the part that most tutorials gloss over because it’s not glamorous. The truth is that wide angle foreground work is mostly about repositioning, not exposure settings.
Danson stepping forward toward rocks to evaluate foreground options
Danson’s immediate instinct when the foreground reads as empty is to physically move toward the rocks he spotted in the scene. This is the part that most tutorials gloss over because it’s not glamorous. The truth is that wide angle foreground work is mostly about repositioning, not exposure settings.
Wide angle lenses exaggerate depth. Objects close to the lens look dramatically larger relative to the background. That’s the whole tool. So when the foreground is boring, the solution is usually to find something worth magnifying and get close to it, not to fiddle with aperture or try to fix it in post. Walk around. Crouch. Look at what’s actually on the ground in front of you before you ever raise the camera.
Step 3: Identify Foreground Anchors (Texture, Shape, Leading Lines)
 Wide angle view showing rocks providing foreground interest in the frame
Once you’re moving around, you need to know what you’re looking for. Danson consistently gravitates toward three types of foreground elements: texture (like pebbled riverbeds or mossy rock faces), distinct shapes (a single interesting boulder, a cluster of reeds), and leading lines (paths, streams, cracks in rock). These work because wide angle lenses stretch perspective and a strong foreground element pulls the viewer’s eye into the frame before it lands on the subject.
Wide angle view showing rocks providing foreground interest in the frame
Once you’re moving around, you need to know what you’re looking for. Danson consistently gravitates toward three types of foreground elements: texture (like pebbled riverbeds or mossy rock faces), distinct shapes (a single interesting boulder, a cluster of reeds), and leading lines (paths, streams, cracks in rock). These work because wide angle lenses stretch perspective and a strong foreground element pulls the viewer’s eye into the frame before it lands on the subject.
Avoid large, undifferentiated surfaces as your foreground. A flat patch of grass or a featureless muddy bank isn’t a foreground anchor, it’s a distraction. You want something with visual weight and variety. If you find yourself thinking “I’ll crop that part out later,” that’s a sign the foreground isn’t working.
Step 4: Get Low and Close to Maximize the Wide Angle Effect
 Camera positioned low near rocks to emphasize foreground depth
This is where the technique gets physical. Danson positions the camera close to the foreground element and low, which is standard wide angle practice but worth being specific about. The closer and lower you get, the more dramatic the size relationship between foreground and background becomes. That tension is what makes wide angle landscape shots feel immersive rather than just wide.
Camera positioned low near rocks to emphasize foreground depth
This is where the technique gets physical. Danson positions the camera close to the foreground element and low, which is standard wide angle practice but worth being specific about. The closer and lower you get, the more dramatic the size relationship between foreground and background becomes. That tension is what makes wide angle landscape shots feel immersive rather than just wide.
Practically speaking: set your tripod low, use your camera’s flip screen if it has one, and don’t be afraid to get your jacket dirty. The sweet spot is usually somewhere between six inches and two feet from your foreground subject. At that distance, even a modest rock or tuft of grass becomes a compositional anchor that commands the bottom third of the frame.
Step 5: Account for Depth of Field Across Formats
 Danson discussing depth of field differences between medium format and full frame
Danson specifically brings up one technical wrinkle worth understanding: medium format cameras like his Hasselblad don’t deliver the same depth of field as full frame or APS-C cameras at equivalent fields of view. To get the same angle of view as a full frame 16mm lens, you’re shooting at 20mm on medium format, but the sensor size means your depth of field is shallower at any given aperture.
Danson discussing depth of field differences between medium format and full frame
Danson specifically brings up one technical wrinkle worth understanding: medium format cameras like his Hasselblad don’t deliver the same depth of field as full frame or APS-C cameras at equivalent fields of view. To get the same angle of view as a full frame 16mm lens, you’re shooting at 20mm on medium format, but the sensor size means your depth of field is shallower at any given aperture.
For most of us shooting full frame or APS-C, this is actually good news. You’ll have an easier time getting both the close foreground element and the distant background in focus at f/8 or f/11. On medium format, focus stacking starts to become more necessary. Whatever system you’re on, stop down more than you think you need to when you’re within arm’s reach of your foreground. Wide angle lenses are more forgiving about this than telephotos, but they’re not magic.
Step 6: Evaluate the Full Frame Before You Shoot
 Danson reviewing composition in live view before committing to the shot
Before you release the shutter, Danson does something a lot of photographers skip: he actually looks at the whole frame, not just the foreground he worked to find. Sky, midground, foreground and the relationships between all three. A killer foreground paired with a blown-out or empty sky doesn’t make a strong image. The wide angle frame has to work as a complete composition.
Danson reviewing composition in live view before committing to the shot
Before you release the shutter, Danson does something a lot of photographers skip: he actually looks at the whole frame, not just the foreground he worked to find. Sky, midground, foreground and the relationships between all three. A killer foreground paired with a blown-out or empty sky doesn’t make a strong image. The wide angle frame has to work as a complete composition.
Check your corners. Wide angle lenses, especially zooms, often show distortion or soft edges at their widest focal lengths. Make sure the elements at the edges of the frame are adding to the image, not distracting from it. If the sky is flat and grey with no detail, consider whether you need to bracket for a blended exposure later in post.
What Danson’s Tutorial Doesn’t Cover (and What I’d Add)
Danson is shooting in the Lake District, which is genuinely one of the most photogenic places in Europe. The foregrounds basically volunteer themselves. In less cooperative environments, like Denver’s Front Range or an urban park, foreground hunting gets harder. My workaround: scout locations on Google Street View or AllTrails photos before I leave the house. I’m looking specifically at what’s on the ground at the spots I’m considering. It sounds obsessive but it cuts wasted trips in half.
Also worth noting: the XCD 20-35E is a remarkable lens, but you don’t need medium format to apply any of this. My most-used wide angle is a third-party zoom that cost less than $400, and the compositional principles are identical.
The single most important takeaway from Danson’s tutorial is this: your wide angle lens does not create great foregrounds, your feet do. Every technique in here starts with moving, crouching, and looking before you ever pick camera settings. Do that first.
Watch the full tutorial on YouTube to see the field examples Danson works through in real time. Watching him reject and reframe scenes is as instructive as the shots that work.
Comments
Leave a Comment