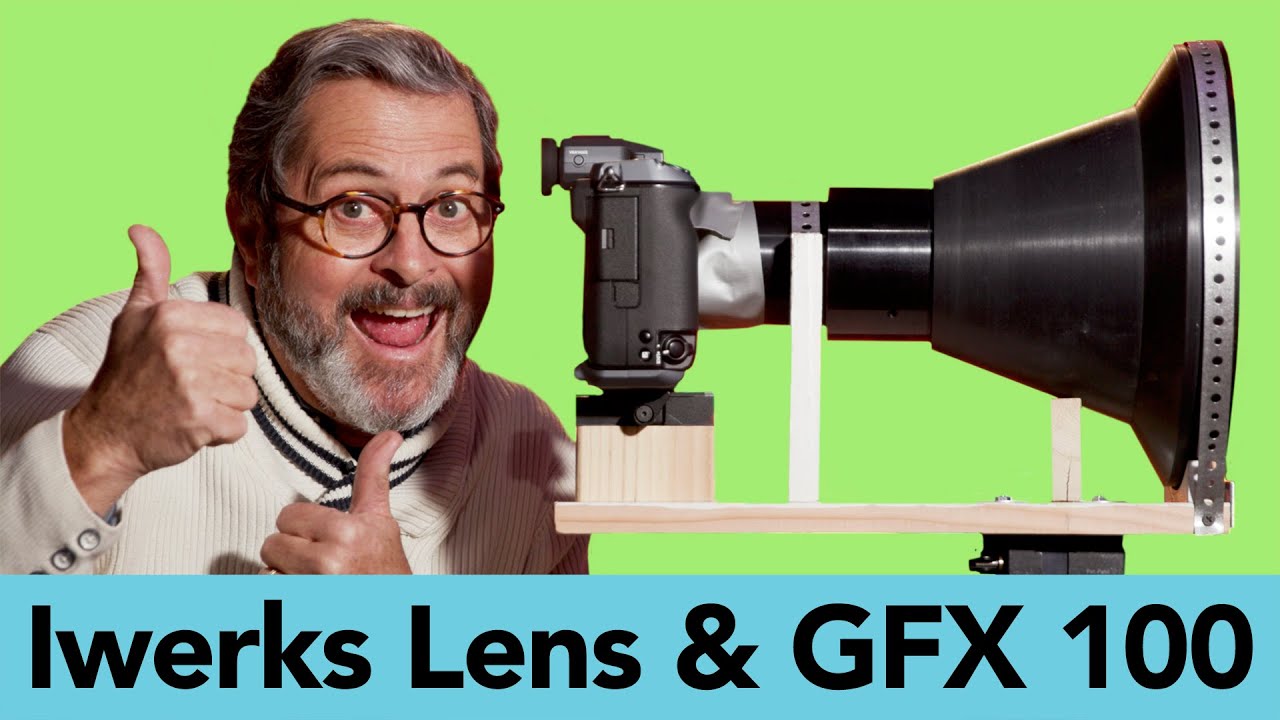
I spend most of my time hunting down budget lenses and cheap alternatives, so when I came across a tutorial where someone was shooting portraits with a repurposed IMAX cinema projection lens, I had to stop scrolling. Not because I’m about to go buy one - I’m not. But because the techniques Jay P. Morgan demonstrates in this video apply far beyond whatever exotic glass he happens to be holding. The lighting approach, the posing psychology, the willingness to ask strangers for portraits - that’s the stuff worth extracting.
In this The Slanted Lens tutorial, Jay takes his OmniMax 180-degree wide angle lens to Grand Central Market in Los Angeles and shoots run-and-gun environmental portraits. He’s pairing it with the Fujifilm GFX 100, using that massive sensor to capture the full circular image the lens projects. The combination is unusual enough to be interesting, but the real value here is watching a working photographer adapt unconventional gear into a practical shooting workflow. Watch the full tutorial on YouTube before or after reading this - both work.
What follows is a step-by-step breakdown of exactly what he’s doing and why it matters, whether you’re working with a $300 kit lens or a one-of-a-kind cinema relic.
Step 1: Understand What Your Lens Actually Does
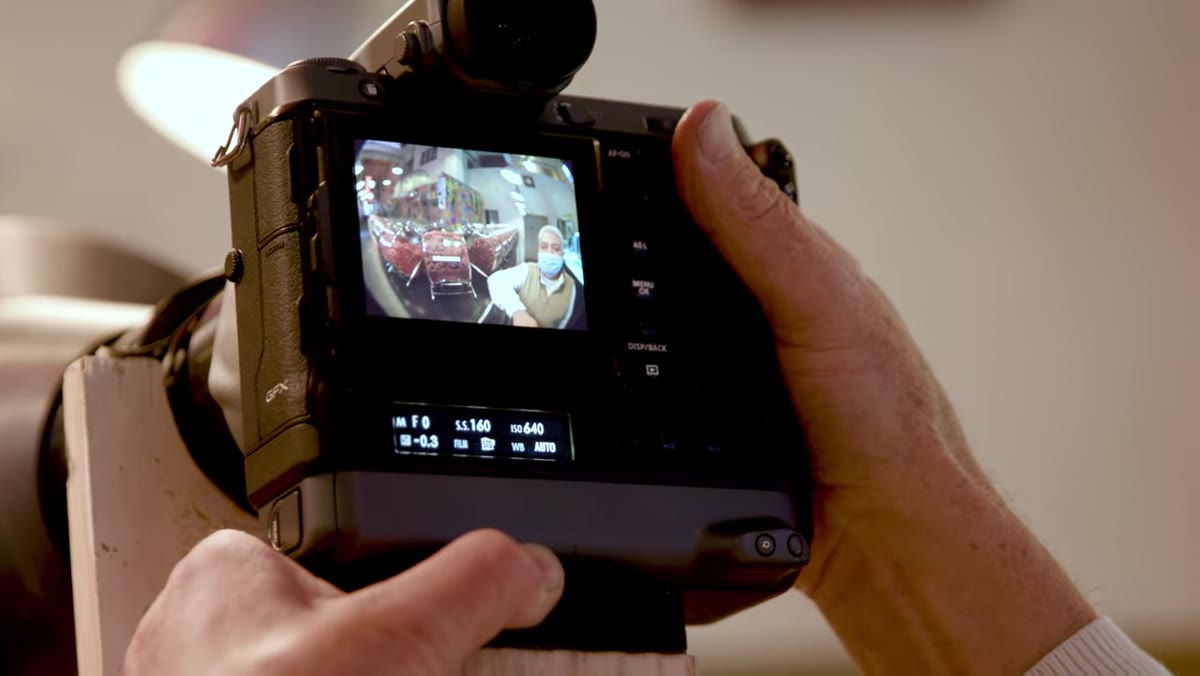 Jay explaining the lens projecting light onto GFX sensor
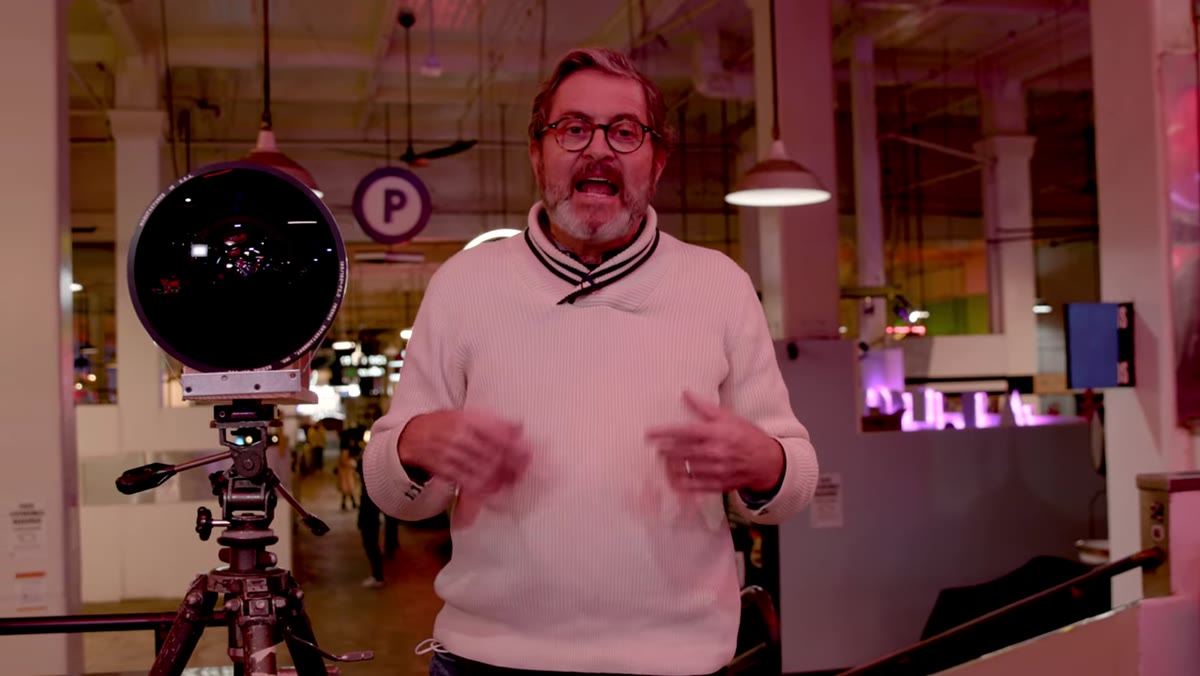
Before Jay fires a single frame, he takes time to understand the original purpose of the lens he’s using. The OmniMax lens was designed to project light outward in a cinema dome environment, not capture it. By reversing that logic and using it to project an image onto the GFX 100’s sensor, he gets a full 180-degree circular frame. Knowing that context shapes every decision he makes about framing and subject placement.
Jay explaining the lens projecting light onto GFX sensor
Before Jay fires a single frame, he takes time to understand the original purpose of the lens he’s using. The OmniMax lens was designed to project light outward in a cinema dome environment, not capture it. By reversing that logic and using it to project an image onto the GFX 100’s sensor, he gets a full 180-degree circular frame. Knowing that context shapes every decision he makes about framing and subject placement.
This matters for any unusual or vintage lens you pick up. If you know it was designed for a specific format - in this case an 8/70 format, meaning 70mm film with eight perforations per frame - you understand why it behaves the way it does at close focus distances and why the depth of field sits in one specific plane. Don’t just mount something weird and hope. Research it first.
Step 2: Match the Lens to a Sensor That Can Handle It
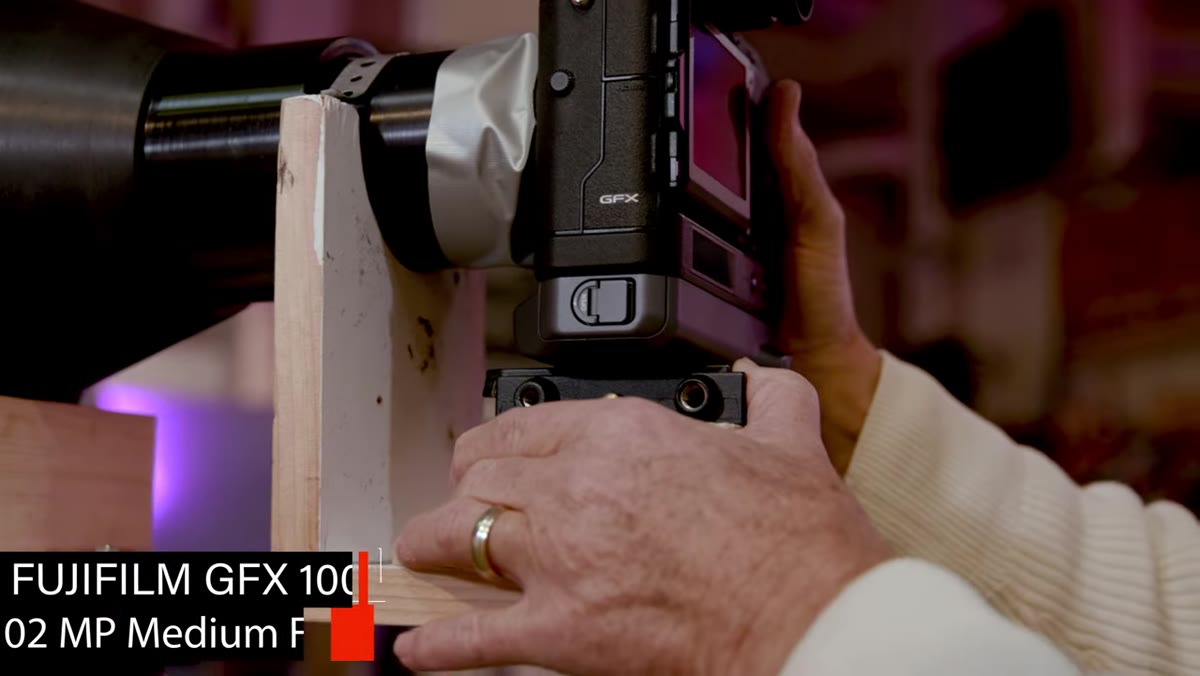 Full circular image visible on the GFX 100 screen
Jay is deliberate about using the GFX 100 specifically because its sensor is large enough to capture the complete circular image the lens projects. On a smaller sensor, you’d lose the edges of that circle and miss the entire visual effect. The large format sensor catches the full 180-degree field of view as a complete circle surrounded by black.
Full circular image visible on the GFX 100 screen
Jay is deliberate about using the GFX 100 specifically because its sensor is large enough to capture the complete circular image the lens projects. On a smaller sensor, you’d lose the edges of that circle and miss the entire visual effect. The large format sensor catches the full 180-degree field of view as a complete circle surrounded by black.
If you’re experimenting with legacy or specialty lenses, sensor size genuinely changes what you get. Full frame vs. APS-C changes effective focal length and coverage. This isn’t just a GFX-specific issue - it’s a principle worth applying whenever you’re adapting glass that wasn’t designed for your camera system.
Step 3: Set Up a Portable Light That Moves With You
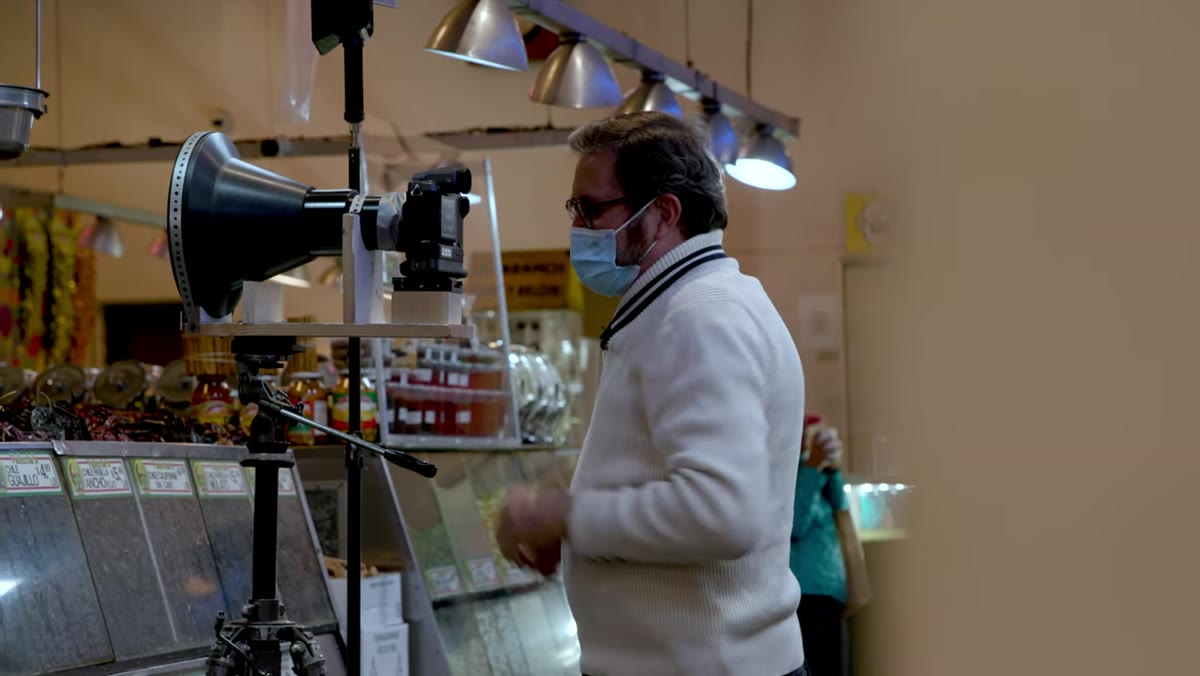 Jay positioning the Lytra Studio light on a stand near subject
For a busy market environment with mixed and unpredictable ambient light, Jay keeps things simple: one light on a stand. He’s using a Lytra Studio panel, but the technique works with any small LED panel or speedlight in a compact softbox. The key is how he positions it - he deliberately feathers the light rather than pointing it directly at the subject, which softens the falloff and avoids that harsh, directional look that makes environmental portraits feel staged.
Jay positioning the Lytra Studio light on a stand near subject
For a busy market environment with mixed and unpredictable ambient light, Jay keeps things simple: one light on a stand. He’s using a Lytra Studio panel, but the technique works with any small LED panel or speedlight in a compact softbox. The key is how he positions it - he deliberately feathers the light rather than pointing it directly at the subject, which softens the falloff and avoids that harsh, directional look that makes environmental portraits feel staged.
When the light is too far off to the side, shadows go heavy and the image looks dramatic in the wrong way for casual portraits. When it sits just above and close to the camera axis, pointed slightly over the subject’s face, it opens up the features naturally. He turns the power down significantly - just enough to fill in what the ambient light is missing, not enough to overpower the scene. That balance is what keeps the background feeling real.
Step 4: Ask Permission - and Make It Easy for People to Say Yes
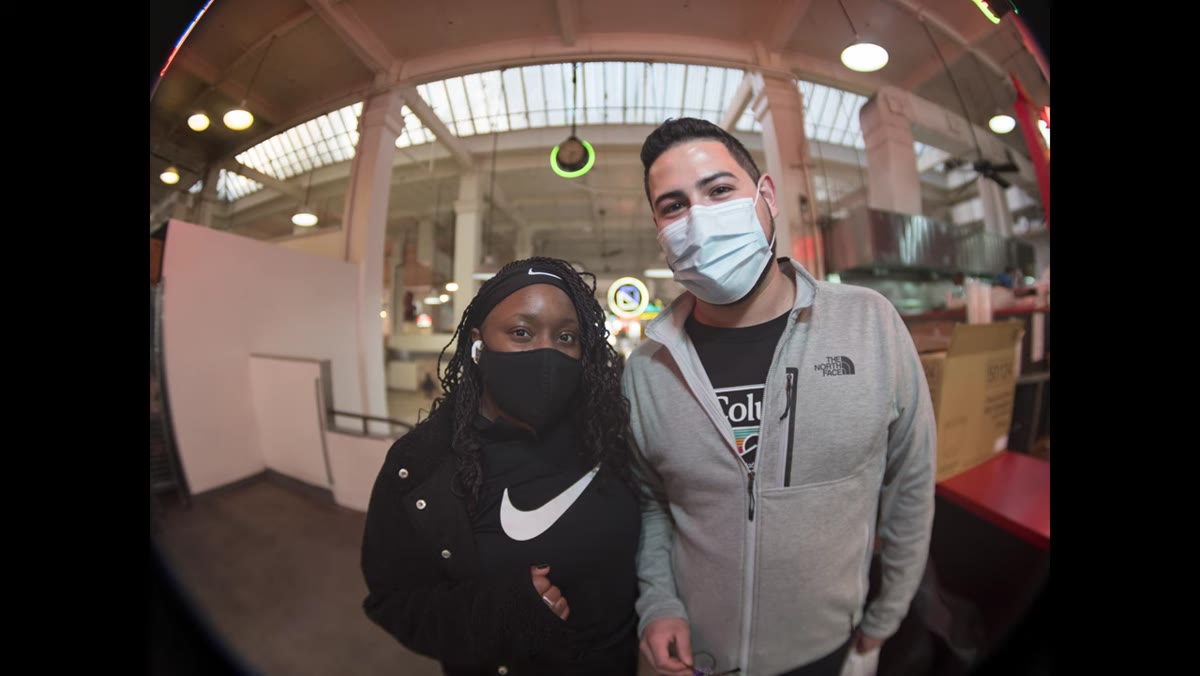 Jay speaking with a vendor at a market stall
Jay is working a busy public market, which means every portrait starts with a conversation. His advice is direct: most people actually want to be photographed. The hesitation is usually on the photographer’s side, not the subject’s. He recommends carrying business cards so subjects have a way to follow up and receive their images - that exchange makes the whole thing feel reciprocal rather than extractive.
Jay speaking with a vendor at a market stall
Jay is working a busy public market, which means every portrait starts with a conversation. His advice is direct: most people actually want to be photographed. The hesitation is usually on the photographer’s side, not the subject’s. He recommends carrying business cards so subjects have a way to follow up and receive their images - that exchange makes the whole thing feel reciprocal rather than extractive.
I’ve found the same thing to be true when shooting in public spaces. Confidence in the ask matters more than the gear in your hands. Nobody has ever turned me down more harshly than I’ve turned myself down in my own head before even walking up. A clean, simple ask - “Hey, I’m shooting portraits today, can I grab one of you?” - lands better than a long explanation.
Step 5: Give Your Subject Something to Think About
 Jay talking quietly to a subject before shooting
This is the technique I found most valuable in the entire video. When Jay has a moment with a subject, he asks them a quiet question - something like asking them to think about someone they genuinely care about and to look into the lens as if they’re looking at that person. He captures the frames right after asking, during that brief window when the person’s expression shifts.
Jay talking quietly to a subject before shooting
This is the technique I found most valuable in the entire video. When Jay has a moment with a subject, he asks them a quiet question - something like asking them to think about someone they genuinely care about and to look into the lens as if they’re looking at that person. He captures the frames right after asking, during that brief window when the person’s expression shifts.
That shift is real and it’s visible on camera. People stop performing for the lens and start actually feeling something. The self-consciousness drops. Jay describes it as a moment of vulnerability, and that’s accurate - but it’s not manufactured vulnerability, it’s just redirection. You’re giving the subject’s brain something real to chew on instead of the awkward fact that a stranger is pointing a lens at them. It works with any camera, any lens, any location.
What I’d Do Differently on a Budget
I’ll never own an OmniMax lens. I checked - they occasionally surface at estate auctions and specialty lot sales, and the prices are not something I’m running a spreadsheet on anytime soon. But the core experiment here is completely reproducible with cheap fisheye lenses, which go for $30 to $80 on Amazon and produce a similar circular distortion effect on full-frame sensors when you use them with the lens hood removed.
The lighting setup is also entirely replicable. I’ve run the same one-light, feathered-panel approach using a $45 Neewer LED panel on a $20 light stand and gotten results I’d put next to anything shot with a $500 Profoto unit in the same conditions. The technique is what’s doing the work.
The single biggest thing to take away from this tutorial is Jay’s posing question trick. It costs nothing, works with any camera, and immediately separates your portraits from the flat, self-conscious expressions that most street portraits default to. The lens is interesting. The sensor pairing is clever. But getting a stranger to genuinely feel something for two seconds while you’re pressing the shutter - that’s the skill worth practicing.
Watch the full tutorial on YouTube to see the actual portraits Jay gets out of this setup. The circular framing on the GFX 100 is something you need to see rendered properly to appreciate what a 180-degree projection lens actually looks like in practice.
Comments
Leave a Comment