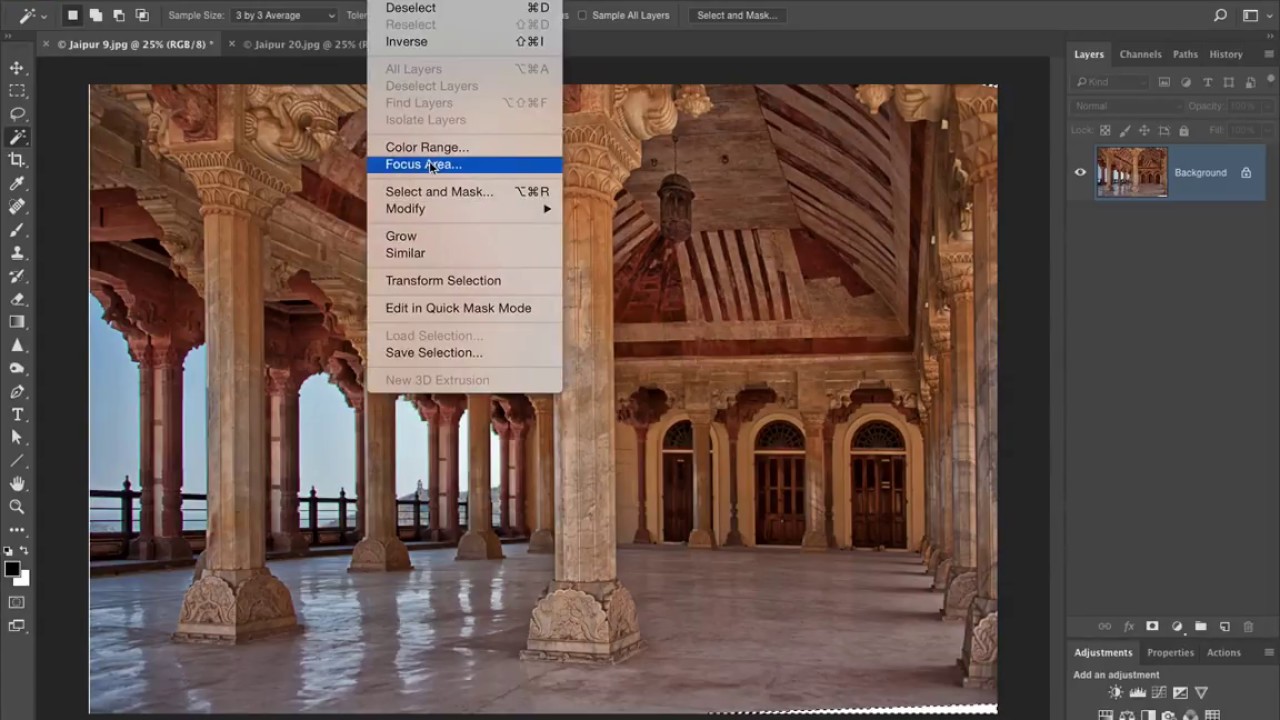
Wide-angle lenses are some of the best value in photography. A 28mm prime for a couple hundred bucks will outperform kit glass on architecture, interiors, and street work all day long. But anyone who shoots buildings with a wide lens knows the tax you pay for that field of view: vertical lines that lean, columns that taper, whole walls that look like they’re about to fall over. I’ve shot interiors with a $180 lens that produced images I was genuinely proud of, and every single one needed some geometry work before it was ready to share. That’s not a failure of the lens. That’s just physics, and Photoshop has the fix.
In this KelbyOne tutorial, Scott Kelby walks through a badly distorted architectural image shot at 28mm, where columns are visibly crooked, the whole frame tilts backward, and one side of the scene is noticeably taller than the other. The technique he uses, Guided Upright inside Camera Raw, is one of those tools I wish I’d found earlier. It’s more precise than the automated correction and more intuitive than dragging sliders blind. Here’s the full walkthrough so you can follow along in Photoshop or Lightroom without needing to pause and rewind.
Watch the full tutorial on YouTube
Step 1: Open Camera Raw Filter from Photoshop
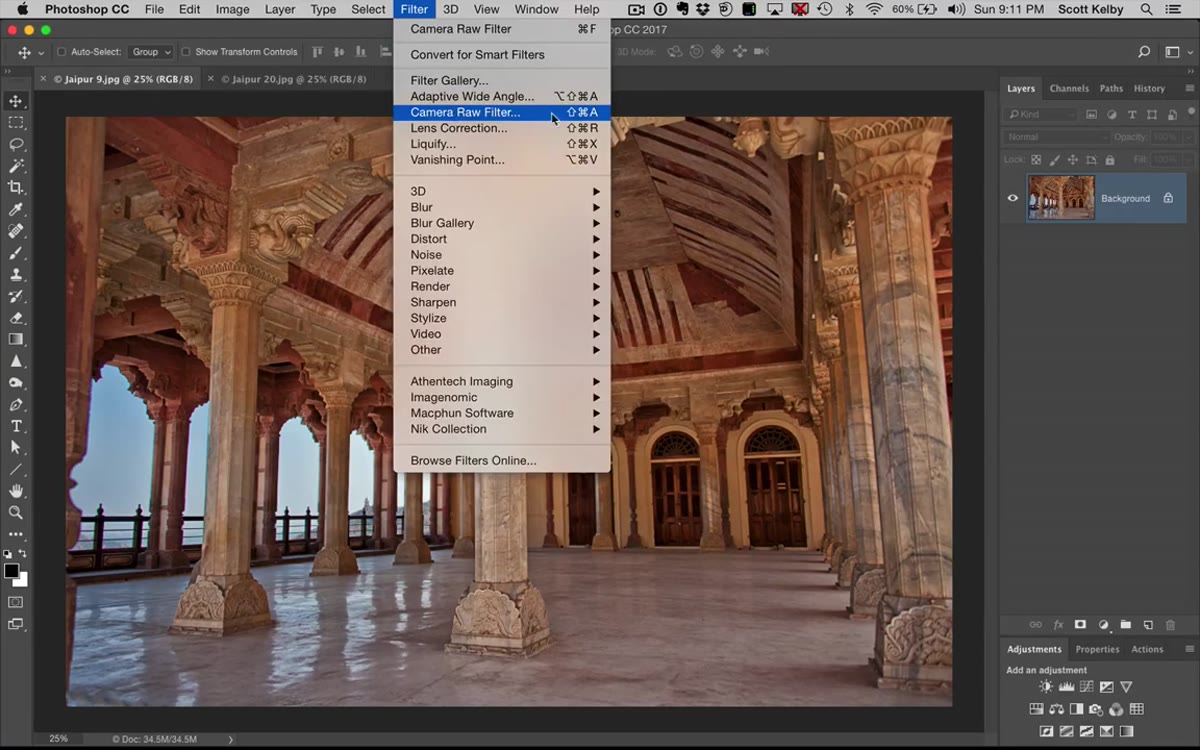 Camera Raw filter selected from Photoshop Filter menu
If your image is already open in Photoshop, go to Filter and choose Camera Raw Filter. This drops you into the full Camera Raw interface without having to open a raw file from scratch. Lightroom users, you’re doing the same thing, but the controls live under the Lens Correction panel instead of a separate filter. Either way, you’re working with identical sliders.
Camera Raw filter selected from Photoshop Filter menu
If your image is already open in Photoshop, go to Filter and choose Camera Raw Filter. This drops you into the full Camera Raw interface without having to open a raw file from scratch. Lightroom users, you’re doing the same thing, but the controls live under the Lens Correction panel instead of a separate filter. Either way, you’re working with identical sliders.
Step 2: Navigate to the Transform Panel
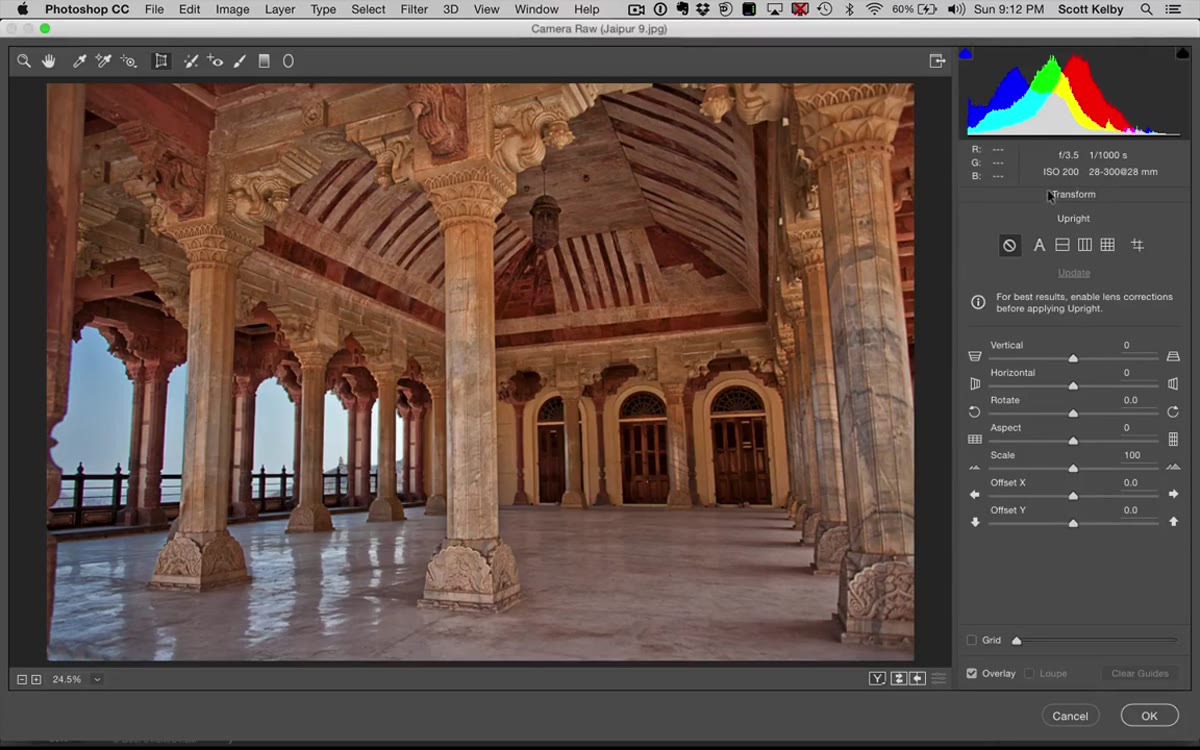 Transform panel icon highlighted inside Camera Raw
Inside Camera Raw, find the Transform panel. In the toolbar along the top of the panel column, there’s a small icon that looks like a grid with perspective lines. Click it to open the Transform controls. This is where all the geometry correction happens, from automated fixes to manual sliders to the Guided Upright tool you’ll actually use.
Transform panel icon highlighted inside Camera Raw
Inside Camera Raw, find the Transform panel. In the toolbar along the top of the panel column, there’s a small icon that looks like a grid with perspective lines. Click it to open the Transform controls. This is where all the geometry correction happens, from automated fixes to manual sliders to the Guided Upright tool you’ll actually use.
Step 3: Try Auto Upright First (Then Reset It)
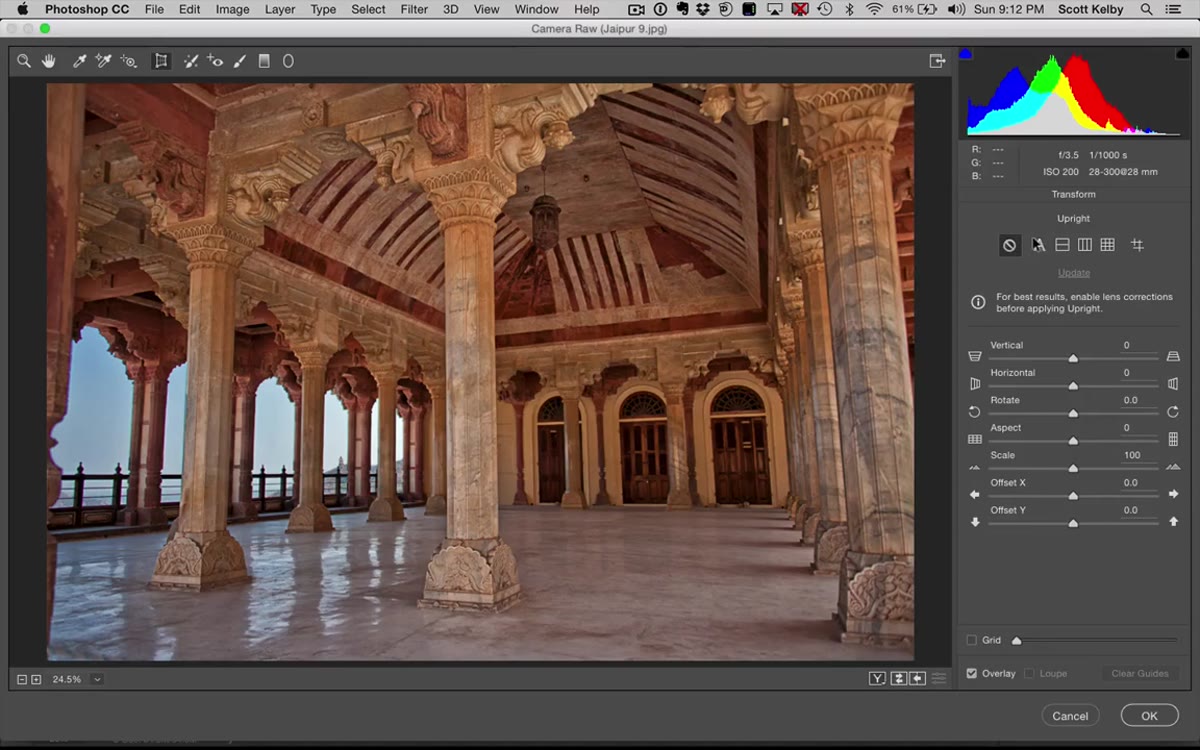 Auto Upright applied, showing partial correction on leaning image
Before going guided, it’s worth seeing what the automated correction gives you. Press the letter A on your keyboard to apply Auto Upright. On a moderately distorted image, this can get you most of the way there. Kelby shows it doing a reasonable job but leaving some visible issues: one side still taller than the other, a column still slightly off. It’s a useful baseline. To reset everything and start clean, hold Option on Mac or Alt on Windows, and the Cancel button turns into a Reset button. Click it and you’re back to the original.
Auto Upright applied, showing partial correction on leaning image
Before going guided, it’s worth seeing what the automated correction gives you. Press the letter A on your keyboard to apply Auto Upright. On a moderately distorted image, this can get you most of the way there. Kelby shows it doing a reasonable job but leaving some visible issues: one side still taller than the other, a column still slightly off. It’s a useful baseline. To reset everything and start clean, hold Option on Mac or Alt on Windows, and the Cancel button turns into a Reset button. Click it and you’re back to the original.
Step 4: Use Guided Upright to Draw Correction Lines
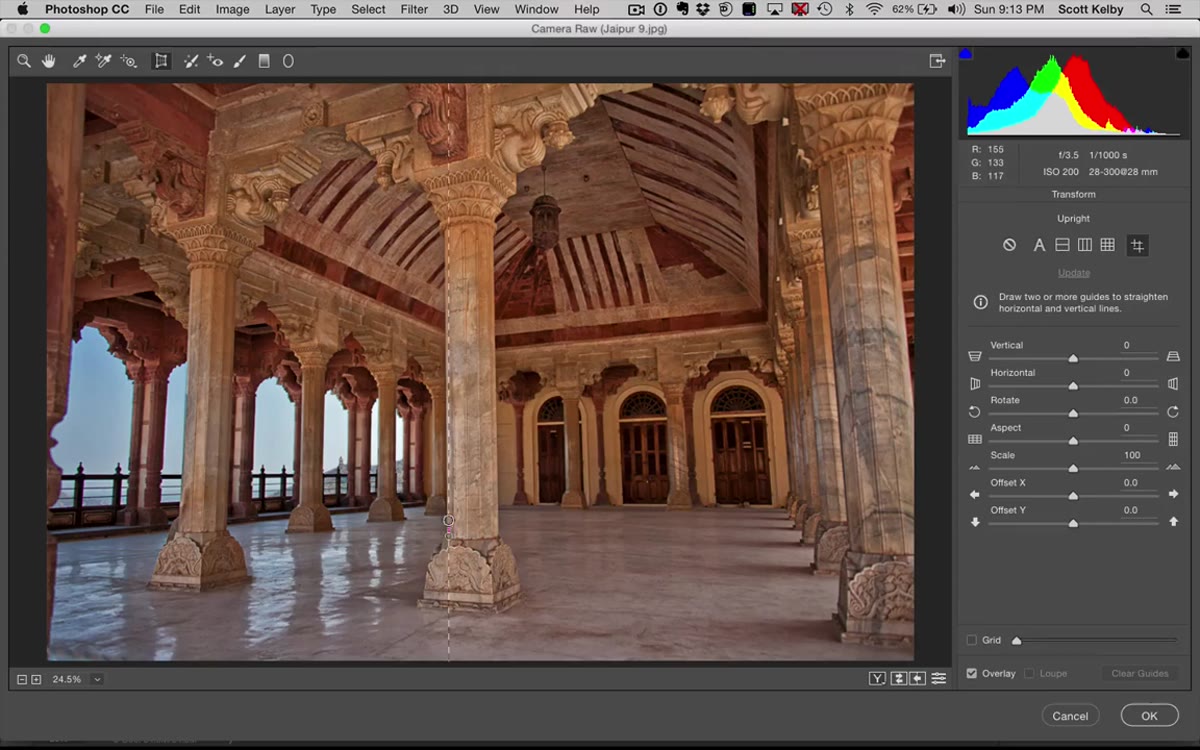 Guided Upright lines being drawn along crooked columns
This is where the technique earns its name. With Guided Upright, you draw lines directly on the elements in the photo that should be straight, and Camera Raw uses those as reference points to correct the geometry. Click the Guided Upright option in the Transform panel, then drag a line along a vertical element that should be plumb, like a column or door frame. Draw a second line along another vertical. You can also draw horizontal lines if needed. The tool reads your input and adjusts the perspective to match. Kelby draws along two columns that are visibly leaning and watches the whole image snap into better alignment.
Guided Upright lines being drawn along crooked columns
This is where the technique earns its name. With Guided Upright, you draw lines directly on the elements in the photo that should be straight, and Camera Raw uses those as reference points to correct the geometry. Click the Guided Upright option in the Transform panel, then drag a line along a vertical element that should be plumb, like a column or door frame. Draw a second line along another vertical. You can also draw horizontal lines if needed. The tool reads your input and adjusts the perspective to match. Kelby draws along two columns that are visibly leaning and watches the whole image snap into better alignment.
Step 5: Fine-Tune with Horizontal, Vertical, and Rotate Sliders
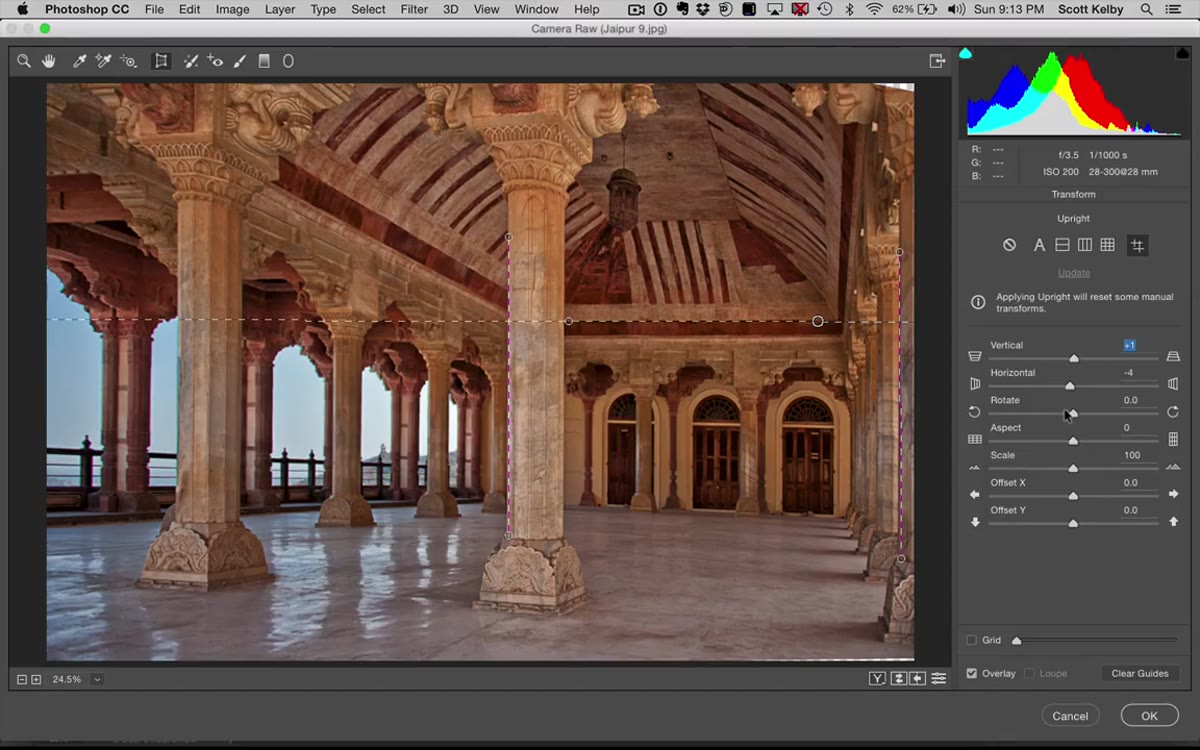 Horizontal and Rotate sliders being adjusted after Guided Upright
Guided Upright gets you close, but the manual sliders let you dial it in. The Horizontal slider shifts the perspective left or right, which is useful when one side of the frame is compressing or expanding more than the other. The Vertical slider adjusts the top-to-bottom lean. Rotate handles any remaining tilt. Kelby nudges all three slightly after running Guided Upright, watching the columns and floor in the image as reference points. Move slowly here. These sliders are sensitive, and a value of 5 or 10 can make a significant difference.
Horizontal and Rotate sliders being adjusted after Guided Upright
Guided Upright gets you close, but the manual sliders let you dial it in. The Horizontal slider shifts the perspective left or right, which is useful when one side of the frame is compressing or expanding more than the other. The Vertical slider adjusts the top-to-bottom lean. Rotate handles any remaining tilt. Kelby nudges all three slightly after running Guided Upright, watching the columns and floor in the image as reference points. Move slowly here. These sliders are sensitive, and a value of 5 or 10 can make a significant difference.
Step 6: Fix Stretching with the Aspect Slider
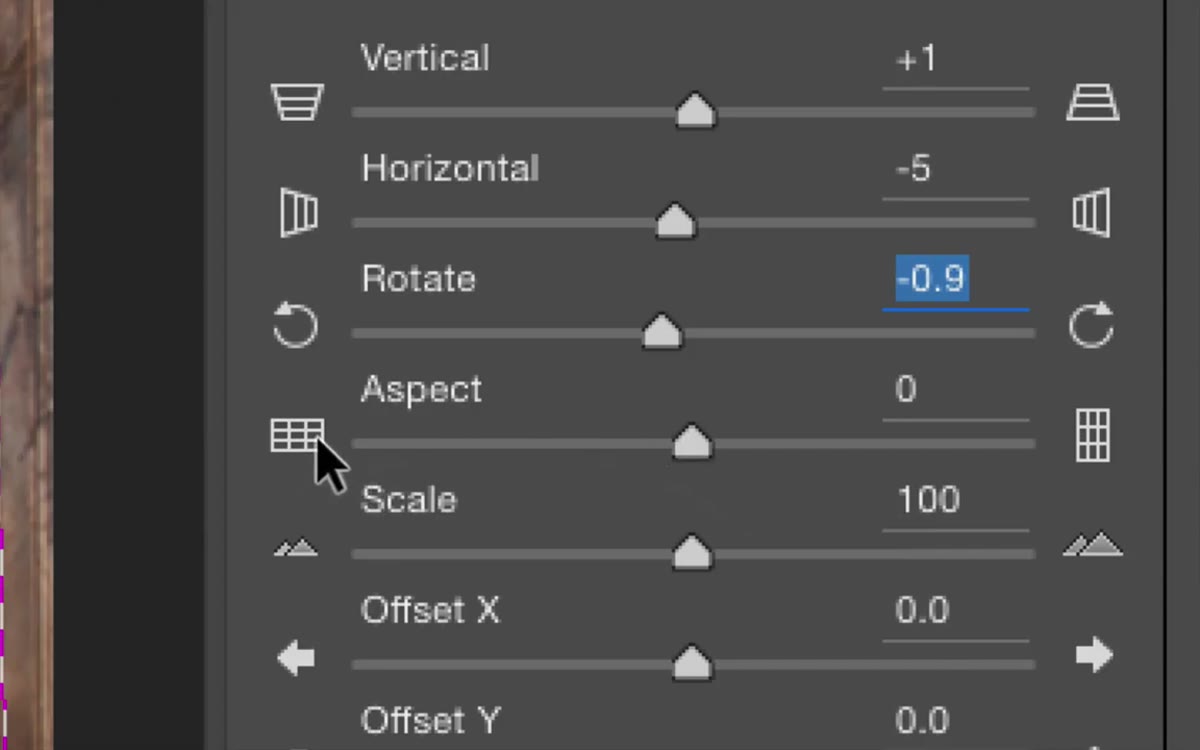 Aspect slider being dragged to correct wide stretch on corrected image
Here’s something that trips people up. After you correct perspective, the image often looks stretched horizontally, like everything got pushed slightly wide. That’s a side effect of the horizontal correction math, and it’s normal. The Aspect slider is the fix. The icons on either end show you exactly what it does: drag left to widen, drag right to narrow and tall. In this case, Kelby pulls it toward the taller end to bring the proportions back to something natural. There’s no magic number here. Use your eye and compare against something in the frame you know the actual proportions of, like a square window or a door.
Aspect slider being dragged to correct wide stretch on corrected image
Here’s something that trips people up. After you correct perspective, the image often looks stretched horizontally, like everything got pushed slightly wide. That’s a side effect of the horizontal correction math, and it’s normal. The Aspect slider is the fix. The icons on either end show you exactly what it does: drag left to widen, drag right to narrow and tall. In this case, Kelby pulls it toward the taller end to bring the proportions back to something natural. There’s no magic number here. Use your eye and compare against something in the frame you know the actual proportions of, like a square window or a door.
Step 7: Click OK and Handle Remaining Distortion in Photoshop
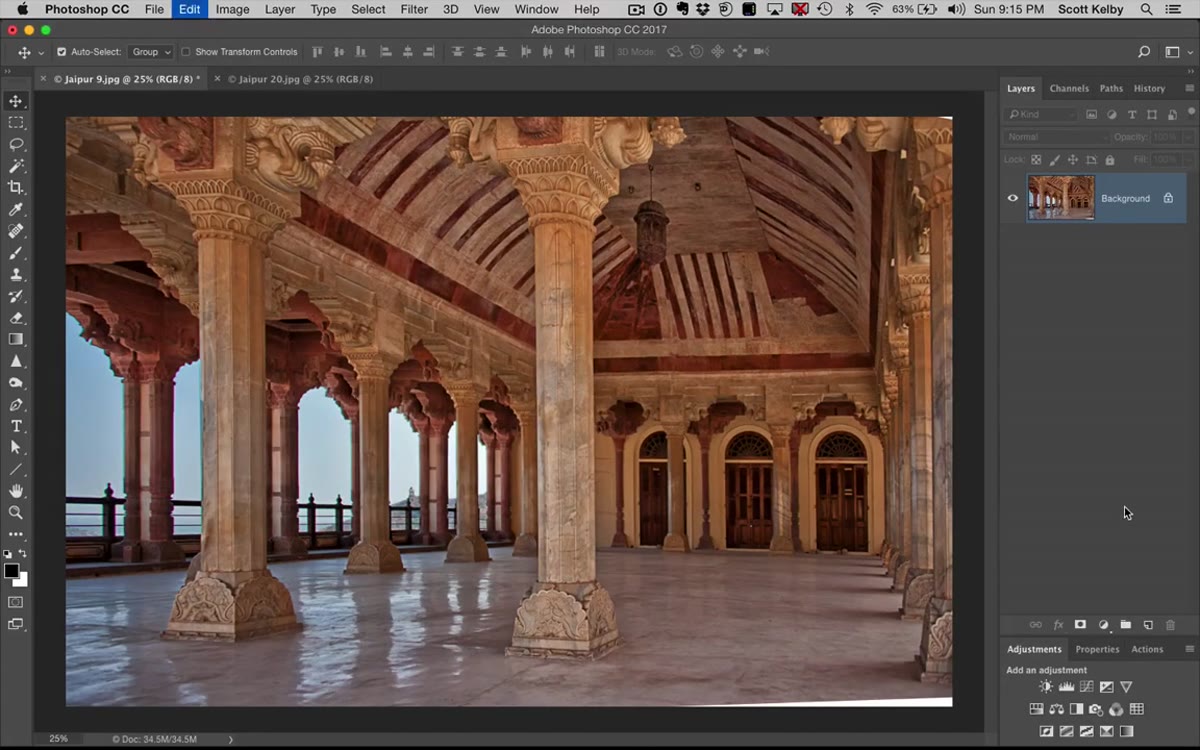 Final corrected image shown after clicking OK in Camera Raw
Once the transform corrections look right, click OK to apply and return to Photoshop. You’ll likely have some edge distortion or content gaps from the crop that happens when you warp perspective. Those are straightforward to fix with Content-Aware Fill or the Clone Stamp. Kelby also points out that one column in his example still appears slightly wider than another, a remnant of the original lens distortion that Guided Upright can’t fully solve. His move is to use a simple selection and Free Transform inside Photoshop itself to nudge that element back into proportion. Not a Camera Raw fix, but it works.
Final corrected image shown after clicking OK in Camera Raw
Once the transform corrections look right, click OK to apply and return to Photoshop. You’ll likely have some edge distortion or content gaps from the crop that happens when you warp perspective. Those are straightforward to fix with Content-Aware Fill or the Clone Stamp. Kelby also points out that one column in his example still appears slightly wider than another, a remnant of the original lens distortion that Guided Upright can’t fully solve. His move is to use a simple selection and Free Transform inside Photoshop itself to nudge that element back into proportion. Not a Camera Raw fix, but it works.
What I’d Add: Check for Chromatic Aberration Before You Start
Kelby briefly mentions chromatic aberration while wrapping up, and I think it deserves a moment before you even touch the Transform panel. On budget wide-angle glass especially, you’ll often see color fringing along high-contrast edges like a column against a bright sky. If you run Guided Upright first and then try to remove CA, the correction lines you drew no longer align perfectly with the edges in the image. Fix the optics first. In Camera Raw, that’s under the Lens Corrections panel, and checking both Remove Chromatic Aberration and Enable Profile Corrections takes about four seconds. It also improves the accuracy of your Guided Upright lines since you’re working with cleaner edges.
The single biggest thing I took from this tutorial: Guided Upright is not just for dramatic architectural distortion. Even a subtle lean in a product photo or a slightly tilted interior wall in a real estate shot benefits from drawing two quick reference lines instead of guessing with sliders. It’s the kind of tool that makes cheap wide-angle lenses much more usable in post, which means you can keep buying the affordable glass and spending the savings somewhere else.
Watch the full tutorial on YouTube to see Scott Kelby walk through the whole correction on a genuinely messy image. Seeing the before-and-after on a photo that bad makes the technique stick.
Comments
Leave a Comment