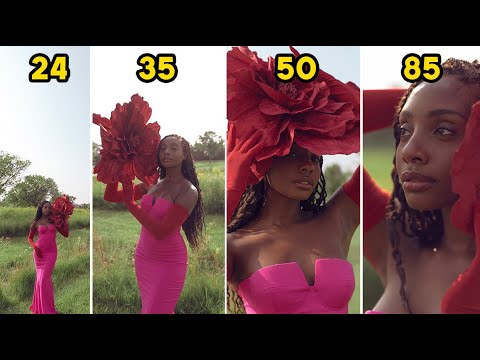
The question I get more than any other from people just getting serious about photography is this: which prime lens should I buy first? I have a whole spreadsheet on this. Dozens of lenses, price points, sharpness charts, real-world test shots. But numbers only tell part of the story. What I always want to see is a working photographer actually running the same subject through multiple focal lengths back to back, so the differences are impossible to ignore. That’s exactly what Jessica Kobeissi does in this tutorial, and it’s one of the most practically useful lens comparison videos I’ve come across.
Watch the full tutorial on YouTube
In this Jessica Kobeissi tutorial, she takes one model to one location and shoots with four prime lenses in sequence: the 24mm f/1.4 Sigma, a 35mm prime, the 50mm f/1.2, and an 85mm. Same model, same outfits, same general lighting conditions. The result is as close to a controlled experiment as you’re going to get outside a lab, and what it reveals about how focal length shapes a photograph is genuinely useful whether you’re shooting fashion, portraits, or anything in between. Here’s a breakdown of what she does and what you can take from each lens.
Step 1: Start Wide With the 24mm to Force Creative Use of Location
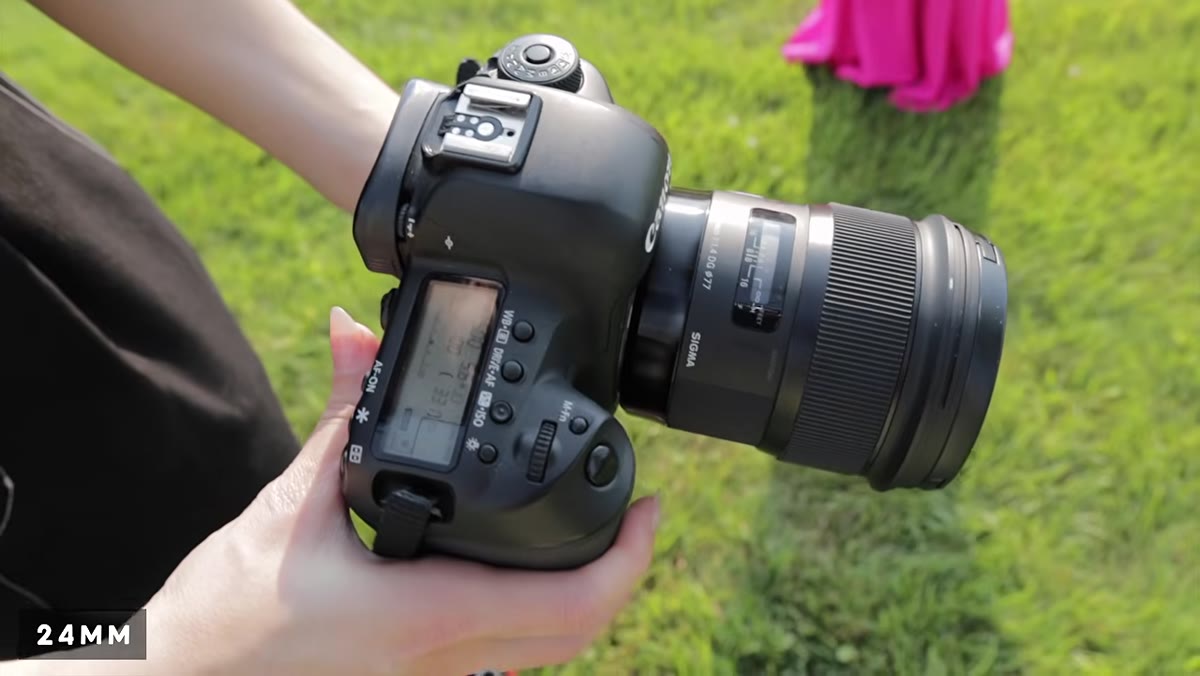 Jessica raising the 24mm Sigma lens toward the model
Jessica opens with the 24mm f/1.4 Sigma, and her reaction is almost immediate. She gets visibly excited within the first few frames. The reason is straightforward: at 24mm, the lens pulls in a wide field of view, which means the environment becomes a major character in every shot. You can’t just point it at a face and call it done. The scenery fills the frame whether you want it to or not, which actually pushes you to think more carefully about where your subject is placed relative to everything around them.
Jessica raising the 24mm Sigma lens toward the model
Jessica opens with the 24mm f/1.4 Sigma, and her reaction is almost immediate. She gets visibly excited within the first few frames. The reason is straightforward: at 24mm, the lens pulls in a wide field of view, which means the environment becomes a major character in every shot. You can’t just point it at a face and call it done. The scenery fills the frame whether you want it to or not, which actually pushes you to think more carefully about where your subject is placed relative to everything around them.
If you’re practicing this yourself, shoot at your widest aperture (f/1.4 or f/1.8) and position your subject off-center. Let the background breathe. Walk closer to your subject than feels comfortable, because at 24mm you need to be physically near them to fill enough of the frame. This lens rewards you for scouting a location rather than just showing up.
Step 2: Use the 24mm for Environmental Portraits and Backlit Setups
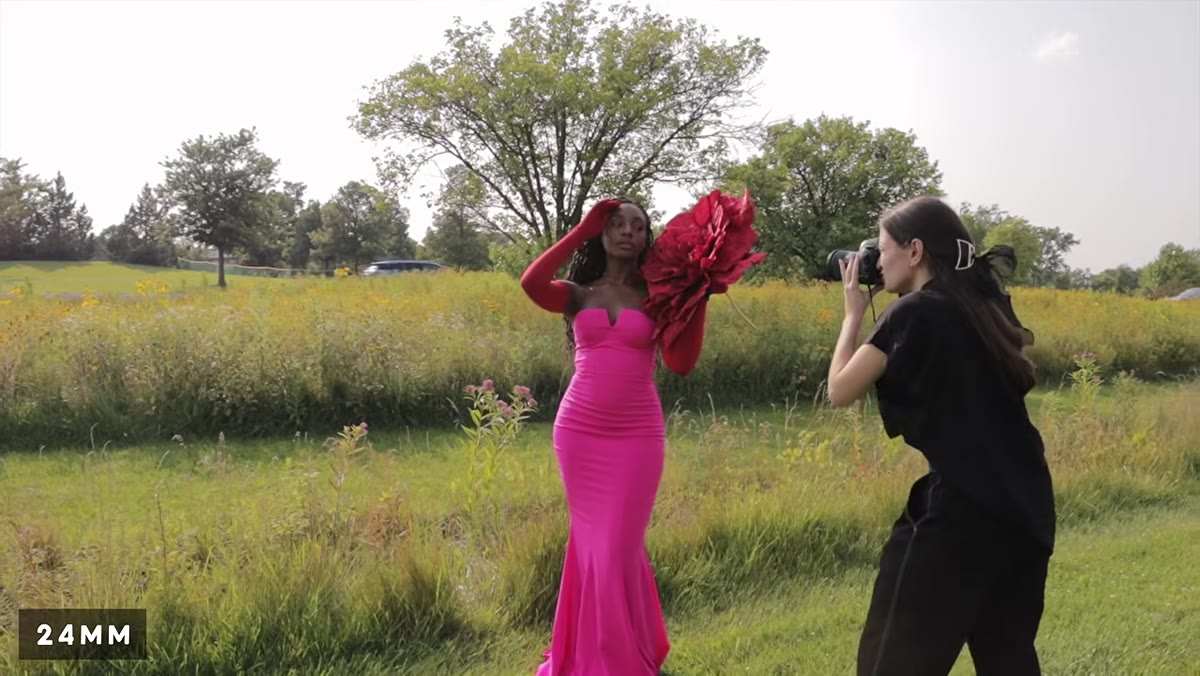 Jessica positioning model with sunlight coming through trees behind
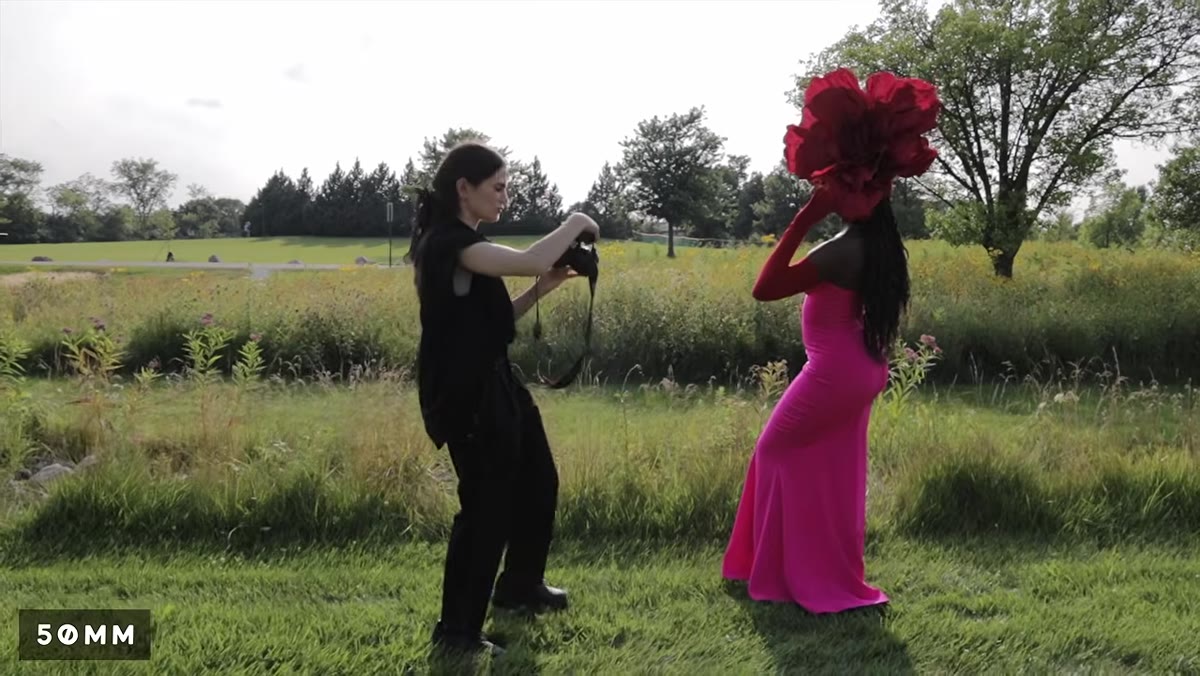
One thing Jessica specifically takes advantage of with the 24mm is backlighting. She works with the available sun coming through from behind the subject and shoots a few frames with the model’s arm raised and a flower as a prop. At 24mm, backlit environmental portraits pick up a quality of light that tighter lenses tend to compress away. The glow around the subject and the depth of the scene behind them both read clearly.
Jessica positioning model with sunlight coming through trees behind
One thing Jessica specifically takes advantage of with the 24mm is backlighting. She works with the available sun coming through from behind the subject and shoots a few frames with the model’s arm raised and a flower as a prop. At 24mm, backlit environmental portraits pick up a quality of light that tighter lenses tend to compress away. The glow around the subject and the depth of the scene behind them both read clearly.
When replicating this, expose for your subject’s face using spot metering or by dialing in exposure compensation to avoid blowing out the background completely. A small amount of fill, whether from a reflector or just a light-colored nearby surface, helps keep the subject’s features visible. Don’t fight the flare at 24mm. It often adds to the image rather than hurting it.
Step 3: Switch to 35mm for the Flexible In-Between Focal Length
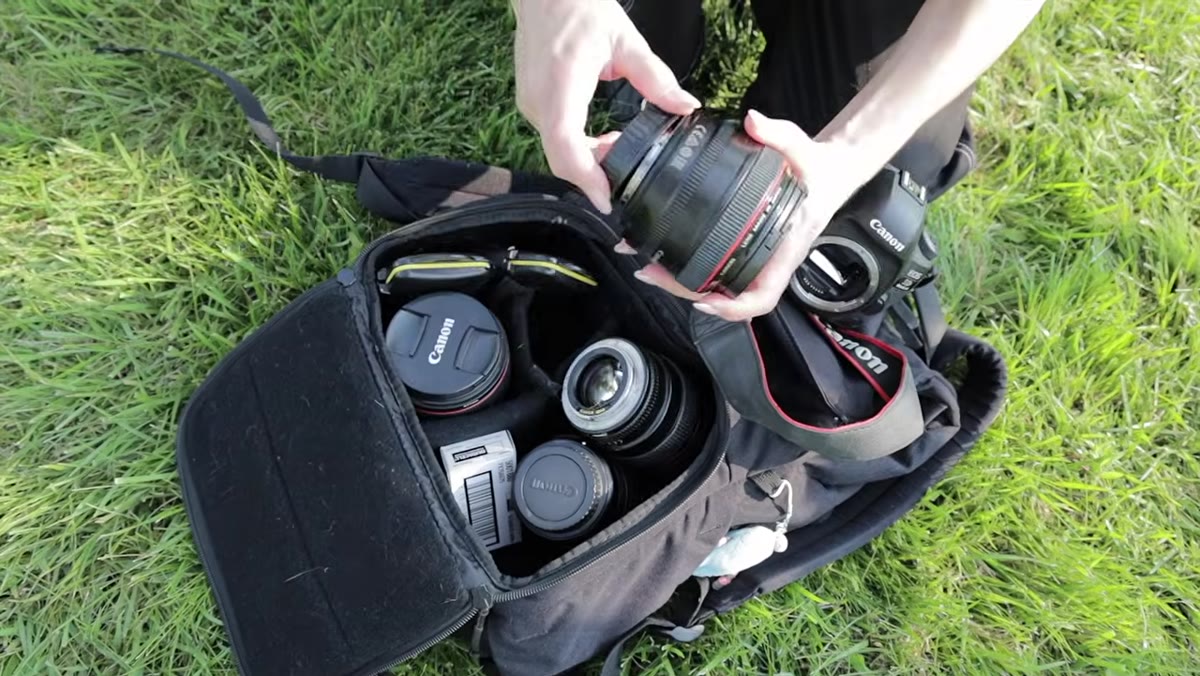
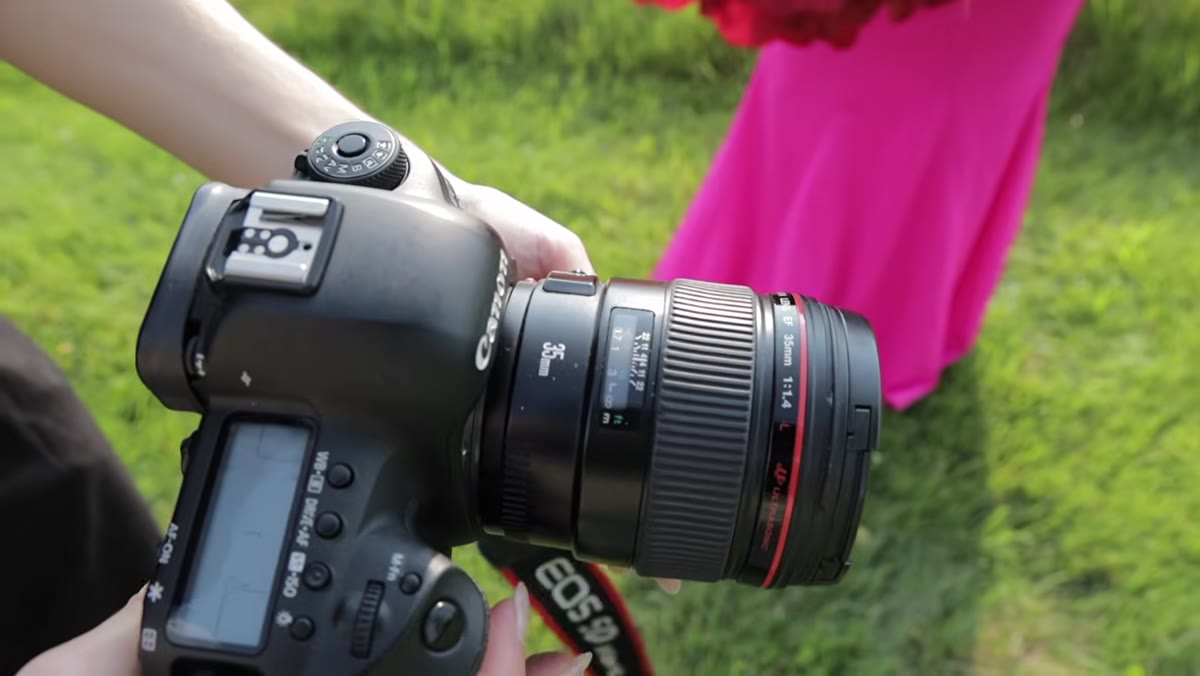 Jessica switching lenses, holding 35mm prime up to camera
Jessica describes the 35mm as her go-to for couples sessions, engagements, and weddings. On a fashion shoot it’s not her first instinct, but she appreciates exactly what makes it useful in other contexts: it sits right in the middle. Wide enough to show meaningful background context, tight enough to let a face fill a reasonable portion of the frame without distorting features.
Jessica switching lenses, holding 35mm prime up to camera
Jessica describes the 35mm as her go-to for couples sessions, engagements, and weddings. On a fashion shoot it’s not her first instinct, but she appreciates exactly what makes it useful in other contexts: it sits right in the middle. Wide enough to show meaningful background context, tight enough to let a face fill a reasonable portion of the frame without distorting features.
For practical shooting, the 35mm is where a lot of photographers land when they need one lens to do most of the work. Shoot at f/2 or f/2.8 when you want subject and some background in focus for storytelling frames. Drop to f/1.4 or f/1.8 when you want the subject to separate from the scene. The 35mm handles both modes well, which is why it’s often the lens sitting on the camera between setups.
Step 4: Move to 50mm for Detail-Forward Portrait Work
 Jessica shooting close portrait of model with 50mm lens
The 50mm f/1.2 is Jessica’s stated all-time favorite lens, and she’s shot this particular model with it multiple times. The reason is clear when you watch how she uses it. At 50mm she’s able to move in tight for detail shots, isolating hands, the flower prop, a portion of the face, without the distortion a 24mm or 35mm would introduce at close range. The compression is flattering without being heavy, and the background falls away cleanly at f/1.2.
Jessica shooting close portrait of model with 50mm lens
The 50mm f/1.2 is Jessica’s stated all-time favorite lens, and she’s shot this particular model with it multiple times. The reason is clear when you watch how she uses it. At 50mm she’s able to move in tight for detail shots, isolating hands, the flower prop, a portion of the face, without the distortion a 24mm or 35mm would introduce at close range. The compression is flattering without being heavy, and the background falls away cleanly at f/1.2.
She also notes that focusing is more manageable at 50mm compared to 24mm, which makes sense. Wider lenses at large apertures have a thinner depth of field relative to how much of the scene they show, so small focusing errors become more visible. At 50mm the relationship between what’s sharp and what’s not feels more predictable. If you’re shooting wide open, use single-point autofocus and place it directly on the nearest eye.
Step 5: Recognize When Each Focal Length Serves the Shot
 Jessica reviewing images on camera screen between lens changes
What makes Jessica’s approach worth studying is that she’s not declaring a winner and moving on. She keeps reassessing. After the 24mm she says she loved it but wants to see the images before committing. After the 35mm she’s leaning back toward the 24mm. After the 50mm she’s reminded why it’s her default for portraits. The exercise itself is the lesson: no focal length wins every situation.
Jessica reviewing images on camera screen between lens changes
What makes Jessica’s approach worth studying is that she’s not declaring a winner and moving on. She keeps reassessing. After the 24mm she says she loved it but wants to see the images before committing. After the 35mm she’s leaning back toward the 24mm. After the 50mm she’s reminded why it’s her default for portraits. The exercise itself is the lesson: no focal length wins every situation.
A useful drill is to repeat this yourself on your next shoot. Pick two primes and shoot identical compositions with both. Don’t judge in the field. Review at full size on a monitor afterward and ask which one served the specific image you were going for. The answer will be different depending on whether you prioritized subject, environment, compression, or mood.
What Budget Shooters Should Know Before Buying Any of These
I’ve tested a lot of third-party primes in these focal lengths, and the honest answer is that you don’t need to spend Canon or Nikon first-party prices to get images like the ones Jessica shoots here. The 24mm f/1.4 Sigma she uses is already a third-party lens, and it performs at or above the level of many native options at a lower price point. At 35mm and 50mm, the gap between a $300 third-party prime and an $800 first-party one is real, but it’s smaller than most buyers expect. I ran a blind test at a local meetup once where nobody could reliably identify which shots came from the budget glass versus the premium glass. People guessed wrong almost as often as they guessed right.
If you’re starting out, the 50mm f/1.8 in whatever mount you’re shooting is almost always the best first prime. It’s cheap, it teaches you focal length discipline, and the image quality is disproportionate to the price. Then you can decide whether the 35mm or 85mm fills your actual shooting gaps.
The single most important thing this video demonstrates is that focal length changes the story a photograph tells, not just the field of view. Choosing a lens is a creative decision before it’s a technical one. Watch Jessica work through all four in real time here: Watch the full tutorial on YouTube
Comments (2)
Quality content like this is rare. Keep it up.
Been doing this wrong for years apparently. Thanks for the wake-up call.
Leave a Comment